Ваша система может отображать ошибку isPostback_RC_Pendingupdates, если ваши системные драйверы, особенно драйверы набора микросхем (например, Intel ME), устарели. Более того, поврежденный агент обновления Windows или установка Windows также могут вызвать обсуждаемую ошибку.
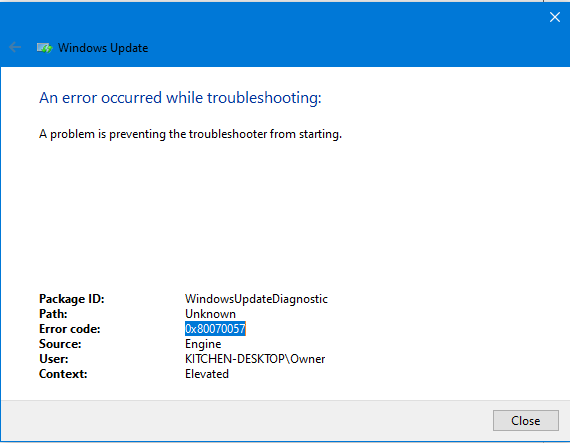
Проблема возникает, когда пользователь пытается обновить систему, но это не удается, и пользователь запускает средство устранения неполадок Windows.
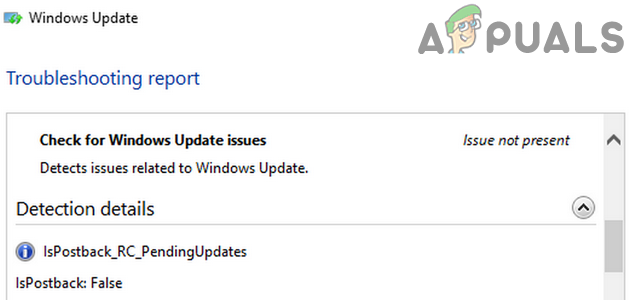
isPostback_RC_Pendingupdates ошибка
Прежде чем перейти к решениям, отключите от системы все внешние устройства, такие как USB, внешний жесткий диск и т. Д.
Решение 1. Отключите подключение по счетчику для вашей сети
Пользователи, у которых есть ограниченный тарифный план, склонны менять тип своей сети на лимитное соединение, которое ограничивает работу различных приложений и служб (включая обновление Windows). В этом сценарии отключение опции дозированного подключения для вашей сети может решить проблему.
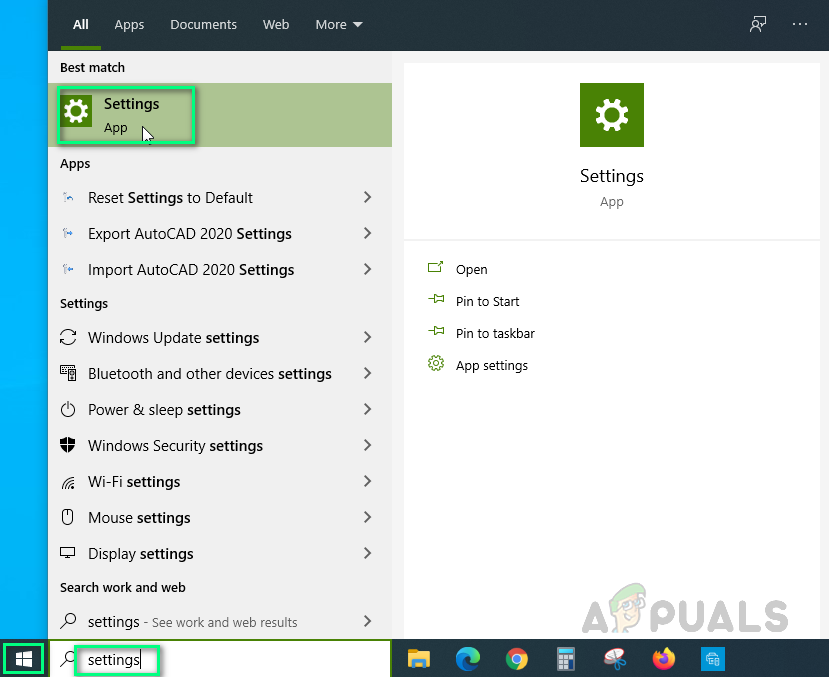
- Запустите поиск Windows, нажав клавиши Windows + S, а затем введите Параметры. Теперь в результатах поиска нажмите «Настройки».
Открытие настроек Windows
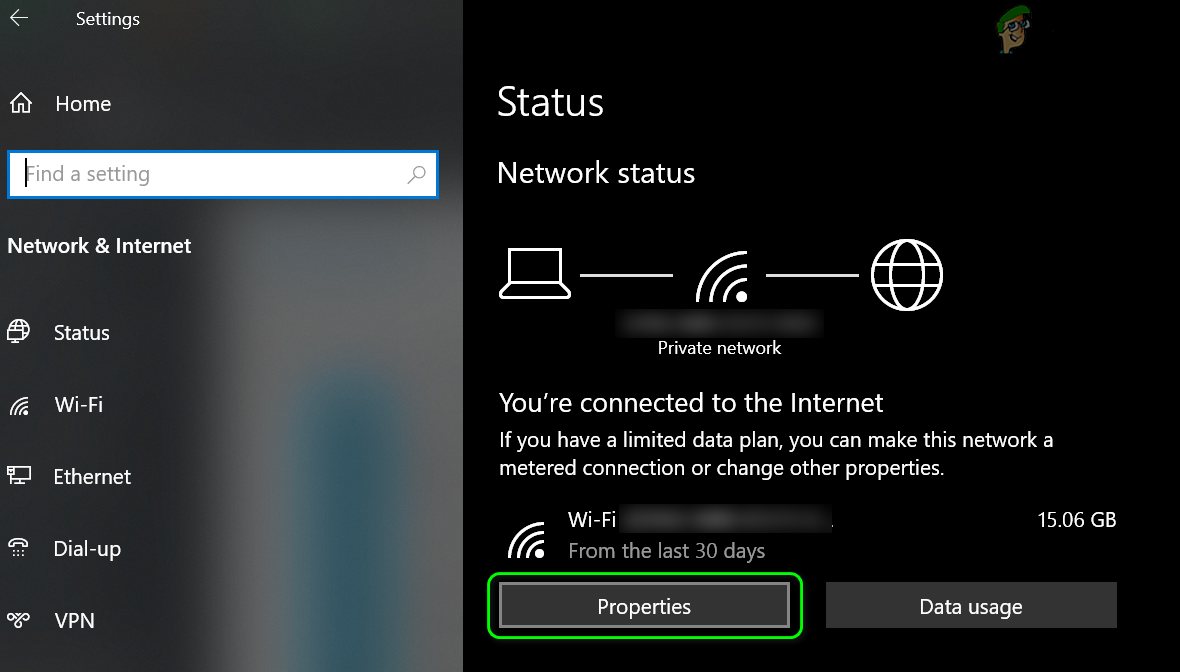
- Откройте Сеть и Интернет, а затем щелкните Свойства (под вашим сетевым подключением).
Откройте свойства вашего сетевого подключения
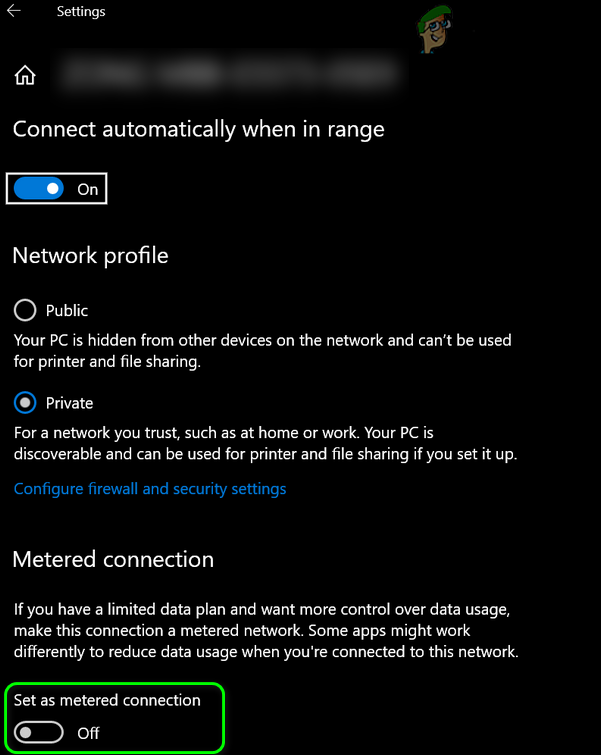
- Переведите переключатель Set as Metered Connection (в разделе Metered Connection) в положение «выключено».
Отключить дозированное соединение
- Теперь перезагрузите систему и после перезапуска проверьте, решена ли проблема с ожидающими обновлениями.
Решение 2. Выполните чистую загрузку системы или загрузите ее в безопасном режиме с использованием сети
Ваша система может отображать ошибку ожидающих обновлений, если какое-либо из сторонних приложений / драйверов мешает работе обновлений. В этом случае проблема может быть решена либо чистой загрузкой системы, либо загрузкой системы в безопасном режиме по сети с последующим обновлением системы.
- Выполните чистую загрузку системы, а затем проверьте, можете ли вы обновить ее в обычном режиме.
- Если нет, загрузите свою систему в безопасном режиме с сетью (для некоторых пользователей в безопасном режиме с сетью Wi-Fi был отключен, но подключение к сети Ethernet работало нормально) и проверьте, можете ли вы обновить свою систему без каких-либо проблем.
Загрузите компьютер в безопасном режиме с подключением к сети
- Если нет, попробуйте все решения, упомянутые в этой статье, в безопасном режиме с подключением к сети (если возможно).
Вы можете столкнуться с обсуждаемой ошибкой, если для службы передачи фоновой информации и службы Центра обновления Windows не задано значение «Автоматически», поскольку это может препятствовать работе обновлений Windows. В этом контексте установка типа запуска указанных служб на Автоматический может решить проблему.
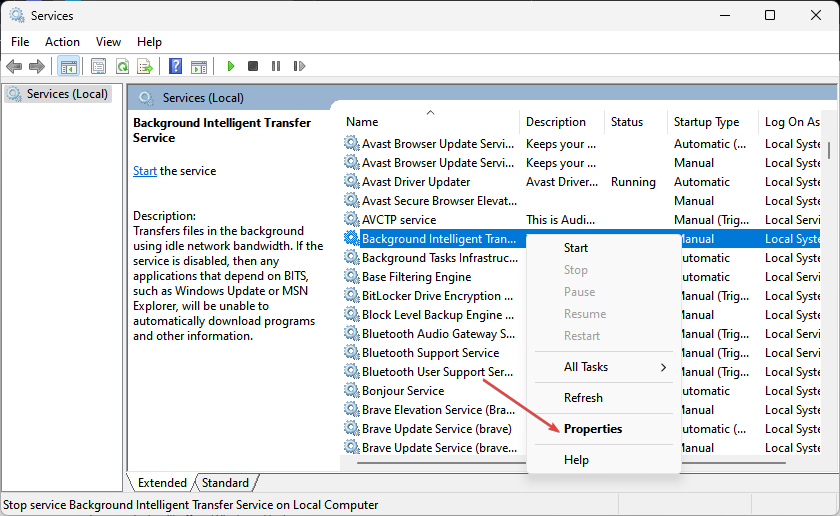
- Нажмите клавиши Windows + Q, чтобы запустить поиск Windows, а затем выполните поиск служб. Теперь в отображаемом списке результатов щелкните правой кнопкой мыши «Службы» и выберите «Запуск от имени администратора».
Откройте службы в качестве администратора
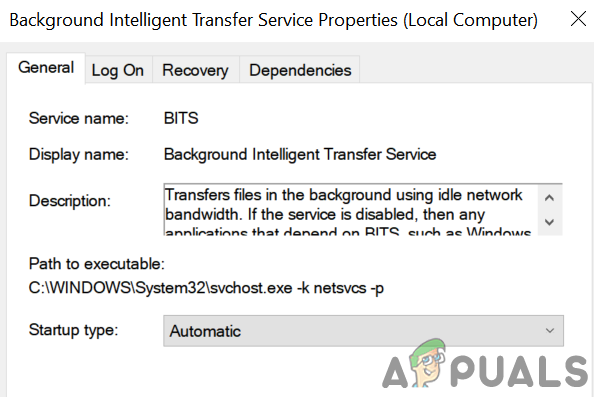
- Теперь щелкните правой кнопкой мыши Background Intelligence Transfer Service и выберите «Свойства».
Откройте свойства службы передачи фоновой информации
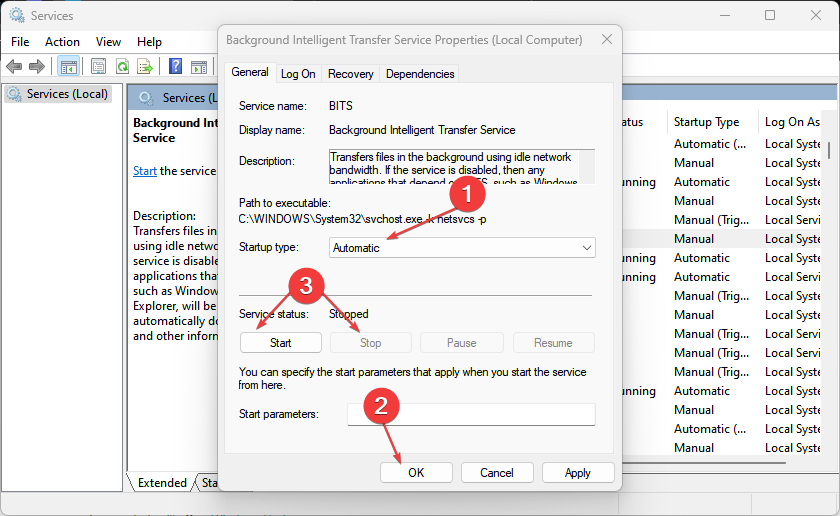
- Затем разверните раскрывающийся список Тип запуска и выберите Автоматически.
Измените тип запуска BITS на автоматический
- Теперь нажмите кнопки Применить / ОК. Если для службы передачи фоновой информации уже задано значение «Автоматически», остановите ее, а затем запустите.
- Затем повторите тот же процесс, чтобы изменить тип запуска службы обновления Windows на автоматический. Если для службы обновления Windows уже установлено значение «Автоматически», остановите ее, а затем запустите.
- Теперь перезагрузите компьютер и после перезагрузки проверьте, решена ли проблема с ожидающим обновлением.
Решение 4. Обновите системные драйверы до последней сборки
Ваша система может отображать текущую ошибку обновления, если системные драйверы не обновлены, особенно драйверы набора микросхем (например, Intel ME). В этом случае обновление системных драйверов может решить проблему.
- Обновите системные драйверы до последней сборки. Вы можете попробовать обновить Windows (мы знаем, что вы столкнулись с проблемой с обновлениями, но некоторые пользователи смогли установить дополнительные обновления, которые в конечном итоге позволили им избавиться от проблемы) до последней сборки. Убедитесь, что нет ожидающих обновлений, даже необязательных.
- Теперь посетите веб-сайт производителя и проверьте, доступны ли какие-либо обновления для ваших системных драйверов. Также, если некоторые драйверы не установлены, установите недостающие.
- Убедитесь, что в вашей системе отсутствует данная ошибка.
Решение 5. Перезапустите системные службы, связанные с Центром обновления Windows.
Ваша система может отображать ошибку ожидающих обновлений, если ее службы находятся в состоянии ошибки. В этом контексте перезапуск системных служб может решить проблему.
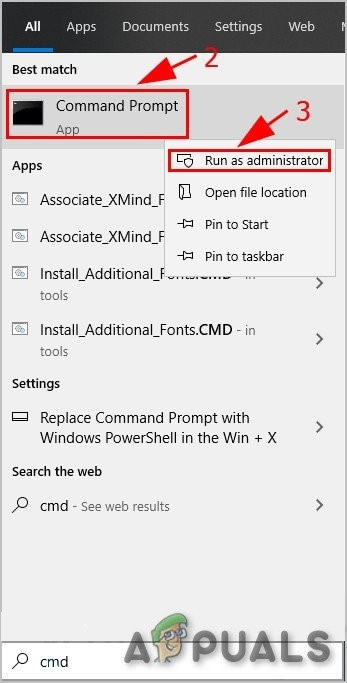
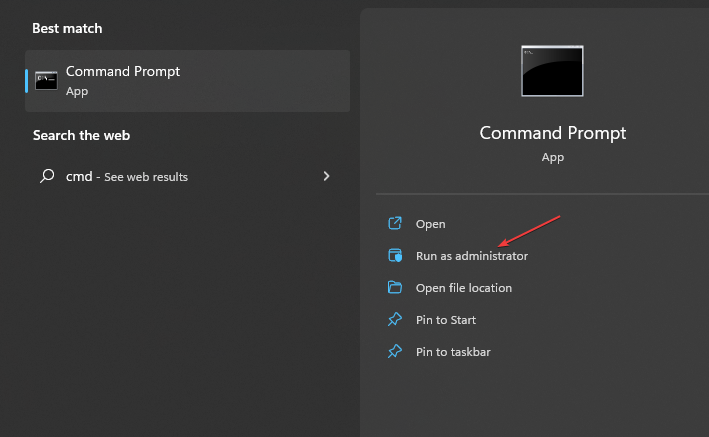
- Нажмите Windows + Q, чтобы открыть панель поиска Кортаны, и введите Командная строка. Теперь в списке результатов щелкните правой кнопкой мыши командную строку и выберите «Запуск от имени администратора».
Запустите командную строку от имени администратора
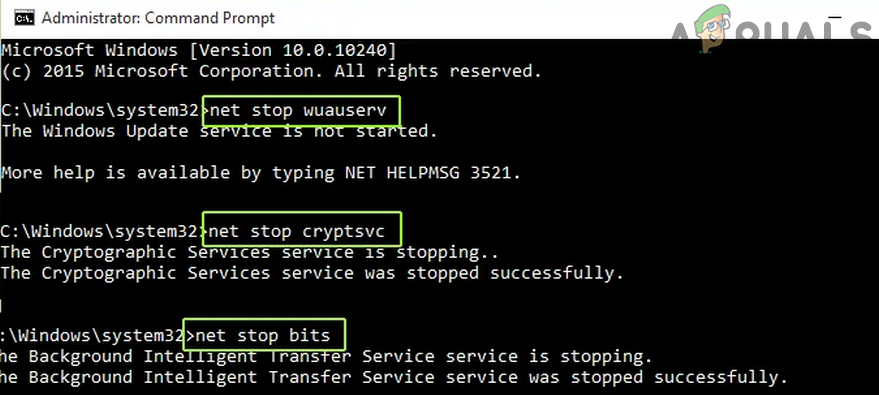
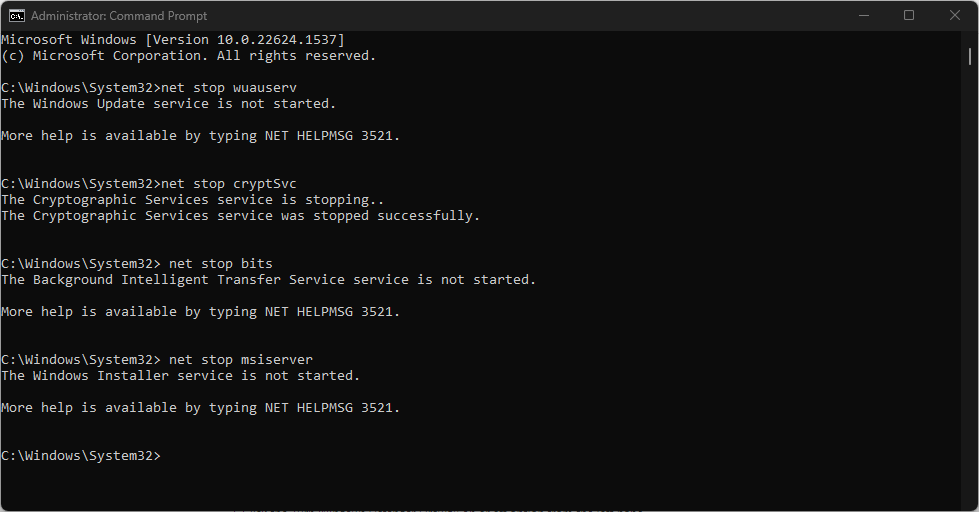
- Теперь выполните следующие команды одну за другой: net stop wuauserv net stop cryptSvc net stop bits net stop msiserver ren C: Windows SoftwareDistribution SoftwareDistribution.old ren C: Windows System32 catroot2 Catroot2.old net start wuauserv net start cryptSvc чистые стартовые биты net start msiserver
Остановите службы, связанные с Центром обновления Windows
- Теперь проверьте, решена ли проблема с обновлениями. Если нет, перезагрузите систему и после перезапуска проверьте, очищена ли ваша система от ошибки ожидающих обновлений.
Решение 6. Сбросьте агент Центра обновления Windows до значений по умолчанию
Вы можете столкнуться с ошибкой IsPostback_RC_PendingUpdate / IsPostback: False, если агент Центра обновления Windows в вашей системе поврежден. В этом случае сброс агента Центра обновления Windows до значений по умолчанию может решить проблему.
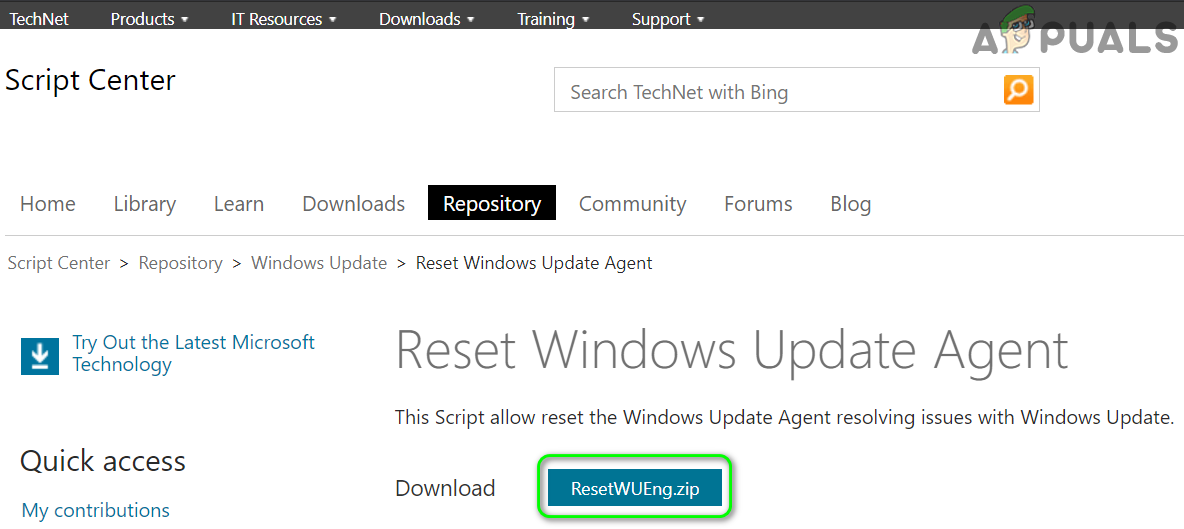
- Запустите веб-браузер и загрузите Сброс агента обновления Windows инструмент (ResetWUEng.zip).
Скачать ResetWUEng.zip
- Теперь извлеките файл загрузки и откройте извлеченную папку.
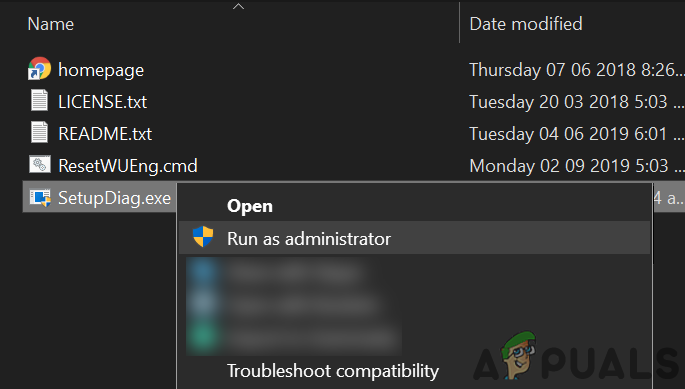
- Теперь щелкните правой кнопкой мыши файл SetupDiag.exe и выберите «Запуск от имени администратора».
Откройте SetupDiag.exe от имени администратора.
- Затем следуйте инструкциям на экране, чтобы сбросить агент Центра обновления Windows.
- Теперь перезагрузите систему и после перезагрузки проверьте, решена ли проблема с Центром обновления Windows.
Решение 7. Удалите недавно установленный Центр обновления Windows
У Microsoft есть история выпуска обновлений с ошибками, и вы также можете стать жертвой этих обновлений. В этом случае возврат к более старой версии Windows или удаление последнего обновления может решить проблему.
- Нажмите клавиши Windows + Q, чтобы открыть Cortana Search, и введите Настройки. Теперь выберите Настройки (в списке результатов).
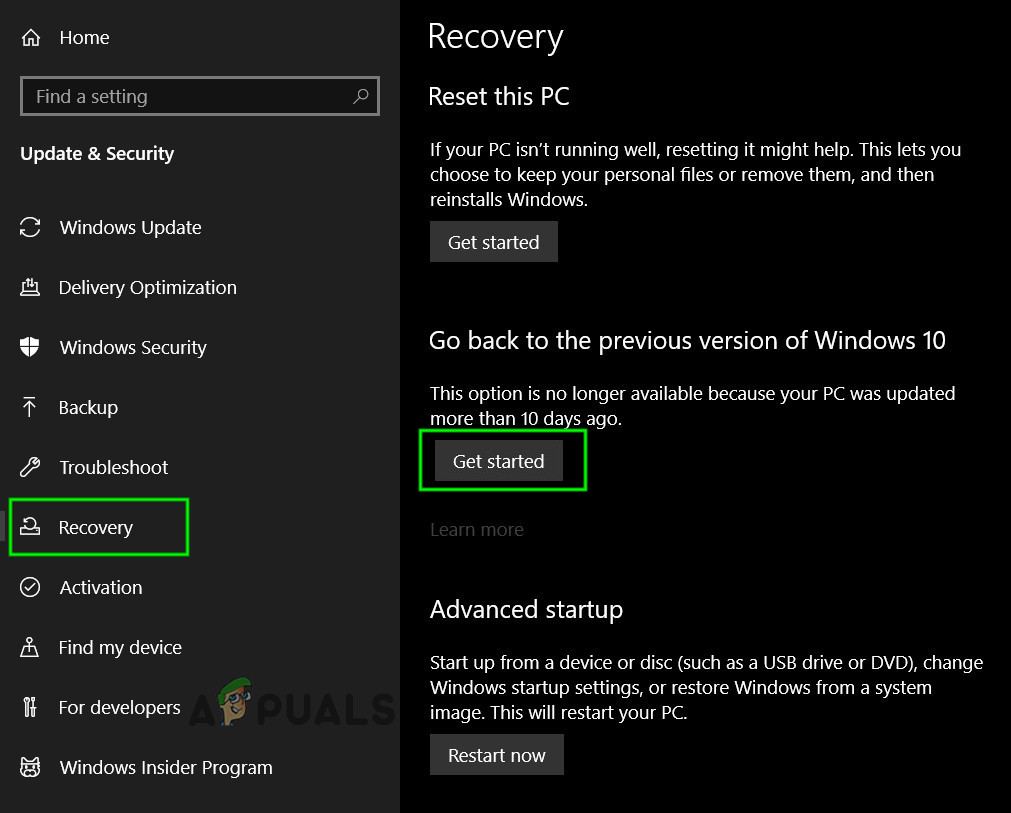
- Теперь откройте «Обновление и безопасность», а затем в левой части окна выберите «Восстановление».
- Затем нажмите кнопку «Начать работу» (в разделе «Вернуться к предыдущей версии Windows 10»).
Нажмите Приступить к работе в Вернуться к предыдущей версии Windows 10.
- Теперь следуйте подсказкам на экране, чтобы завершить процесс возврата, а затем проверьте, решена ли проблема.
Если проблема начала возникать после системного / дополнительного обновления, удаление проблемного обновления может решить проблему.
- Нажмите клавиши Windows + Q, чтобы открыть Cortana Search, и введите Настройки.
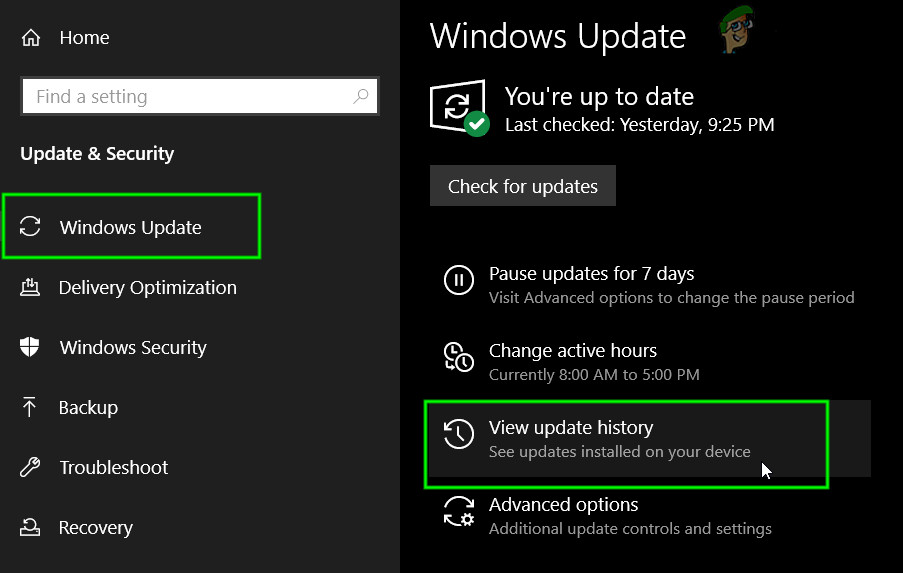
- Теперь откройте «Обновление и безопасность» и выберите «Просмотреть историю обновлений».
Открыть Просмотреть историю обновлений
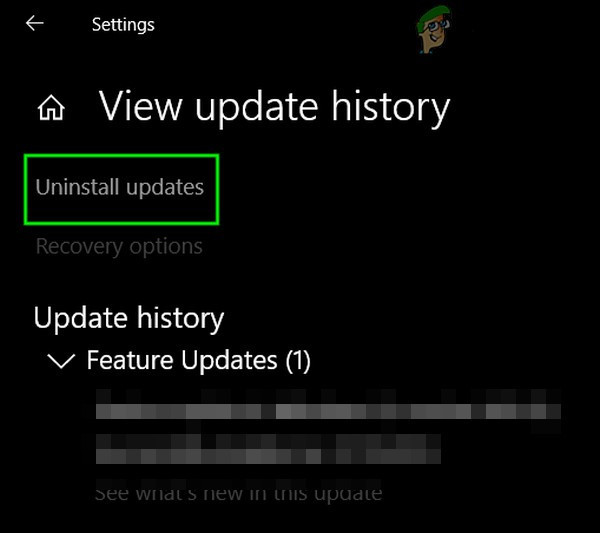
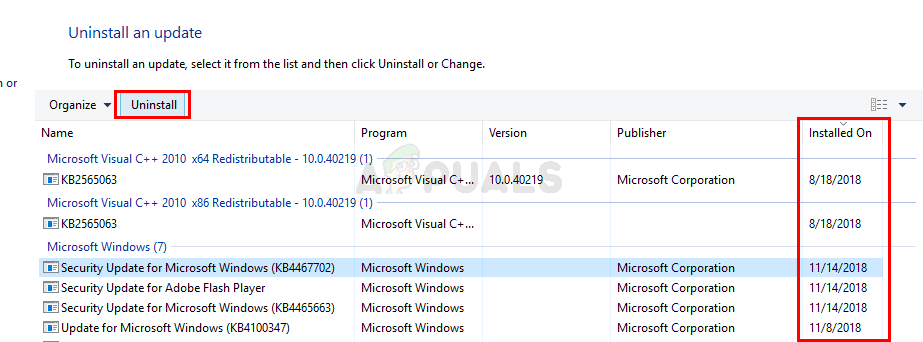
- Затем в верхней части окна нажмите кнопку «Удалить обновления».
Удалить обновления в истории обновлений
- Теперь выберите проблемное обновление и нажмите «Удалить».
Выберите «Недавно установленные обновления» и нажмите «Удалить».
- Затем следуйте инструкциям на экране, чтобы удалить проблемное обновление.
- Теперь проверьте, очищена ли ваша система от ошибки ожидающих обновлений.
Решение 8. Удалите историю загрузок Центра обновления Windows.
В вашей системе может отображаться проблема с ожидающими обновлениями, если история загрузки обновлений Windows повреждена. В этом случае удаление истории загрузок обновлений Windows может решить проблему.
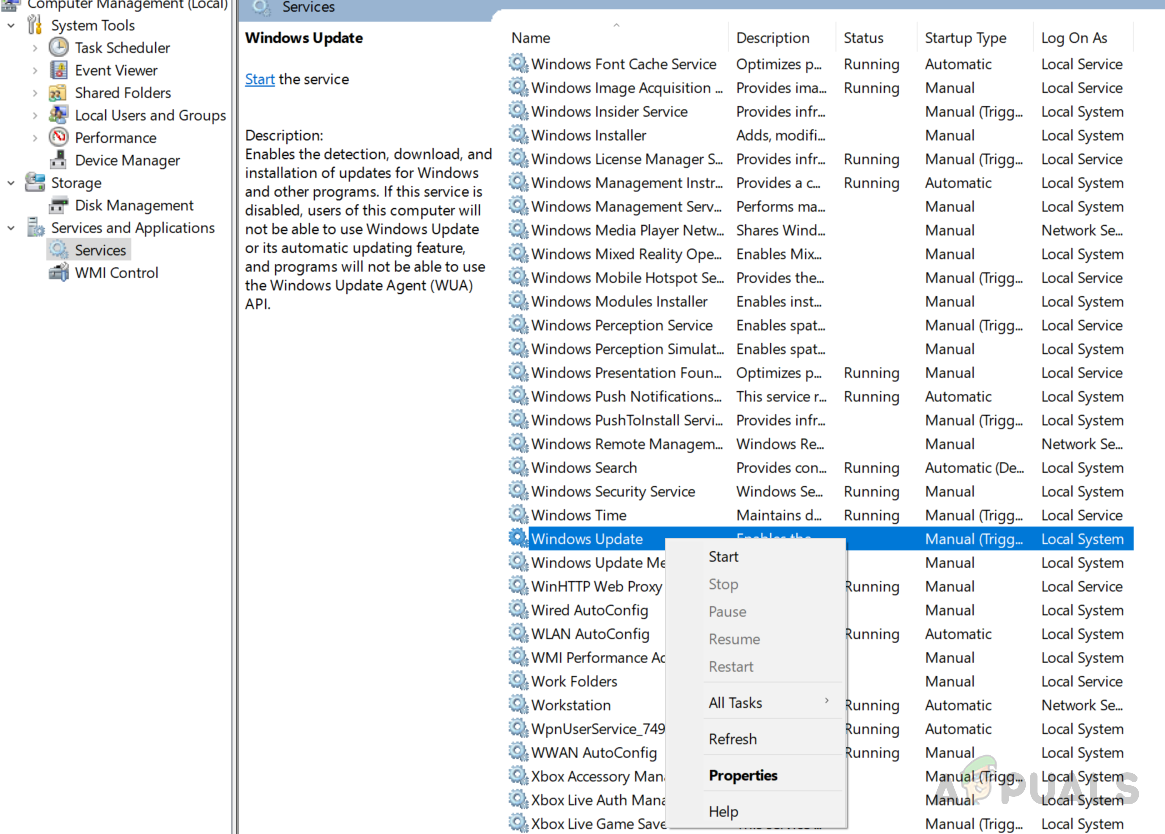
- Откройте панель поиска Cortana, нажав клавиши Windows + Q, а затем введите Services. Теперь в результатах, полученных поиском, щелкните правой кнопкой мыши «Службы» и выберите «Запуск от имени администратора».
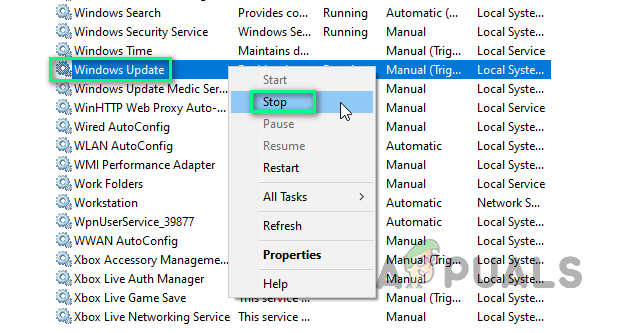
- Теперь щелкните правой кнопкой мыши службу Windows Update, а затем в показанном меню выберите Остановить.
Остановка Центра обновления Windows
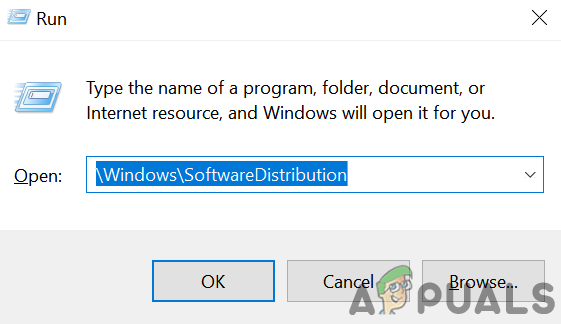
- Затем сверните окно «Службы» и запустите команду «Выполнить», нажав клавиши Windows + R.
- Теперь выполните следующее в поле команды Выполнить: Windows SoftwareDistribution
Открыть папку распространения программного обеспечения
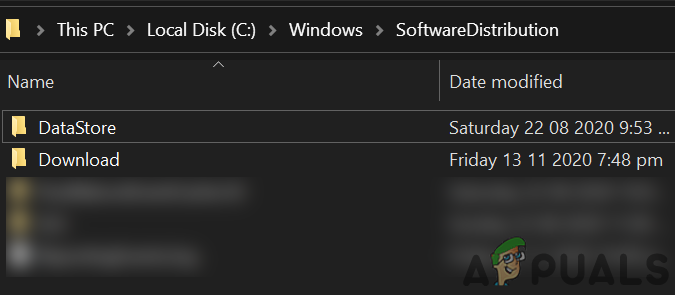
- Теперь удалите папки DataStore и Download.
Удалить хранилище данных и папку загрузки в распространении программного обеспечения
- Затем переключитесь в окно «Службы» и запустите службу обновления Windows.
Запуск и остановка Центра обновления Windows
- Теперь перезагрузите систему и после перезапуска проверьте, решена ли проблема с ожидающими обновлениями.
- Если нет, щелкните правой кнопкой мыши на панели задач вашей системы и в показанном меню выберите «Диспетчер задач» и перейдите на вкладку «Автозагрузка».
- Теперь включите процессы / службы, связанные с обновлением Windows. Если процессы / службы обновления Windows уже включены, отключите их и перезапустите систему.
- После перезапуска убедитесь, что в вашей системе нет ожидающих обновлений.
Решение 9. Переустановите проблемное обновление вручную
Если проблема с ожидающими обновлениями все еще не решена, то установка обновлений вручную может решить проблему.
- Запустите веб-браузер и откройте Каталог Windows.
Каталог Центра обновления Windows
- Теперь найдите проблемное обновление и загрузите его.
- Затем установите обновление и проверьте, нет ли в системе ожидающих обновлений.
- Если нет, нажмите клавишу Windows, чтобы открыть меню Windows, а затем найдите Параметры (в строке поиска Windows).
- Затем выберите «Обновление и безопасность» и в левой половине окна выберите «Устранение неполадок».
- Теперь в правой половине окна нажмите Дополнительные средства устранения неполадок.
- Затем разверните Центр обновления Windows (в разделе «Начало работы») и нажмите кнопку «Запустить средство устранения неполадок».
- Теперь дождитесь завершения средства устранения неполадок Центра обновления Windows, а затем проверьте, решена ли проблема с обновлениями.
Решение 10. Выполните автономное обновление вашей системы
Если ни одно из решений не помогло решить вашу проблему, то выполнение автономного обновления может решить проблему ожидающих обновлений.
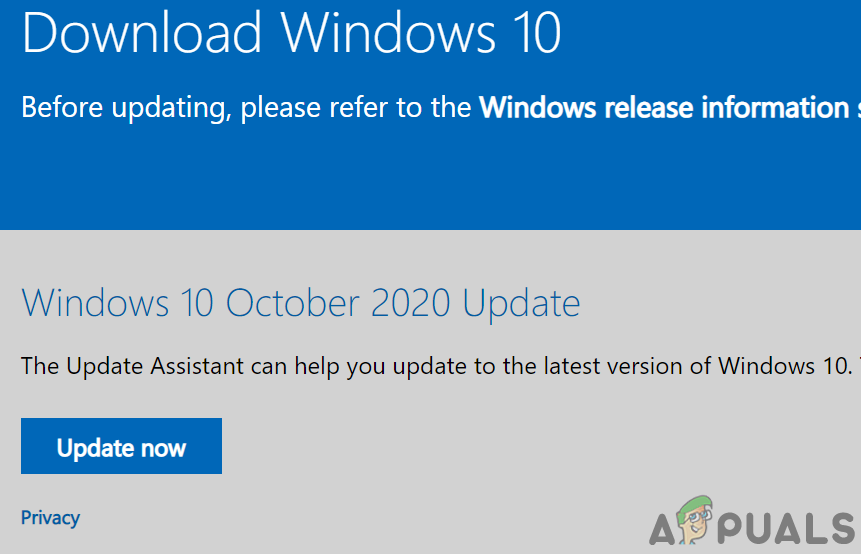
- Запустите веб-браузер и перейдите к Windows 10 скачать.
- Теперь нажмите кнопку «Обновить сейчас» (в последней версии Центра обновления Windows) и загрузите обновление.
Загрузить помощник обновления Windows
- Затем запустите файл загрузки с правами администратора и дождитесь завершения процесса обновления.
- Теперь перезагрузите компьютер и после перезагрузки проверьте, решена ли проблема с ожидающим обновлением.
- Если в процессе обновления произошел сбой, попробуйте еще раз, но когда в программе установки отображается установка (не загрузка), выйдите из своей учетной записи и подождите один час.
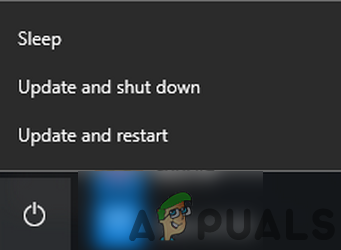
- Теперь на экране входа в систему (не входите ни в одну учетную запись на этом этапе) щелкните Power Option и выберите Update and Restart. Если нет опции обновления и перезапуска, подождите еще некоторое время (не менее 20 минут), а затем проверьте, отображается ли опция «Обновить и перезагрузить», если да, то нажмите на нее и подождите, пока ваш компьютер не перезагрузится (ПК может запускается самостоятельно во время автономного обновления).
Обновите и перезапустите вашу систему
- После перезапуска проверьте, решена ли проблема с ожидающими обновлениями.
- Если нет, повторите процесс в безопасном режиме с сетью и проверьте, решена ли проблема.
- Если нет, снова откройте Windows 10 скачать и в разделе «Создать установочный носитель Windows 10» нажмите «Загрузить инструмент сейчас».
Загрузите средство создания мультимедиа сейчас
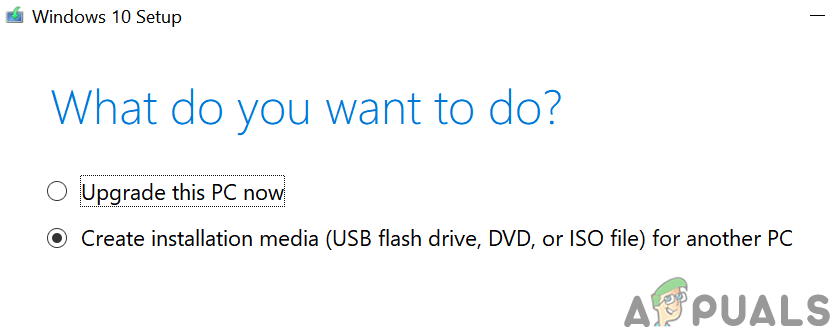
- Теперь запустите загруженный файл с правами администратора и нажмите Да (если получено приглашение UAC).
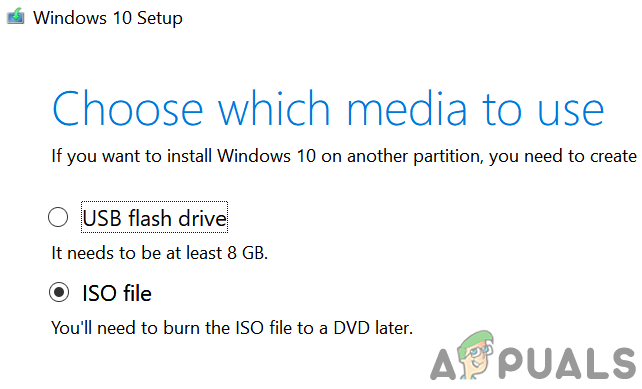
- Затем примите условия лицензии и на следующем экране выберите вариант «Создать установочный носитель (флэш-накопитель USB, DVD или файл ISO) для другого компьютера».
Выберите Создать установочный носитель.
- Теперь выберите «Язык», «Издание» и «Архитектура», а на следующем экране выберите вариант файла ISO.
Выберите тип файла ISO
- Затем выберите место для сохранения файла ISO и нажмите Далее.
- Теперь дождитесь завершения загрузки и извлеките загруженный файл ISO.
- Затем отключите систему от Интернета, а затем временно отключите антивирус (будьте осторожны, так как отключение антивируса может подвергнуть вашу систему таким угрозам, как вирусы и т. Д.).
- Теперь откройте извлеченную папку ISO и щелкните правой кнопкой мыши файл Setup.exe.
- Затем выберите «Запуск от имени администратора» и следуйте инструкциям на экране, чтобы выполнить автономное обновление.
- Надеемся, что после завершения обновления проблема с ожидающими обновлениями будет решена.
Если ни одно из решений не устранило проблему, возможно, вам придется либо перезагрузить компьютер (или использовать раздел восстановления вашей системы, если он поддерживается), либо выполнить чистую установку Windows.
Your system may show isPostback_RC_Pendingupdates error if your system drivers especially, chipset drivers (like Intel ME) are outdated. Moreover, a corrupt Windows Update Agent or Windows installation may also cause the error under discussion.
The issue arises when the user tries to update the system which fails and the user launches the Windows Troubleshooter.
Before moving on with the solutions, unplug any external devices from the system like USB, external Hard Disk, etc.
Solution 1: Disable Metered Connection for Your Network
The users who have a limited data plan, tend to change their network type to the metered connection which restricts the operation of different applications and services (including Windows update). In this scenario, disabling the metered connection option for your network may solve the problem.
- Launch the Windows Search by pressing Windows + S keys and then type Settings. Now, in the results shown by the search, click on Settings.

Opening Windows Settings - Open Network & Internet and then click on the Properties (under your network connection).

Open Properties of Your Network Connection - Toggle the switch of Set as Metered Connection (in the Metered Connection section) to off position.

Disable Metered Connection - Now restart your system and upon restart, check if the pending updates issue is resolved.
Solution 2: Clean Boot Your System or Boot Your System into Safe Mode with Networking
Your system may show the pending updates error if any of the third-party applications/drivers are interfering in the operation of updates. In this case, either clean booting your system or booting your system into safe mode with network and then updating the system may solve the problem.
- Clean boot your system and then check if you can update your system normally.
- If not, boot your system into safe mode with networking (for some users, in the Safe mode with networking, Wi-Fi was disabled but ethernet connection worked fine) and check if you can update your system without any issue.

Boot computer in Safe Mode with networking - If not, then try all the solutions mentioned in this article with safe mode with networking (if possible).

Solution 3: Set Startup Type of Background Intelligence Transfer Service and Windows Update Service to Automatic
You may encounter the error under discussion if the Background Intelligence Transfer Service and Windows Update service are not set to Automatic as it may hinder the operation of Windows updates. In this context, setting the startup type of the said services to Automatic may solve the problem.
- Press Windows + Q keys to launch Windows Search and then search for Services. Now, in the list of results shown, right-click on Services and then select Run as Administrator.

Open Services as Administrator - Now right-click on Background Intelligence Transfer Service and then select Properties.

Open Properties of Background Intelligence Transfer Service - Then expand the dropdown of Startup type and select Automatic.

Change Startup Type of BITS to Automatic - Now, click on Apply/OK buttons. If the Background Intelligence Transfer Service is already set to Automatic, stop it, and then start it.
- Then repeat the same process to change the Startup type of Windows Update Service to Automatic. If the Windows Update Service is already set to Automatic, stop it, and then start it.
- Now, reboot your PC and upon reboot, check if the pending update issue is resolved.

Solution 4: Update the System Drivers to the Latest Build
Your system may show the current update error if your system drivers are not updated, especially chipset drivers (like Intel ME). In this case, updating the system drivers may solve the problem.
- Update the system drivers to the latest build. You may try to update Windows (we know you are encountering the issue with updates but some users were able to install optional updates which eventually let them get rid of the issue) to the latest build. Make sure no update is pending, even the optional ones.
- Now, visit the manufacturer’s website and check if there are any updates available for your system drivers. Also, if some of the drivers are not installed, install the missing ones as well.
- Check if your system is clear of the error at hand.
Solution 5: Restart System Services Related to Windows Update
Your system may show pending updates error if its services are in an error state. In this context, restarting the system related services may solve the problem.
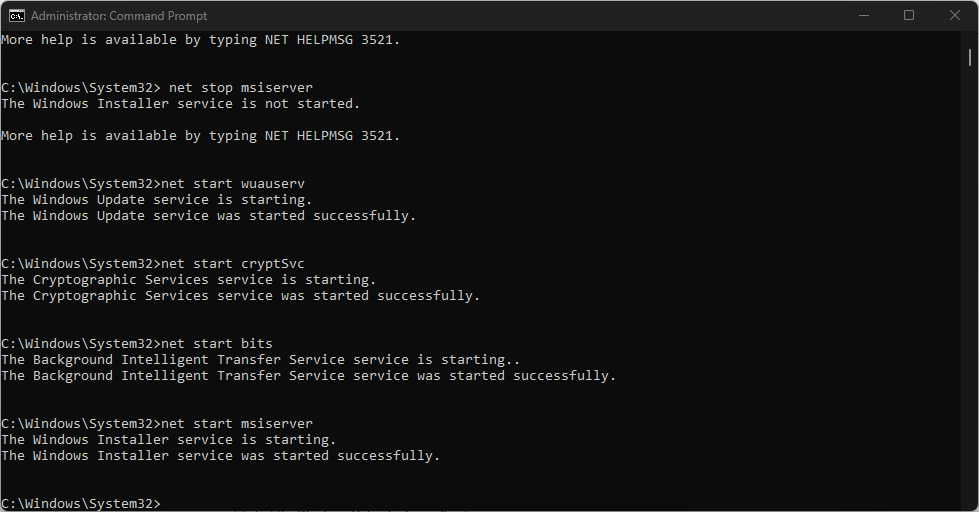
- Press Windows + Q to open the Cortana Search bar and type Command Prompt. Now, in the list of results, right-click the Command Prompt and choose Run as Administrator.

Run Command Prompt as Administrator - Now, execute the following commands one by one:
net stop wuauserv

net stop cryptSvc

net stop bits

net stop msiserver

ren C:WindowsSoftwareDistribution SoftwareDistribution.old

ren C:WindowsSystem32catroot2 Catroot2.old

net start wuauserv

net start cryptSvc

net start bits

net start msiserver

Stop the Services Related to Windows Update - Now, check if the updates issue is resolved. If not, then restart your system and upon restart, check if your system is clear of the pending updates error.
Solution 6: Reset Windows Update Agent to Defaults
You may encounter the IsPostback_RC_PendingUpdate / IsPostback: False error if the Windows Update agent of your system is corrupt. In this scenario, resetting the Windows Update agent to defaults may solve the problem.
- Launch a Web browser and download the Windows Update Agent Reset tool (ResetWUEng.zip).

Download ResetWUEng.zip - Now, extract the download file and then open the extracted folder.
- Now, right-click on the SetupDiag.exe file and then select Run as Administrator.

Open SetupDiag.exe as Administrator - Then follow the prompts on your screen to reset the Windows Update Agent.
- Now, restart your system and upon restart, check if the Windows Update issue is resolved.
Solution 7: Remove the Newly Installed Windows Update
Microsoft has a history of releasing buggy updates and you can also be a victim of these updates. In this case, reverting to the older version of Windows or uninstalling the latest update may solve the problem.
- Press Windows + Q keys to open Cortana Search and type Settings. Now, choose Settings (in the list of results).
- Now open Update & Security and then, in the left portion of the window, select Recovery.
- Then, click on the button Get Started (in the Go Back to the Previous Version of Windows 10 section).

Click on Get Started in Go back to the Previous Version of Windows 10 - Now, follow the prompts on your screen to complete the revert process and then check if the issue is resolved.
If the issue started to occur after a system/optional update, then uninstalling the problematic update may solve the problem.
- Press Windows + Q keys to open Cortana Search and type Settings.
- Now open Update & Security and select View Update History.

Open View Update History - Then, near the top of the window, click on the button of Uninstall Updates.

Uninstall Updates in Update History - Now, select the problematic update and click on Uninstall.

Select The Recently Installed Updates and Click Uninstall - Then follow the prompts on your screen to remove the problematic update.
- Now, check if your system is clear of the pending updates error.
Solution 8: Delete Windows Update Download History
Your system may show the pending updates issue if its Windows update download history is corrupt. In this case, deleting the Windows update download history may solve the issue.
- Open the Cortana Search bar by pressing Windows + Q keys and then type Services. Now, in the results pulled by the Search, right-click Services, and then click on Run as Administrator.
- Now, right-click on the Windows Update service, and then, in the menu shown, select Stop.

Stopping Windows Update - Then minimize the Services window and launch the Run command by pressing Windows + R keys.
- Now, execute the following in the Run command box:
WindowsSoftwareDistribution

Open Software Distribution Folder - Now delete the DataStore and Download folders.

Delete DataStore and Download Folder in Software Distribution - Then switch to the Services window and start the Windows Update Service.

Windows Update Start and Stop - Now restart your system and upon restart, check if the pending updates issue is resolved.
- If not, right-click on the Taskbar of your system, and in the menu shown, choose Task Manager and navigate to the Startup tab.
- Now, enable the processes/services related to the Windows update. If the Windows update processes/services are already enabled, then disable them and restart your system.
- Upon restart, check if your system is clear of the pending updates issue.
Solution 9: Reinstall the Problematic Update Manually
If the pending updates issue is still not resolved, then installing the updates manually may solve the problem.
- Launch a web browser and open the Windows Catalog.

Windows Update Catalog - Now, search for the problematic update and then download it.
- Then install the update and check if the system is clear of the pending updates.
- If not, press the Windows key to launch the Windows menu and then search for Settings (in the Windows Search bar).
- Then choose Update & Security and in the left half of the window, select Troubleshoot.
- Now, in the right half of the window, click on Additional Troubleshooters.
- Then expand Windows Update (in the “Get up and Running” section) and click on the Run the Troubleshooter button.
- Now wait for the completion of the Windows Update troubleshooter and then check if the updates issue is resolved.

Solution 10: Perform an Offline Upgrade of Your System
If none of the solutions solved your issue, then performing an offline upgrade may solve the pending updates issue.
- Launch a web browser and navigate to the Windows 10 download.
- Now, click on the Update Now button (under the latest Windows Update) and then download the update.

Download Windows Update Assistant - Then, launch the download file with administrative privileges and wait for the completion of the update process.
- Now, reboot your PC and upon reboot, check if the pending update issue is resolved.
- If the update process fails during the process, then try again but when the setup shows installing (not downloading), log off your account and wait for one hour.
- Now on the login screen (do not log in to any account at this step), click on the Power Option and select Update and Restart. If there is no update and restart option, wait some more time (at least 20 minutes) and then check if the “Update and Restart” option shows up, if so, then click on it and wait till your PC restarts (the PC may start on its own during the offline upgrade).

Update and Restart Your System - Upon restart, check if the pending updates issue is resolved.
- If not, repeat the process with safe mode with networking and check if the issue is resolved.
- If not, again open the Windows 10 download page, and under the Create Windows 10 installation media option, click on Download Tool Now.

Download Media Creation Tool Now - Now, launch the downloaded file with administrative privileges and then click Yes (if UAC prompt received).
- Then Accept the license terms and on the next screen, select the option of Create Installation Media (USB Flash Drive, DVD, or ISO File) for Another PC.

Select Create Installation Media - Now, select Language, Edition, & Architecture, and on the next screen, select the option of ISO file.

Select ISO File Type - Then select the location to save the ISO file and then click on Next.
- Now, wait for the completion of the download and then extract the downloaded ISO file.
- Then disconnect your system from the internet and then temporarily disable your antivirus (be cautious as disabling antivirus may expose your system to threats like viruses etc.).
- Now, open the extracted ISO folder and right-click on Setup.exe.
- Then select Run as Administrator and follow the prompts on your screen to perform an offline upgrade.
- Upon completion of the upgrade, hopefully, the pending updates issue is resolved.

If none of the solutions rectified the issue, you may have to either reset your PC (or use your system’s recovery partition, if supported) or perform a clean installation of Windows.

Kevin Arrows
Kevin Arrows is a highly experienced and knowledgeable technology specialist with over a decade of industry experience. He holds a Microsoft Certified Technology Specialist (MCTS) certification and has a deep passion for staying up-to-date on the latest tech developments. Kevin has written extensively on a wide range of tech-related topics, showcasing his expertise and knowledge in areas such as software development, cybersecurity, and cloud computing. His contributions to the tech field have been widely recognized and respected by his peers, and he is highly regarded for his ability to explain complex technical concepts in a clear and concise manner.
Corrupt Windows Update Temporary cache folder will cause this error
by Henderson Jayden Harper
Passionate about technology, Crypto, software, Windows, and everything computer-related, he spends most of his time developing new skills and learning more about the tech world. He also enjoys… read more
Updated on April 20, 2023
Reviewed by
Alex Serban

After moving away from the corporate work-style, Alex has found rewards in a lifestyle of constant analysis, team coordination and pestering his colleagues. Holding an MCSA Windows Server… read more
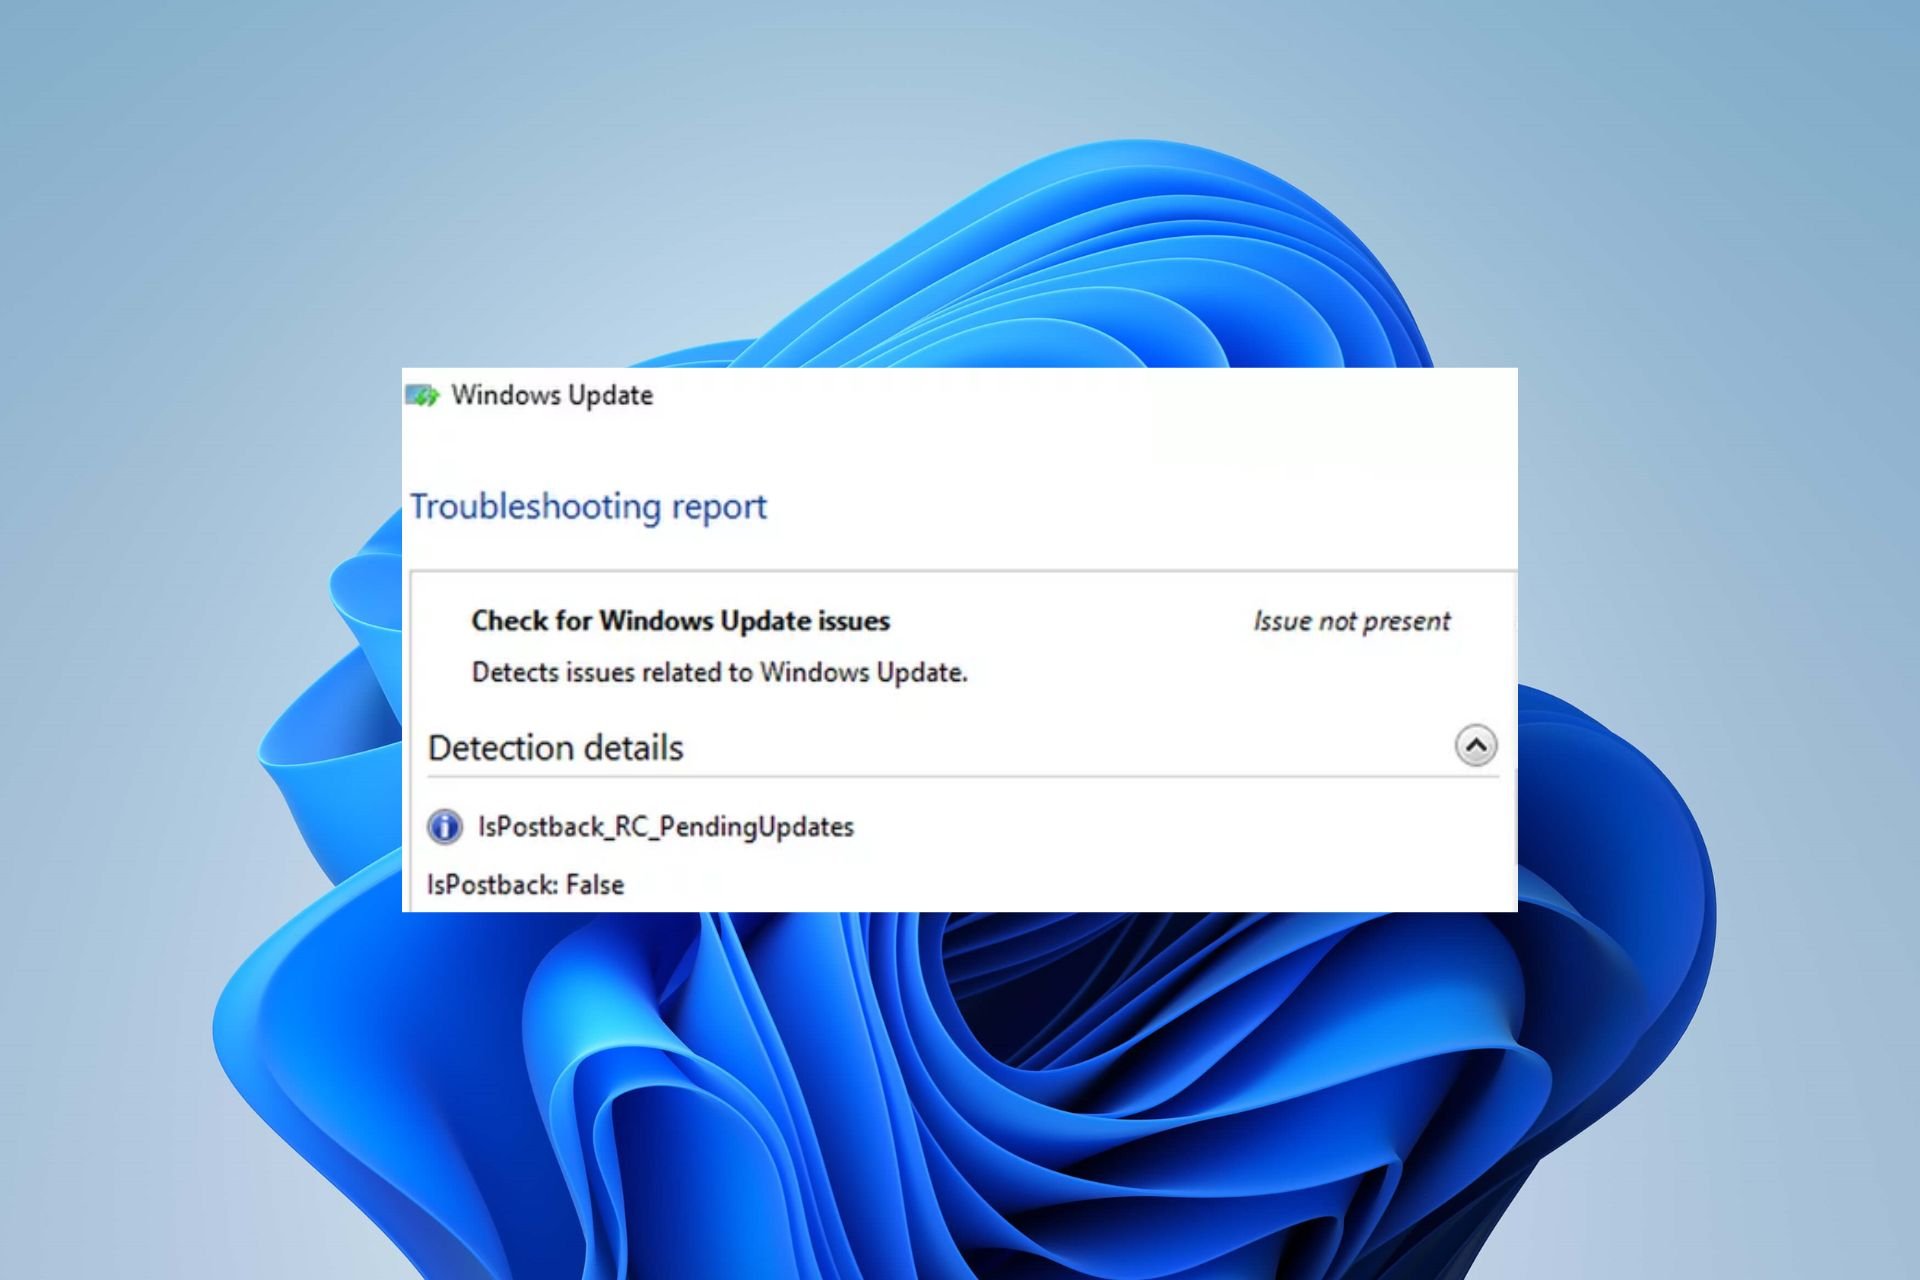
- The isPostback_RC_Pendingupdates appears when running the Windows Update troubleshooter.
- Some major causes are outdated system drivers and Windows Update components issues.
- Troubleshoot by restarting the Windows Update components and adjusting Windows Services.
XINSTALL BY CLICKING THE DOWNLOAD FILE
Windows update failures can be annoying! With Fortect, you will get rid of errors caused by missing or corrupted files after an update. The utility maintains a repository of the original Windows system file versions, and it uses a reverse algorithm to swap out the damaged ones for good ones.
- Download Fortect and install it on your PC
- Start the tool’s scanning process to look for corrupt files that are the source of the issues
- Right-click on Start Repair to resolve security and performance issues with your computer
- Fortect has been downloaded by 0 readers this month.
The Windows Update Troubleshooter helps resolve update failures. However, users complain about the isPostback_RC_Pendingupdates error that appears when trying to use the troubleshooter. This guide will take you through some steps to help fix the issue.
Also, our readers can check our guide on Windows update error 0x80010105 and ways to fix it.
What causes isPostback_RC_Pendingupdates?
The following are some of the notable causes of the error:
- Outdated system drivers – The error may occur if the device drivers running on your system are outdated. Also, corrupt chipset drivers can affect the Windows update process, resulting in the Detection details: isPostback_RC_Pendingupdates error.
- Corrupt or faulty Windows update components – Windows update components are responsible for the update process. If they are not intact or accessible, it can cause the isPostback:False error to appear when running the Windows update troubleshooter.
- Windows update Temporary Cache folder – Windows updates installer patch files are saved as cache files in a folder. However, they can become corrupt and cause interference with the Windows update process. Hence, the isPostback_RC_Pendingupdates error will occur when troubleshooting the issue.
Fortunately, our technical team has put together some solutions you can get to fix the error. As we go further into this article, we’ll discuss them.
How can I fix the error isPostback_RC_Pendingupdates?
Go through the following preliminary checks before attempting any advanced troubleshooting steps:
- Disable Metered connection for your network.
- Update the system drivers – You can read about how to reinstall devices in Device Manager in Windows 11.
- Restart Windows in Safe Mode with Networking and check if the error persists in the Troubleshooter.
If you can’t resolve the error, go ahead with the solutions below:
1. Perform a Clean boot
- Press Windows + R key to open the Run dialog box, type msconfig, and click OK.
- Go to the Services tab, check the box for the Hide all Microsoft services option, then click the Disable all button.

- Go to the Startup tab and click Task Manager.
- Select the startup programs and click the Disable button.

- Restart your PC and check if the isPostback_RC_Pendingupdates error appears during the update.
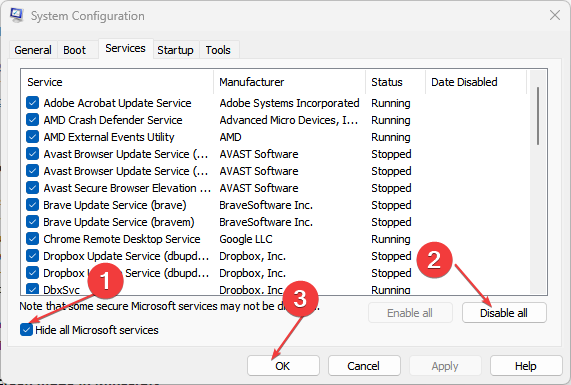

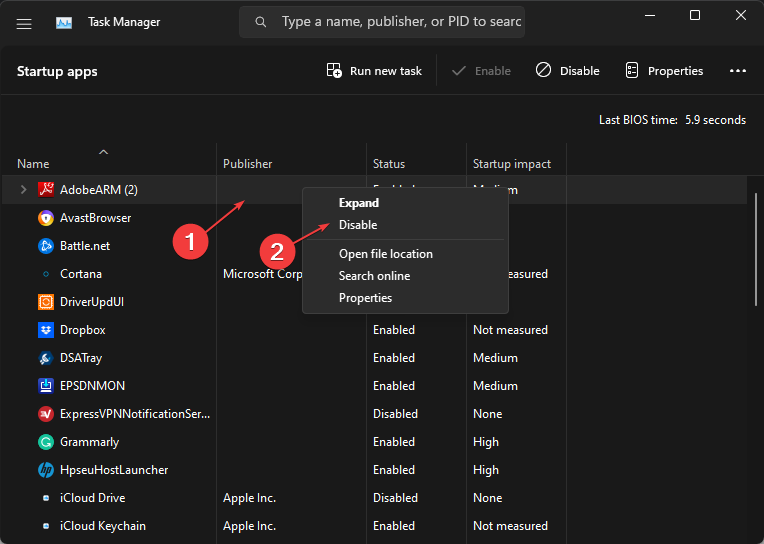
Performing a Clean boot prevents services and tasks from interfering with the update from running when you boot the system. Check our guide on how to disable startup apps on Windows 11.
2. Adjust settings in Windows Services
- Press Windows + R key to open the Run dialog box, type services.msc, and click OK to open Windows Services.
- Right-click on Background Intelligence Transfer Service and then select Properties.

- Change Startup Type to Automatic and click OK. If it’s already Automatic, then stop and click Start.
- Repeat the Steps 2 and 3 for Windows Update Service.

Some PC issues are hard to tackle, especially when it comes to missing or corrupted system files and repositories of your Windows.
Be sure to use a dedicated tool, such as Fortect, which will scan and replace your broken files with their fresh versions from its repository.
If the Startup Type for Windows Update Service and Background Intelligence Transfer Service are not set to Automatic, it will affect the Windows Updates process and it will cause ispostback_rc_pendingupdates error to appear.
3. Restart the Windows Update components
- Left-click the Start button, type Command Prompt and select the Run as administrator option.

- Click Yes on the User Account Control prompt.
- Copy and paste the following commands and press Enter after each one:
net stop wuauservnet stop cryptSvcnet stop bitsnet stop msiserver
- Then, type the following:
ren C:WindowsSoftwareDistribution SoftwareDistribution.oldren C:WindowsSystem32catroot2 Catroot2.old - Restart the services by pressing Enter after each of these commands:
net start wuauservnet start cryptSvcnet start bitsnet start msiserver - Close the Command Prompt and restart your PC to see if the isPostback_RC_Pendingupdates error persists.
Restarting the Windows Update service components will reset them and fix the malfunctioning update component causing the error when using the troubleshooter.
Our readers can check to fix issues running the Command Prompt as an administrator on Windows 11.
- VirTool:Win32/DefenderTamperingRestore: How to Remove
- Sysmain.dll Could Not Be Found: How to Fix It
- Windows 11 Keeps Asking for A1B2C3? Fix it in 3 Steps
- Dcfwinservice: What Is It & How to Fix Its High CPU Usage
4. Uninstall recent Windows updates
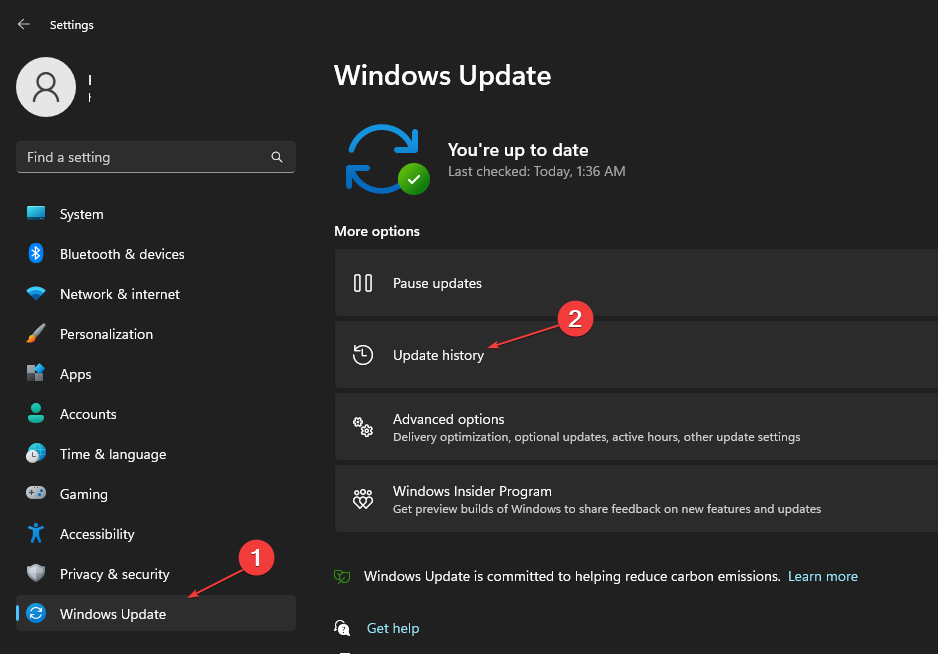
- Press Windows + I key to open the Settings app.
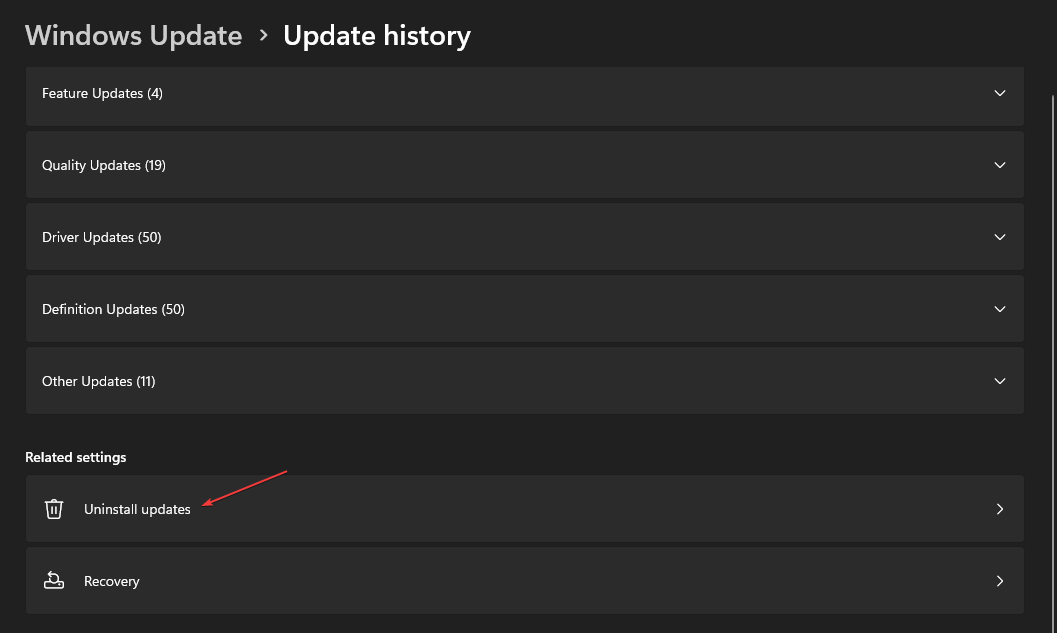
- Go to Windows Update and select Update History.

- Click the Uninstall updates button and select the most recent update.

- Click on Uninstall to complete the process.
Uninstalling the recent Windows update will remove the last installed build likely to be corrupted or faulty and resolve the ispostback_rc_pendingupdates error. Read our guide on how to uninstall updates on Windows 11 for more steps.
5. Delete Windows Update download history
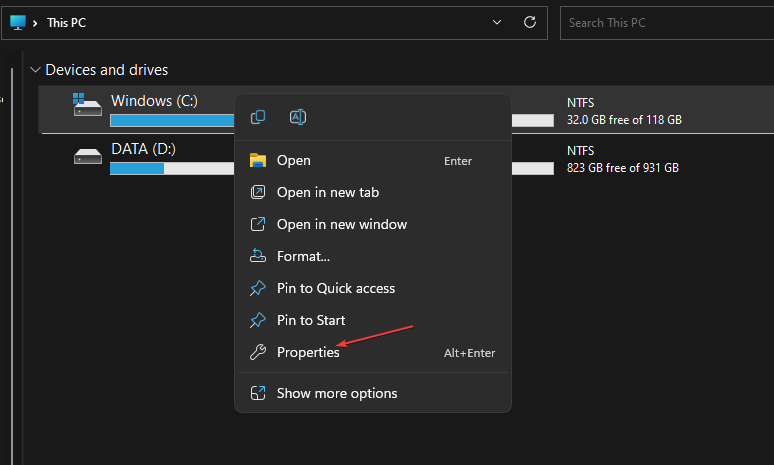
- Press Windows + E to open File Explorer.
- Go to Local Disk (C) and right-click, then click on Properties from the drop-down.

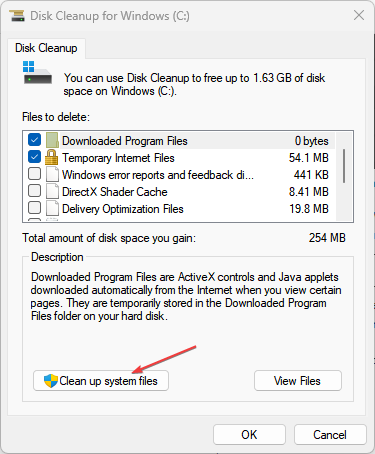
- Click Disk Clean-up, then the Cleanup system files button.

- Check the boxes for Windows upgrade log files and Temporary Windows Installation files, then click OK.
- Restart your PC to check if the error persists.
Deleting the Windows update cache files will remove the corrupt update files impeding the update process. You can read our article on what to do if File Explorer keeps crashing your PC.
Alternatively, you can check our list of the best Windows Update Repair Tools for Windows 10 & 11 in 2023.
Should you have further questions or suggestions, kindly drop them in the comments section.
Still experiencing issues?
SPONSORED
If the above suggestions have not solved your problem, your computer may experience more severe Windows troubles. We suggest choosing an all-in-one solution like Fortect to fix problems efficiently. After installation, just click the View&Fix button and then press Start Repair.
![]()
Newsletter

Update issues can be solved with the Windows Update Troubleshooter. The isPostback RC Pendingupdates issue, however, is a common complaint from users who attempt to use the troubleshooter. You can follow the steps in this tutorial to help resolve the problem.
IsPostback RC PendingUpdates a result of what?
Some significant reasons of the error include the ones listed below:
- Outdated system drivers – If your system’s device drivers are out of date, the error may occur. Corrupt chipset drivers can also hinder Windows update functionality, as seen by the following Diagnostic details: error: isPostback RC Pendingupdates.
- Windows update components that are broken or corrupt are to blame for the updating process. Using the Windows update troubleshooter may result in the isPostback:False issue if they are not intact or accessible.
- Temporary Cache folder for Windows Updates – Cache files for Windows Updates installer patch files are saved in a folder. Unfortunately, they are susceptible to corruption, which can obstruct Windows updates. The isPostback RC Pendingupdates error will consequently appear while trying to diagnose the problem.
Thankfully, our technical team has developed a few fixes you can use to correct the issue. We’ll talk about them as this article progresses.
How can I resolve the isPostback RC Pendingupdates error?
Before beginning any advanced troubleshooting procedures, perform the preliminary checks listed below:
- Network Metered Connection should be disabled.
- Upgrade the system drivers. Windows 11’s Device Manager has instructions on how to reinstall devices.
- Use the Troubleshooter to see whether the error still occurs after restarting Windows in Safe Mode with Networking.
If you are unable to fix the issue, continue with the following solutions:
Quickly fix Windows 11, 10, 8 and 7 errors with Outbyte PC Repair
Take the bull by the horns: identify and fix performance issues that may be affecting your PC.
Outbyte PC Repair is a comprehensive computer repair tool designed to solve a number of different system problems, clean up your disk, optimize performance, and improve privacy and security.

- Compatible with: Windows 11, 10, 8 and 7
- Trial: Free trial by category for at least 2 days*
- Full version: from $29.95 (for a 3-month subscription)
*Free trial allows you to fix all detected items in each category
1. Perform a Clean boot
- Press Windows + R key to open the Run dialog box, type msconfig, and click OK.
- Go to the Services tab, check the box for the Hide all Microsoft services option, then click the Disable all button.
- Go to the Startup tab and click Task Manager.
- Select the startup programs and click the Disable button.
- Restart your PC and check if the isPostback_RC_Pendingupdates error appears during the update.


2. Adjust settings in Windows Services
- Press Windows + R key to open the Run dialog box, type services.msc, and click OK to open Windows Services.
- Right-click on Background Intelligence Transfer Service and then select Properties.
- Change Startup Type to Automatic and click OK. If it’s already Automatic, then stop and click Start.
- Repeat the Steps 2 and 3 for Windows Update Service.


It will affect Windows Updates and result in the ispostback rc pendingupdates issue if the Startup Type for Background Intelligence Transfer Service and Windows Update Service is not set to Automatic.
3. Restart the Windows Update components
- Left-click the Start button, type Command Prompt and select the Run as administrator option.
- Click Yes on the User Account Control prompt.
- Copy and paste the following commands and press Enter after each one:
net stop wuauservnet stop cryptSvcnet stop bitsnet stop msiserver - Then, type the following:
ren C:WindowsSoftwareDistribution SoftwareDistribution.oldren C:WindowsSystem32catroot2 Catroot2.old - Restart the services by pressing Enter after each of these commands:
net start wuauservnet start cryptSvcnet start bitsnet start msiserver - Close the Command Prompt and restart your PC to see if the isPostback_RC_Pendingupdates error persists.


The broken update component producing the error when using the troubleshooter will be fixed by restarting the Windows Update service components.
4. Uninstall recent Windows updates
- Press Windows + I key to open the Settings app.
- Go to Windows Update and select Update History.
- Click the Uninstall updates button and select the most recent update.
- Click on Uninstall to complete the process.


5. Delete Windows Update download history
- Press Windows + E to open File Explorer.
- Go to Local Disk (C) and right-click, then click on Properties from the drop-down.
- Click Disk Clean-up, then the Cleanup system files button.
- Check the boxes for Windows upgrade log files and Temporary Windows Installation files, then click OK.
- Restart your PC to check if the error persists.


Please leave any further queries or recommendations in the comments area.
Related post
Updated May 2023: Stop these error messages and fix common problems with this tool. Get it now at this link
- Download and install the software.
- It will scan your computer for problems.
- The tool will then fix the issues that were found.
Your system may display the isPostback_RC_Pendingupdates error if system drivers, especially chipset drivers (such as Intel ME), are not updated. In addition, a corrupted Windows Update agent or a corrupted Windows installation can cause the mentioned error.
The problem occurs when the user tries to update the faulty system and the user runs Windows troubleshooter.
Please disconnect all external devices such as USB, external hard drive, etc. of the system before looking for solutions.
Run Windows Update Troubleshooter

- First, run the Windows Update troubleshooter, which can fix many update problems. Launch the Win 10 Search Utility by pressing the Enter button to search or by pressing the Windows + S key combination.
- Enter troubleshooter in the search box.
- Users can then click Troubleshooting Options to open the Options window.
- Select Windows Update and click Run the troubleshooter to run it.
- Users can then search for possible fixes in the Windows Update troubleshooter.
Updated: May 2023
This tool is highly recommended to help you fix your error. Plus, this tool offers protection against file loss, malware, and hardware failures, and optimizes your device for maximum performance. If you already have a problem with your computer, this software can help you fix it and prevent other problems from recurring:
- Step 1 : Install the PC Repair and Optimizer Tool. (Windows 10, 8, 7, XP, Vista).
- Step 2 : Click Start Scan to determine what problems you are experiencing with your computer.
- Step 3 : Click Repair Allto resolve all problems.

Disable the measured connection for your network

Users with limited data plans usually change their network type to metered connection, which limits the operation of various applications and services (including Windows Update). In this case, disabling the measurement connection setting for your network may resolve the issue.
- Start Windows Search by pressing Windows Key + S, then enter settings. Now click on Settings in the search results.
- Open Network & Internet, then click Properties (under your network connection).
- Set the switch with Set as measured connection (in the section “Measured connection”) to Off.
- Now, reboot your system and on restart check if the issue with pending updates is resolved.
Run BITS Troubleshooter
- The Background Intelligent Transfer Service Troubleshooter can troubleshoot BITS issues. This is what some users need to do to fix error 2182 NET HELPMSG. To open the BITS troubleshooter, press the Windows key + R key combination.
- Enter “Control Panel” in the “Open” field and select “OK”.
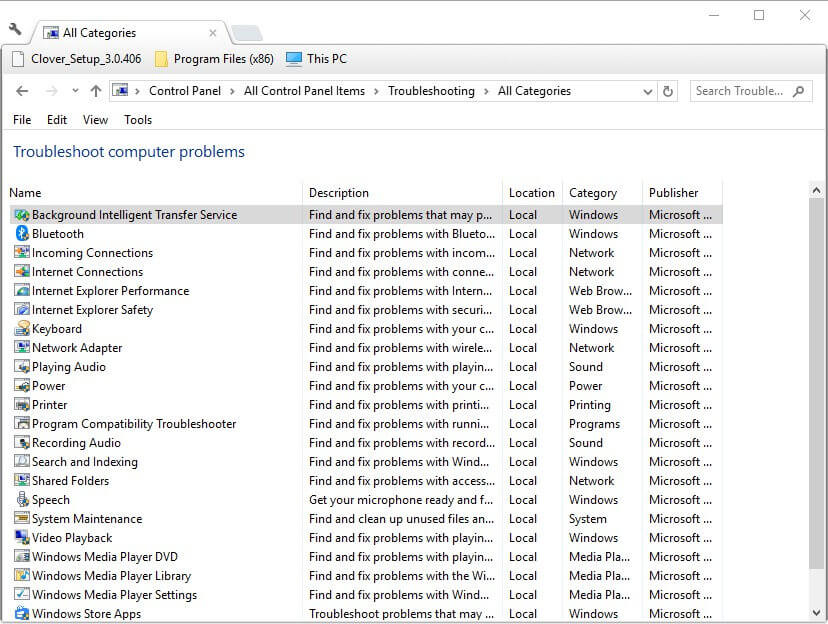
- Click Troubleshoot to open the Control Panel applet.
- On the left side of the window, click Show All to open a list of troubleshooting tools.
- Then click Background Intelligent Transfer Service to open this fix.
- Click Advanced to select the Apply repairs automatically option, and then click Next.
APPROVED: To fix Windows errors, click here.
Post Views: 1,515