5 способов исправить ошибку мыши Razer при двойном щелчке мыши (05.26.23)
Мышь  razer продолжает двойное нажатие
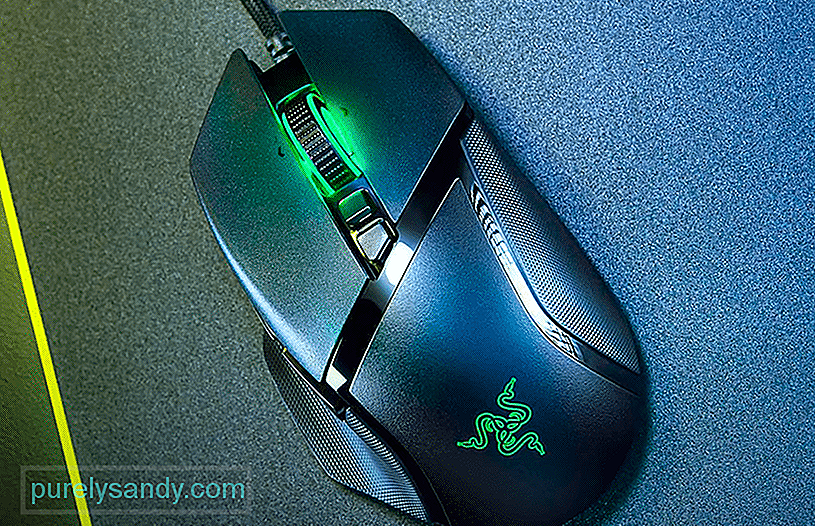
Мыши Razer могут быть немного дорогими, но все дополнительные функции, которые вы получаете вместе с мышью, делают мышь достойной покупки. Razer предлагает широкий выбор мышей на выбор. В зависимости от вашего игрового процесса или стиля захвата вы можете просмотреть и выбрать идеальную мышь, которая соответствует вашим требованиям.
Хотя мыши razer довольно надежны, в последнее время многие пользователи жалуются на проблемы с мышью razer. Их мышь будет продолжать дважды щелкать, и они не смогут использовать ее должным образом. Если вы находитесь в подобной ситуации, вот несколько исправлений, которые помогут решить вашу проблему.
Как исправить двойное нажатие мыши Razer?
Исправление, которое сработало для большинства пользователей, касалось мышки. Существует большая вероятность того, что что-то застряло под кнопкой щелчка, и всякий раз, когда вы нажимаете кнопку, это регистрируется как два щелчка, что делает мышь непригодной для использования. Иногда накопление статического электричества также может вызвать эту проблему, и влажность в вашем дыхании устраняет это накопление, и проблема с двойным щелчком решается сама собой.
Легкий удар по щелчку, который не работает, может решить вашу проблему. Вы также можете использовать воздуходувку для очистки любого мусора, который может застрять под кнопкой щелчка, и он должен начать работать правильно после того, как вы снова подключите мышь к порту.
Иногда устаревшая прошивка также может вызвать эту проблему. Мы рекомендуем вам зайти на официальный веб-сайт razer и просмотреть его, чтобы найти программу обновления прошивки для вашей конкретной модели мыши. После этого просто установите его на свой компьютер и обновите прошивку мыши. Просто следуйте инструкциям на экране и перезагрузите компьютер после успешного обновления прошивки мыши. После загрузки компьютера попробуйте щелкнуть мышью, чтобы увидеть, решена ли ваша проблема.
Если вы уверены, что с вашей мышью все в порядке, попробуйте перезапустить синапс razer, чтобы решить эту проблему. Чтобы выполнить чистую установку razer synapse, выполните следующие действия.
- Удалите программное обеспечение Razer и Chroma SDK с панели управления и перезагрузите компьютер.
- Проверьте службу Windows и диспетчер задач чтобы убить все процессы Razer, которые все еще работают.
- Перейдите к своим программным файлам и данным локального приложения, чтобы удалить все найденные папки Razer.
- После удаления всех папок Razer перезагрузите компьютер.
- После загрузки компьютера загрузите синапс в свою систему и установите его в своей системе.
- После этого вы можете войти в свою учетную запись и начать настройку своих устройств с помощью синапса Razer
После выполнения всех этих шагов, если ваша конкретная проблема все еще не решена, мы рекомендуем вам немедленно связаться со службой поддержки Razer. команда, чтобы помочь вам. Вы также можете использовать функцию живого чата, чтобы получить помощь от профессионала, который шаг за шагом проведет вас через процесс устранения неполадок.
Не забудьте предоставить группе поддержки все необходимые сведения, чтобы помочь им точно определить проблему с вашей мышью Razer. Было бы даже лучше, если бы вы могли записать видео и предоставить его им. После того, как они смогут определить проблему, они смогут более эффективно подсказать вам, как вы можете решить эту проблему.
Если Кажется, что ничего не работает, то вполне вероятно, что что-то не так с оборудованием вашей мыши. В этом случае у вас остается единственный вариант — попросить вашего поставщика сделать заказ на замену. Чтобы точно определить проблему с оборудованием, вам следует подключить мышь к другой компьютерной системе. Если он по-прежнему не работает, вы будете уверены, что с вашим устройством Razer что-то не так. Заказ на замену может быть довольно легко оформлен, если ваша гарантия еще не нарушена, поэтому обязательно свяжитесь со своим поставщиком в течение гарантийного срока.
Это несколько исправлений, которые можно использовать, чтобы решить проблему с двойным щелчком. Для большинства пользователей проблема решалась простым ударом по мышке. Поэтому обязательно попробуйте это, прежде чем переходить к другим исправлениям.
YouTube видео: 5 способов исправить ошибку мыши Razer при двойном щелчке мыши
05, 2023
Table of Contents
1
It must have happened to us once, if not more; you’ve clicked the mouse once but got a DoubleClick. What to do if your Razer DeathAdder mouse is double-clicking even when you click it once? You can use the double click test to identify if your mouse has a double-clicking issue. If so, here are a few quick fixes to follow.
Reasons for Double Clicking Problem | How to Fix It?
1. Mouse Reset
To fix it, you try the mouse reset method.
- Disconnect your mouse from the device.
- Then press and hold the right, left mouse button and scroll wheel down together.
- When holding these buttons down, connect your mouse back to your device.
- Release the buttons after 5-10 seconds. This mouse reset will hopefully end the double-click issue.
2. Release the Buildup of Static Charge
In some cases, the mouse switches may develop a static charge that leads to a double click problem. Either breathe into the empty space between the mouse and button or blow damp air to release this charge. Humidity can help remove the static charge that has been built up and stop the double click issue.
3. Check the PC for Updates
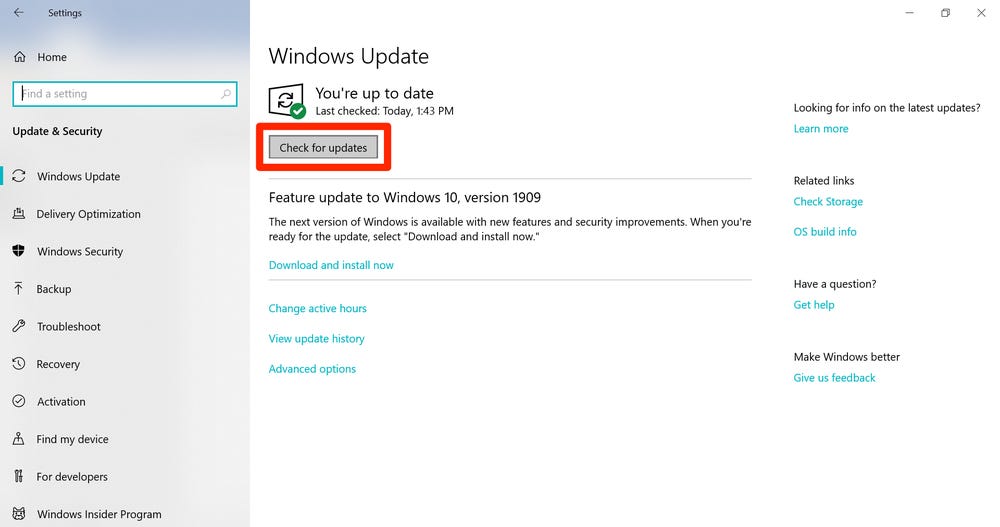
This should be amongst the first steps to solve this issue. Sometimes, the problem of double-clicks with Razer DeathAdder can also occur because of an outdated Windows version. Follow these steps to update.
- Press the Windows key+I to open the settings.
- Then open the tab “update & security”.
- From here, select “check for updates”.
- Windows will search for updates on your device. This can take a while if you haven’t updated your PC in a while.
- The PC will restart automatically, but if it doesn’t, restart it yourself and see if the issue is resolved.
4. Update the Firmware of the Mouse
Razer Deathadder recommends users update their mouse firmware if they face a double click issue. To do this, follow these steps.
- Download the DeathAdder Chroma or DeathAdder 2013 updater on your device.
- Install the app and then launch it on the device.
- Follow the on-screen instructions to update the firmware. The mouse may become unresponsive during this time.
5. Increase the Speed of Double Click
If the methods don’t work, you should try adjusting the double-click speed from the control panel of Windows. Follow these steps.
- Open the search option for windows and type the control panel.
- In the control panel, go to the mouse option.
- Then visit the buttons tab and increase the speed of double click with the slider. Increasing the speed should prevent the computer from making false clicks.
6. Change the Type of Connection
The system of interaction between the mouse and the computer can also be a problem at times. If you’re using a wireless and USB hub Razer Deathadder mouse and the double-click issue occurs, you may want to try to change the connection type. If you’re using the wireless option, try connecting directly to the PC port to see if that works. You can also resolve the problem by disconnecting the BlueTooth and reconnecting it.
The above methods will help you resolve the double-clicking issue with Razer DeathAdder. But if none of the above methods works, it is recommended to ask for a new mouse if the mouse still has a warranty. If out of warranty, you may need to replace the switches from a repair shop or do it yourself if you’re skilled enough.
Recent Posts
Categories
Even though you have probably paid a lot of money for your mouse, the Razer Deathadder double click problem hasn’t been fixed. It is an issue that pops up in many different gaming mouses. Still, the Razer Mouse double-clicking is one of the most widespread problems you hear about. In this article, our experts will help you to fix this issue.

Contents
- Razer Deathadder Double-Clicking? Try These Solutions First
- Fix #1: Roll Back After Update
- Fix #2: Set Your Default Driver
- Fix #3: Change Mouse Speed
- #4: Check Your Power Management
- Fix #5: Third-Party Monitoring
- Fix #6: Switch Buttons
- Fix #7: Change Your Connection Type
- Fix #8: Check For New Updates
- Fix #9: Do Some Maintenance
Razer Deathadder Double-Clicking? Try These Solutions First
It happens to all of us occasionally: we click once, and there is accidentally a double click. But what happens if your Razer mouse is double clicking on a single click? The first few fixes will help you to solve the problem quickly. We have a fix that takes more time and effort but can be used if none of these works.
Fix #1: Roll Back After Update
A few people have said that after some Windows updates, they have problems with their Razer mouse clicking twice. If you have recently updated and think that may be the problem, try these steps to fix the problem:
1. Press on the Windows Key and the X key at the same time to open up the Power User Menu.
2. Select “Device Manager.”
3. When this opens, find your Razer Deathadder mouse and double click on it to open up the “Properties” menu.
4. Go into the “Driver” tab and click on the button that says “Roll Back Driver.”
5. Wait for the roll-back process to render.
6. Restart your computer. Wait for it to boot back up completely. Check to see if the problem is solved.
If this problem isn’t solved, move onto the next step.
Fix #2: Set Your Default Driver
If that solution didn’t work and your Razer mouse keeps double clicking, it could be that you want to use the default driver. The steps are similar to the step above:
1. Press on the Windows Key and the X key at the same time to open up the Power User Menu.
2. Select “Device Manager.”
3. When this opens, find your Razer Deathadder mouse. Right-click on the mouse and choose the “Uninstall” option.
4. Restart your computer. Wait for it to boot back up completely. This will force the computer to use the default driver. Check to see if the problem is solved.
If your problem isn’t solved, move onto the next option.
Fix #3: Change Mouse Speed
If your Razer mouse keeps double clicking, another common issue is that the click speed settings are wrong. Resetting them can make the mouse work properly. This doesn’t work for everyone, but enough people have had success because it is worth a try. To change the mouse speed:

1. Open up the Control Panel by pressing the Windows Key and the S key simultaneously, then typing in “Control Panel” and selecting it on the results.
2. Change the view from “Category View” to “Large Icon View.”
3. Locate your Razer Deathadder mouse. Click to change the settings.
4. Look through the menu to find the “Double-Click Speed” section. You should see a slider bar there. You may need to try a few different things, as people have found success in various options. Some suggest putting it to the highest possible speed first, while others suggest reducing it. Whatever you do, you can always change it.
5. After you are finished making changes, click on “Apply” and then “OK” to save the changes.
6. Restart your computer so that the changes take hold.
If this doesn’t fix your problem, move onto the next solution.
#4: Check Your Power Management
To fix a double clicking mouse Razer Deathadder, the following solution has to do with the power management settings for the USB Root Hub. This may sound a bit complicated, but it is relatively easy once you get into it.
1. Start your Device Manager by pressing on the Windows Key and the X key at the same time to open up the Power User Menu. From there, select “Device Manager.”
2. Go into the Universal Serial Bus controllers section, and click on the carrot to expand it.
3. Double-click on the USB Root Hub to open the properties.
4. Go into “Power Management” and uncheck the “Allow The Computer To Turn Off This Device To Save Power.”
5. Click on “apply” and then “OK” to save your changes.
6. Repeat for all of the USB Root Hub devices.
7. Restart your computer so that the changes take hold.
Fix #5: Third-Party Monitoring
If your Razer mouse double clicking problems persist, the following solution you can try is third-party software. There are plenty of options out there, but you may want to start with Googling your problem. Many users have had success using tools like “Left Mouse Button Fix.” Be sure to read reviews to see which apps you can trust.
 Download the app and follow the wizard to install everything. You will then be able to go into the settings and select something like “De-bounce” or ‘Ignore Rapid Mouse Button Clicks.” Now, there are some issues with these apps because they don’t always launch, they aren’t permanent fixes, and you will have to start the tool every time you restart your computer.
Fix #6: Switch Buttons
If your Razer Deathadder double clicking issue persists at this point, something may likely be wrong with the hardware on your mouse, not necessarily the software. To check if it is a hardware issue, you can switch the left and right mouse buttons to check if the problem appears again.
To do this:
1. Open up the Control Panel by pressing the Windows Key and the S key simultaneously, then typing in “Mouse & Touchpad Settings.”
2. When the menu opens, find the option that says “Select Primary Button.”
3. Select Right” for the primary button.
4. Click on “Apply” and then “OK” to save changes.
5. Restart your computer.
6. Test to see if this fixed the problem. You may want to use your mouse for a few minutes in this style, even though it may seem awkward to you. We are testing here if the problem is with the connection to the computer, with the hardware, or something else. If the problem continues with the mouse, skip the next solution and move onto the one after it. If the problem doesn’t continue, try the next solution.
Fix #7: Change Your Connection Type
The following solution changes the interaction between your computer and the mouse. Suppose you are using a USB hub and a wireless version of the Razer Deathadder with double click issues. In that case, you may want to try to connect it directly to the PC. You may also want to disconnect it from BlueTooth and then reconnect it again.
This may solve your problems, especially if you have an issue with only one button. If it doesn’t, try the next solution.
Fix #8: Check For New Updates
Usually, this is one of the first solutions that we list. Still, it is less likely that this will cause a double-clicking problem for the Razer Deathadder. However, if you have tried all of the other solutions and haven’t worked, this could be your fix. Sometimes a problem will occur if the Windows version is out of date.

To fix it, all you have to do is install the latest updates:
1. Press the Windows Key and the I key at the same time to open up the Settings App.
2. Next, go to the “Update & Security” tab.
3. Click on the “Check For Updates” button.
4. Windows will start to search for updates and then make them. If you haven’t updated your PC in some time, this may take a bit of time.
5. Your PC should automatically restart, but if it doesn’t, restart it.
6. Check to see if your problem has been solved.
Fix #9: Do Some Maintenance
This is the riskiest solution on the list and, if done incorrectly, can destroy your mouse, so only use this as a last resort. You will have to be very precise and careful as you work through the solution.
1. Remove the batteries from your mouse. You will need to pop open the bottom to get them out. This is also an excellent time to check for corrosion.
2. Find the screws that hold the mouse body together: there should be four of them. These screws are located under the “slide pads.”
3. Remove these screws and put them in a safe place. At this point, you should be able to pull the mouse apart. There is a small white button that may fall off when you open the mouse, so be sure to look for it and keep it.
4. Find the mechanism that is causing the problem. You can click the left button (the one that usually double clicks) to see what is sticking.
5. Open the mechanism box by prying the cover away: be gentle!
6. Find the spring that is stretched out. It should be easy to see. It is a tiny copper tension spring in the click mechanism. Bend the coil back together so that it is tight. Be sure to straighten it as well.
7. Reinstall the tension spring, which is a challenging step to do. It would be best if you put it on the small hook at the front of the mechanism. Then, use a screwdriver to push it into place while ensuring the back part of the spring stays under the small arm. The slower you go, the easier this will be.

Yoodley is reader-supported. When you buy through links on our site, we may earn an affiliate commission.
The double-clicking issue with Razer mice was first reported years ago, the number of instances may have reduced after Razer addressed the issue and fixed it in a firmware update, but still, it remains a big problem for those who use mice like DeathAdder, 2013, Elite, V2, Chroma, and even Razer Naga. This article explains why this problem occurs with Razer mice and how you can fix it by using one of the methods we have covered.
Reason Behind the Issue
Multiple reasons can cause the double click issue, the most common is software related, but sometimes static charge buildup can be the reason. In some rare cases, faulty mouse switches can also cause the double click issue. Below we have mentioned some methods to fix the problem; trying all of them one by one will hopefully fix the problem.
We have tried to cover all the methods which usually fix the double click problem on Razer mice. Before you jump to the next section and start following the steps mentioned below the methods, keep in mind, trying just one method may not work; if so, we recommend trying all of them until one of them fixes the issue.
Method 1) Reset the Mouse
Step 1) Disconnect the mouse from the computer.
Step 2) Press and hold down the Right + Left Mouse Button + Scroll Wheel.
Step 3) While holding down the mouse buttons, connect the mouse to the computer.
Step 4) After 5 – 10 seconds, release the buttons. This will reset the mouse and hopefully fix the double-click issue.
Method 2) Release the Static Charge Buildup
Sometimes mouse switches get a static charge buildup that can cause the double click issue. To release the charge, you can blow humid air or gently breath into the gap between the button and the mouse. Some people breathe into the gap and think it got fixed because there was dirt on the switches, but in reality, the humidity present in the breath helps in removing the static charge buildup.
There are antistatic sprays available in the market, but it’s better to blow humid air or breath into the gap gently. Before you try this method, keep in mind that you may have to breathe air from different angles and do it 4-5 times.
Method 3) Update Mouse Firmware
Gaming mouse firmware is a software program; just like the firmware of other devices like smartphones, it provides important instructions to the mouse. After the double click issue was first recognized, Razer had advised the people who were facing the issue to update the mouse’s firmware.
Note: We only found DeathAdder 2013 and Chroma’s firmware updater; if you are facing the double click issue on Elite or any other model, try contacting Razer Support.
Step 1) Download DeathAdder 2013 or DeathAdder Chroma Updater on your Windows computer.
Step 2) Install the Updater and launch it.
Step 3) Follow the on-screen prompts to update the firmware. Keep in mind during the update; the mouse will become unresponsive.
Method 4) Increase Double-Click Speed
If you have tried all the methods, including troubleshooting like reinstalling Synapse and trying different USB ports and you are still unable to fix the issue. You can change double-click speed from your Windows control panel. This is not a proper solution, it is more like a workaround for the double-click issue, but it does work.
Step 1) Open the control panel on your Windows computer.
Step 2) Click on the Mouse option.
Step 3) Click on the buttons tab and then use the slider to increase the double click speed.
Increasing the click speed will prevent the system from registering the false click. If you see the double click problem even after doing this, you may have faulty switches.
What to Do If Nothing Works?
As mentioned before, if you cannot fix the problem by following the methods mentioned in this guide, the mouse’s Omron switches need to be replaced. If your mouse is still in warranty, you can get a new one from Razer, free of charge, but if it’s not, you will have to replace the switches. You can take the mouse to a repair shop, and they’ll do it for you, or if you know how to solder, you can fix it yourself.
How to Replace the Switches?
To replace the switches, you will have to disassemble the mouse first. Both Deathadder Elite and Chroma have three screws on the bottom.
Two screws are hidden behind the rubber feet, and the third screw is behind the product information sticker.
You can either use a magnet to find the screws and then poke with a screwdriver or remove the rubber feet and the sticker using a knife. Once you find the screws, unscrew them, and you should be able to remove the bottom plate. Now carefully remove the cables connected to the circuit board ports.
The next thing you have to do is, remove the circuit board. There are four screws that you need to unscrew to remove the board. When done, remove the power cable from the board’s circuit port and look for the switches that you need to replace; they have Omron written on top. If you can’t find them, watch the video attached below to figure that out.
Now, remove the scroll wheel, desolder the switches, and solder the new ones. After that, replace the board screws, plugs and close the shell and replace the main screws.
Read More
- Best Gaming Mouse with Number Pad
- Top 9 Lightest Gaming Mice
- Best Gaming Mouse For Small Hands
- Best Gaming Mice for Big Hands
- Best Wireless Gaming Mouse
Introduction: Fixing Your Mouse Double Click Issue (replacing Microswitch on Razer Deathadder 3.5G)
There’s one thing we hate from old mouses and one of it is double clicking issue. This problem is caused by the old spring mechanism inside the microswitch had loosen it’s tension and as the results registering clicks as double or triple clicks (or worse, not registering anything at all.)
Now, if you feel more adventurous you can follow frEmn’s instructables on on how to retention your microswitch spring mechanism. But on this instructables, I’ll show you on how to replace it instead. We’ll be using my Razer Deathadder 3.5G for example on this instructables.
PS: Your «broken» microswitch could be repaired too! Just follow frEmn’s instructables, it should be easier since you’ve pulled out the microswitch from the PCB.
Step 1: Getting the Microswitch
Every microswitch that has this form factor works, but if you’re a heavy user (or gamer) like me I will recommend you Omron D2FC-F-7N or Omron Japan D2F-01F-T, both are actually same switches and manufactured in china, but Japan’s D2F-01 passed an additional quality control in Japan but there’s no real difference on them except the marking on the switches. They cost about $5.25 for 4pcs and that’s pretty cheap.
You could find this at
Here at ebay Hong Kong Seller
Or another hongkong seller
or US Seller
Oh, and before you install it you must straighten the pins, use anything flat like pliers to straighten it.
Step 2: Preparing Your Tools
You’ll need
- Soldering Iron
- Desoldering tools as Desoldering Wick or Pump
- Screwdivers
- Pen Knife/Hobby Knife (X-Acto)
- Solder tin
SAFETY FIRST!
Now if you never solder anything before I would recommend you to read this comic titled «Soldering is easy» by MightyOhm (it’s free!) to grasp the basics of soldering and be careful that you’re going to work with heat based tools, if you’re still underage please have a guardian/parents on your side to watch your work and helps you if needed.
Step 3: Open the Holes!
Now let’s open the holes first and then unscrew the hidden screw.
Some mouse manufactures hides the screw holes behind the label or mousefeet, you could search on the internet about your mouse or you could just try to removes everything and try to unscrew it carefully.
On this particular model, there’s 3 hidden screw holding the cover from the surface facing side.
Use the blunt side of the knifes or anything thin and blunt to remove the mousefeet and carefully removes them, then poke a hole behind the label to reveal the secret screww. Use your screwdriver to unscrew the screw by turning it counter clockwise until the screw pops out. sets aside.
Step 4: Removing the Cover
Carefully, using the blunt side of the knife remove the cover by the seam lines from the front to the side. Carefully open the cover from the surface facing cover and disconnect the led cable (if any). In this particular mouse model, you’ll see a ribbon data cable, do not break them (or break them, if you can solder them again). Now you might want to also clean the insides from dust and dirt.
Step 5: Removing Top PCB Screws
In able to removes the broken microswitch from the PCB, you need to unscrew the screws that hold the top PCB first. Carefully, using smaller screwdrivers turn counter clockwise and then set aside the screws. Now you can removes the scroll wheel (and clean it if necessary) and identify the broken microswitch.
Step 6: Desoldering Time.
Be careful that you’re now using a heat tool to desoldering and soldering new microswitch.
Use small amount of solder tin on the tip to transfer the heat easier. I know it seems ironic that I use more solder to removes solder, but hey as long as it works.
While you melts it carefully pull the microswitch from pcb using x-acto/pen knife or anything that thin enough to pull it. Desolder every legs until you could remove the switch.
Step 7: Soldering the New Switch
This is the easiest part, put the switch legs inside the hole (be careful with the orientation!) and bent them so it can holding itself to the hole while you solder them.
Now use your soldering iron and the solder tin to solder the legs and complete the connection. Shake the board a bit to make sure everything is strong enough.
Step 8: Assembling
On this final step, you just need to reverse the fifth step and before. And then test it to see if it works.
I don’t have pictures for this step, but I’m sure you can do it! (But I’m not liable for any damages from doing this, do it at your own risk!)
Thank you for reading this instructables, I’m sorry if there’s any mistake in spelling or grammar. And if you like this instructables you can give it a vote on the First Time Author Contest 2016, every vote is appreciated. Thank you!