I have a tomcat as my web-server, it stopped down automatically with the given Error —
Java HotSpot(TM) 64-Bit Server VM warning: INFO: os::commit_memory(0x00007f16a8405000, 12288, 0) failed; error='Cannot allocate memory' (errno=12)
i need to figured it out what actually happened ? and what warning does mean ?
asked Jun 23, 2015 at 12:18
![]()
Greesh KumarGreesh Kumar
1,8473 gold badges27 silver badges44 bronze badges
4
There is insufficient memory for the Java Runtime Environment to continue.
Native memory allocation (malloc) failed to allocate xxxxx bytes for committing reserved memory.
Possible reasons:
- The system is out of physical RAM or swap space
- In 32 bit mode, the process size limit was hit
Possible solutions:
- Reduce memory load on the system
- Increase physical memory or swap space
- Check if swap backing store is full
- Use 64 bit Java on a 64 bit OS
- Decrease Java heap size (-Xmx/-Xms)
- Decrease number of Java threads
- Decrease Java thread stack sizes (-Xss)
- Set larger code cache with -XX:ReservedCodeCacheSize=
If you are on Java 8 or later, please also see this question: Java HotSpot(TM) 64-Bit Server VM warning: ignoring option MaxPermSize
![]()
Joachim Sauer
301k57 gold badges553 silver badges612 bronze badges
answered Jun 9, 2016 at 10:07
![]()
Manisha BanoManisha Bano
1,8232 gold badges22 silver badges34 bronze badges
5
Java was not able to allocate enough memory, i.e. it’s not Java’s heap limit that’s in the way but rather no more memory available to be given to Java by OS. Check that the machine is not running out of memory.
And first clean ram or increase ram then check if again there is an out of memory error then increase heap size:
-Xms128m min(heap size)
-Xmx512m max(heap size)
-XX:MaxPermSize max(perm size)
![]()
Hack-R
22.2k14 gold badges74 silver badges129 bronze badges
answered Feb 4, 2016 at 13:54
![]()
BrainsbotBrainsbot
1211 silver badge5 bronze badges
1
There is insufficient memory for the Java Runtime Environment.
I was facing the same issue as shown below.
OpenJDK 64-Bit Server VM warning: INFO:
os::commit_memory(0x00000000f80f7000, 20729856, 0) failed;
error=’Cannot allocate memory’ (errno=12)
I solved this by using below steps.
There are processes hanging on to files they’ve accessed on /tmp
Use lsof to check:
lsof | grep deleted
It will list processes, Now you can kill those process which will free the space for you.
![]()
Dharman♦
30.3k22 gold badges84 silver badges132 bronze badges
answered May 16, 2021 at 9:10
![]()
The Java Hotspot(TM) 64-bit Server VM warning is a common issue that developers encounter when working with Java applications. This ultimate guide will help you understand the root cause of these warnings and provide step-by-step solutions to resolve them. Additionally, we have included a FAQ section to answer some common questions related to this issue.
Table of Contents
- Understanding the Java Hotspot(TM) 64-bit Server VM Warning
- Common Causes of the Warning
- Solutions to Resolve the Warning
- Solution 1: Update Your JDK
- Solution 2: Increase Heap Size
- Solution 3: Optimize Garbage Collection
- Solution 4: Use Appropriate JVM Flags
- Solution 5: Profile and Optimize Your Code
- FAQ
- Related Links
Understanding the Java Hotspot(TM) 64-bit Server VM Warning
The Java Hotspot(TM) 64-bit Server VM warning is an alert that indicates potential performance or memory related issues in your Java application. This warning is generated by the Java Virtual Machine (JVM) when it detects a potential problem with the application’s configuration, memory management, or garbage collection.
The exact warning message may vary depending on the issue, but a common example is:
Java HotSpot(TM) 64-Bit Server VM warning: INFO: os::commit_memory(0x00000000c5330000, 715849728, 0) failed; error='Cannot allocate memory' (errno=12)
Common Causes of the Warning
There are several reasons why you might encounter the Java Hotspot(TM) 64-bit Server VM warning. Some of the most common causes include:
- Outdated JDK: Running your application with an outdated version of the Java Development Kit (JDK) may result in these warnings.
- Insufficient Heap Size: Your application may require more memory than is currently allocated to the JVM heap.
- Garbage Collection Issues: The JVM may be struggling to manage memory efficiently due to improper garbage collection configuration.
- Inefficient Code: Poorly optimized code can lead to these warnings as it may cause performance bottlenecks and memory leaks.
Solutions to Resolve the Warning
Solution 1: Update Your JDK
Ensure that you are running your application with the latest version of the JDK. You can check your current JDK version by running the following command in your terminal:
java -version
If you need to update your JDK, visit the official JDK download page and follow the instructions for your operating system.
Solution 2: Increase Heap Size
By increasing the JVM heap size, you can allocate more memory to your application. You can set the heap size using the -Xmx and -Xms flags when starting your application:
java -Xmx1024m -Xms512m -jar your_application.jar
In this example, the maximum heap size is set to 1024 MB, and the initial heap size is set to 512 MB. Adjust these values according to your application’s requirements.
Solution 3: Optimize Garbage Collection
To improve garbage collection performance, you can use the -XX:+UseG1GC flag to enable the G1 garbage collector:
java -XX:+UseG1GC -jar your_application.jar
You can also fine-tune the garbage collection process with additional flags. For example, to set the maximum garbage collection pause time to 200 milliseconds, use the -XX:MaxGCPauseMillis flag:
java -XX:+UseG1GC -XX:MaxGCPauseMillis=200 -jar your_application.jar
Solution 4: Use Appropriate JVM Flags
There are numerous JVM flags that can help you optimize the performance of your Java application. Some common flags include:
-XX:+UseCompressedOops: Enables compressed references to save memory.-XX:+UseNUMA: Enables Non-Uniform Memory Access (NUMA) optimizations.-XX:InitialCodeCacheSize: Sets the initial size of the code cache.
You can find a comprehensive list of JVM flags in the official JVM options documentation.
Solution 5: Profile and Optimize Your Code
Use profiling tools such as VisualVM or JProfiler to identify performance bottlenecks and memory leaks in your application. Optimize your code accordingly to resolve these issues.
FAQ
How do I identify the cause of the Java Hotspot(TM) 64-bit Server VM warning?
Use profiling tools like VisualVM or JProfiler to analyze your application’s performance and memory usage. This will help you identify the root cause of the warning.
What is the difference between the 64-bit Server VM and the 32-bit Client VM?
The main difference between the 64-bit Server VM and the 32-bit Client VM is the amount of memory they can address. The 64-bit VM can address a larger amount of memory, which can improve the performance of memory-intensive applications.
Can I ignore the Java Hotspot(TM) 64-bit Server VM warning?
Ignoring the warning may lead to performance issues or application crashes. It is recommended to investigate the root cause and apply the appropriate solutions.
How can I avoid the Java Hotspot(TM) 64-bit Server VM warning in the future?
Keep your JDK up to date, allocate sufficient memory to your application, optimize garbage collection settings, and regularly profile your code to ensure optimal performance.
How do I know if my application requires more memory than is currently allocated?
Use profiling tools to analyze your application’s memory usage. If you notice that the heap size is consistently reaching the maximum allocated size, it may be time to increase the heap size.
- Java Heap Space Explained
- JVM Memory Management
- Java Garbage Collection Optimization
Note: This guide is intended for informational purposes only and should not be considered as professional advice. Always consult official documentation and seek expert assistance if you encounter issues when working with Java applications.
Приветствую, за время праздников подготовил статью про низкоуровневое профилирование и производительность. Перед погружением предлагаю читателю ознакомится с кратким предуведомлением:
Здесь целых три пункта
-
мопед не мой
-
ошибки в HotSpot-e нужно исправлять в нём самом
-
мои размышления об асме могут показаться наивными
Погружение
Как-то на СО мне попался любопытный вопрос: Missing bounds checking elimination in String constructor? Автор сформулировал свой вопрос так:
Looking into UTF8 decoding performance, I noticed the performance of protobuf’s
UnsafeProcessor::decodeUtf8is better thanString(byte[] bytes, int offset, int length, Charset charset)for the following non-ascii string:"Quizdeltagerne spiste jordbær med flØde, mens cirkusklovnen".…
I assume the difference is due to missing bounds checking elimination which I expected to kick in, especially since there is an explicit bounds check in the form of a call to
checkBoundsOffCount(offset, length, bytes.length)in the beginning ofString(byte[] bytes, int offset, int length, Charset charset).
Сформулировано несколько сумбурно и запутанно и с самого начала не очень понятно, почему сравнивается код UnsafeProcessor.decodeUtf8() и String(byte[], int, int, Charset). Перво-наперво проясним эту часть.
Дело в том, что в них по-разному выполняется доступ к элементам входящего массива байтов.
Если для раскодирования используется c.g.p.Utf8.UnsafeProcessor.decodeUtf8(), то его производительность лучше, чем у c.g.p.Utf8.SafeProcessor и String(byte[] bytes, int offset, int length, Charset charset), ведь доступ к ячейкам массива в UnsafeProcessor.decodeUtf8() происходит так:
while (offset < limit) {
  byte b = UnsafeUtil.getByte(bytes, offset);
  //...
  offset++;
}
UnsafeUtil.getByte() делегирует обращение к Unsafe.getByte(), который предоставляет доступ к «сырой» памяти, что быстрее (и опаснее), чем обычный доступ, выполняемый в SafeProcessor.decodeUtf8() (и в конструкторе строки):
while (offset < limit) {
  byte b = bytes[offset];
  //...
  offset++;
}
Код бенчмарка можно посмотреть в гисте, а вот его вывод:
Benchmark                       Mode  Cnt    Score   Error  Units
StringBenchmark.safeDecoding    avgt   10  127.107 ± 3.642  ns/op
StringBenchmark.unsafeDecoding  avgt   10  100.915 ± 4.090  ns/op
Чем интересен этот пример для рядового разработчика? Интересен он тем, что автор высказал предположение о роли проверок выхода за пределы массива и предложил способ сгладить эту разницу:
while (offset < limit) {}

-->

while (0 <= offset && offset < limit) {}
И действительно, это уравняло время работы обоих методов:
Benchmark                       Mode  Cnt    Score    Error  Units
StringBenchmark.safeDecoding    avgt   10  100.802 ± 13.147  ns/op
StringBenchmark.unsafeDecoding  avgt   10  102.774 ±  3.893  ns/op
Мне захотелось разобраться в этом случае и по возможности принести какую-то пользу сообществу. Первым делом я сосредоточился на исследовании кода JDK, а именно упомянутого выше конструктора:
public String(byte[] bytes, int offset, int length, Charset charset) {
  Objects.requireNonNull(charset);
  checkBoundsOffCount(offset, length, bytes.length);
  if (length == 0) {
    this.value = "".value;
    this.coder = "".coder;
  } else if (charset == UTF_8.INSTANCE) {
    if (COMPACT_STRINGS && !StringCoding.hasNegatives(bytes, offset, length)) {
      this.value = Arrays.copyOfRange(bytes, offset, offset + length);
      this.coder = LATIN1;
    } else {
      int sl = offset + length;
      int dp = 0;
      byte[] dst = null;
      if (COMPACT_STRINGS) {
        dst = new byte[length];
        while (offset < sl) {
          int b1 = bytes[offset];
          if (b1 >= 0) {
            dst[dp++] = (byte)b1;
            offset++;
            continue;
          }
          //...
}
Для этого я использовал бенчмарк:
@State(Scope.Thread)
@BenchmarkMode(Mode.AverageTime)
@OutputTimeUnit(TimeUnit.NANOSECONDS)
public class StringConstructorBenchmark {
  private byte[] array;

  @Setup
  public void setup() {
    var str = "Quizdeltagerne spiste jordbær med fløde, mens cirkusklovnen. Я";
    array = str.getBytes(StandardCharsets.UTF_8);
  }

  @Benchmark
  public String newString()  {
      return new String(array, 0, array.length, StandardCharsets.UTF_8);
  }
}
Опыт показывает, что незначительное изменение условия while в конструкторе строки даёт ощутимый прирост:
// while (offset < sl)

StringConstructorBenchmark.newString     173,092 ± 3,048 ns/op

// while (0 <= offset && offset < sl)

StringConstructorBenchmark.newString     126,908 ± 2,355 ns/op
Странности
Поговорим о странностях рассматриваемого примера.
Итак, изначально предположение состоит в том, что причина почти 20% разницы в производительности заключается в использовании небезопасного доступа, что позволяет сэкономить на проверках выхода за границы массива.
Это хорошо согласуется с наблюдаемой картиной: как только мы заменяем одностороннюю проверку offset < sl двусторонней 0 <= offset && offset < sl, то компилятор прозревает и выбрасывает проверки из кода.
Предположение кажется верным и понятным, а вот поведение компилятора не очень, ведь проверка отрицательного значения переменной offset выполняется в самом начале метода:
public String(byte[] bytes, int offset, int length, Charset charset) {
  Objects.requireNonNull(charset);
  checkBoundsOffCount(offset, length, bytes.length);
  //...
}
Далее в цикле у нас есть только приращение, следовательно значение переменной offset никогда не может стать отрицательным (а превышение допустимого ограничено самой петлёй). Это понятно человеку, но почему-то непонятно компилятору. Попахивает явным багом и он действительно имеет место быть, но обо всём по порядку.
Проверка
Для успокоения совести выполним решающую проверку, а именно сравним ассемблерный код «до» и «после». Для этого подключим LinuxPerfAsmProfiler, руководство по использованию которого описано в отдельной статье.
Порядок действий следующий:
1) берём свежие исходники OpenJDK и собираем с помощью
bash configure && make clean && make images2) берём свежие binutils (в моём случае верcии 2.37) и собираем из тех же исходников
3) подкладываем собранный hsdis-*.so в папку к libjvm.so
4) профилируем
Полный профиль «до» доступен здесь, полный профиль «после» — тут. Дабы избавить от необходимости вычитки длинной простыни подсвечу основное, а именно цикл while:
До
2.22% ││   │ 0x00007fed70eb4c21:   mov    (%rsp),%r8               ;*iload_2 {reexecute=0 rethrow=0 return_oop=0}
      ││   │                                                       ; - java.lang.String::<init>@107 (line 537)
2.32% ↘│   │ 0x00007fed70eb4c25:   cmp    %r13d,%ecx
       │   │ 0x00007fed70eb4c28:   jge    0x00007fed70eb5388       ;*if_icmpge {reexecute=0 rethrow=0 return_oop=0}
       │   │                                                       ; - java.lang.String::<init>@110 (line 537)
3.05%  │   │ 0x00007fed70eb4c2e:   cmp    0x8(%rsp),%ecx
       │   │ 0x00007fed70eb4c32:   jae    0x00007fed70eb5319
2.38%  │   │ 0x00007fed70eb4c38:   mov    %r8,(%rsp)
2.64%  │   │ 0x00007fed70eb4c3c:   movslq %ecx,%r8
2.46%  │   │ 0x00007fed70eb4c3f:   mov    %rax,%rbx
3.44%  │   │ 0x00007fed70eb4c42:   sub    %r8,%rbx
2.62%  │   │ 0x00007fed70eb4c45:   add    $0x1,%rbx
2.64%  │   │ 0x00007fed70eb4c49:   and    $0xfffffffffffffffe,%rbx
2.30%  │   │ 0x00007fed70eb4c4d:   mov    %ebx,%r8d
3.08%  │   │ 0x00007fed70eb4c50:   add    %ecx,%r8d
2.55%  │   │ 0x00007fed70eb4c53:   movslq %r8d,%r8
2.45%  │   │ 0x00007fed70eb4c56:   add    $0xfffffffffffffffe,%r8
2.13%  │   │ 0x00007fed70eb4c5a:   cmp    (%rsp),%r8
       │   │ 0x00007fed70eb4c5e:   jae    0x00007fed70eb5319
3.36%  │   │ 0x00007fed70eb4c64:   mov    %ecx,%edi                ;*aload_1 {reexecute=0 rethrow=0 return_oop=0}
       │   │                                                       ; - java.lang.String::<init>@113 (line 538)
2.86%  │  ↗│ 0x00007fed70eb4c66:   movsbl 0x10(%r14,%rdi,1),%r8d   ;*baload {reexecute=0 rethrow=0 return_oop=0}
       │  ││                                                       ; - java.lang.String::<init>@115 (line 538)
2.48%  │  ││ 0x00007fed70eb4c6c:   mov    %r9d,%edx
2.26%  │  ││ 0x00007fed70eb4c6f:   inc    %edx                     ;*iinc {reexecute=0 rethrow=0 return_oop=0}
       │  ││                                                       ; - java.lang.String::<init>@127 (line 540)
3.28%  │  ││ 0x00007fed70eb4c71:   mov    %edi,%ebx
2.44%  │  ││ 0x00007fed70eb4c73:   inc    %ebx                     ;*iinc {reexecute=0 rethrow=0 return_oop=0}
       │  ││                                                       ; - java.lang.String::<init>@134 (line 541)
2.35%  │  ││ 0x00007fed70eb4c75:   test   %r8d,%r8d
       ╰  ││ 0x00007fed70eb4c78:   jge    0x00007fed70eb4c04       ;*iflt {reexecute=0 rethrow=0 return_oop=0}
          ││                                                       ; - java.lang.String::<init>@120 (line 539)
После
17.28%    ││ 0x00007f6b88eb6061:   mov    %edx,%r10d               ;*iload_2 {reexecute=0 rethrow=0 return_oop=0}
          ││                                                       ; - java.lang.String::<init>@107 (line 537)
 0.11%    ↘│ 0x00007f6b88eb6064:   test   %r10d,%r10d
           │ 0x00007f6b88eb6067:   jl     0x00007f6b88eb669c       ;*iflt {reexecute=0 rethrow=0 return_oop=0}
           │                                                       ; - java.lang.String::<init>@108 (line 537)
 0.39%     │ 0x00007f6b88eb606d:   cmp    %r13d,%r10d
           │ 0x00007f6b88eb6070:   jge    0x00007f6b88eb66d0       ;*if_icmpge {reexecute=0 rethrow=0 return_oop=0}
           │                                                       ; - java.lang.String::<init>@114 (line 537)
 0.66%     │ 0x00007f6b88eb6076:   mov    %ebx,%r9d
13.70%     │ 0x00007f6b88eb6079:   cmp    0x8(%rsp),%r10d
 0.01%     │ 0x00007f6b88eb607e:   jae    0x00007f6b88eb6671
 0.14%     │ 0x00007f6b88eb6084:   movsbl 0x10(%r14,%r10,1),%edi   ;*baload {reexecute=0 rethrow=0 return_oop=0}
           │                                                       ; - java.lang.String::<init>@119 (line 538)
 0.37%     │ 0x00007f6b88eb608a:   mov    %r9d,%ebx
 0.99%     │ 0x00007f6b88eb608d:   inc    %ebx                     ;*iinc {reexecute=0 rethrow=0 return_oop=0}
           │                                                       ; - java.lang.String::<init>@131 (line 540)
12.88%     │ 0x00007f6b88eb608f:   movslq %r9d,%rsi                ;*bastore {reexecute=0 rethrow=0 return_oop=0}
           │                                                       ; - java.lang.String::<init>@196 (line 548)
 0.17%     │ 0x00007f6b88eb6092:   mov    %r10d,%edx
 0.39%     │ 0x00007f6b88eb6095:   inc    %edx                     ;*iinc {reexecute=0 rethrow=0 return_oop=0}
           │                                                       ; - java.lang.String::<init>@138 (line 541)
 0.96%     │ 0x00007f6b88eb6097:   test   %edi,%edi
 0.02%     │ 0x00007f6b88eb6099:   jl     0x00007f6b88eb60dc       ;*iflt {reexecute=0 rethrow=0 return_oop=0}
           │                                                       ; - java.lang.String::<init>@124 (line 539)
Сразу бросается в глаза, что код «после» стал на 8 строк короче: инструкции между байт-кодами if_icmpge и aload_1 (предполагаемо отвечающие за проверку выхода за границы массива) куда-то делись. Вот они, выделенные в отдельный листинг:
2.38%  │   │ 0x00007fed70eb4c38:   mov    %r8,(%rsp)
2.64%  │   │ 0x00007fed70eb4c3c:   movslq %ecx,%r8
2.46%  │   │ 0x00007fed70eb4c3f:   mov    %rax,%rbx
3.44%  │   │ 0x00007fed70eb4c42:   sub    %r8,%rbx
2.62%  │   │ 0x00007fed70eb4c45:   add    $0x1,%rbx
2.64%  │   │ 0x00007fed70eb4c49:   and    $0xfffffffffffffffe,%rbx
2.30%  │   │ 0x00007fed70eb4c4d:   mov    %ebx,%r8d
3.08%  │   │ 0x00007fed70eb4c50:   add    %ecx,%r8d
В дальнейшем оказалось, что это не единичное проявление бага, метод String.translateEscapes() содержит похожий код
char[] chars = toCharArray();
int length = chars.length;
int from = 0;
int to = 0;
while (from < length) {        // <---
  char ch = chars[from++];
  if (ch == '\') {
    ch = from < length ? chars[from++] : '';
который будучи изменённым «по образу и подобию» показал похожий прирост на исходной строке:
// from < length
StringConstructorBenchmark.translateEscapes avgt 53,627 ± 0,850 ns/op

// from >=0 && from < length
StringConstructorBenchmark.translateEscapes avgt 48,087 ± 1,129 ns/op
После этого я создал JDK-8278518 и на всякий случай создал ПР с изменениями в коде JDK (там же см. бенчмарки). Вдруг в обсуждении всплывёт что-то любопытное?
И таки да!
Внезапно оказалось, что
1) во-первых, исчезнувшие 8 строк кода — это не проверка выхода за границы массива
2) сама проверка всё ещё там!
На деле выход за границы массива проверяется всего двумя инструкциями:
// до

0x00007fed70eb4c2e:   cmp    0x8(%rsp),%ecx
0x00007fed70eb4c32:   jae    0x00007fed70eb5319

// после

0x00007f6b88eb6079:   cmp    0x8(%rsp),%r10d
0x00007f6b88eb607e:   jae    0x00007f6b88eb6671
А что же тогда делают исчезнувшие 8 строк? Ответ прост: ничего полезного. В псевдокоде их можно записать как
long temp = sl;
loop {
  long newTemp = (long)((int)((temp - (long)offset + 1) & (-2L)) + offset) - 2L;
  if (newTemp u>= temp) jump;
  temp = newTemp;
}
Иными словами баг состоит не в том, что компилятор не смог выбросить лишний код, а в том, что он добавил избыточный. Разумеется, исправлять это нужно в коде самой виртуальной машины, сделать это самостоятельно я не смог, поэтому задачу подхватил Роланд Вестрелин. Вот как он объясняет происходящее:
The loop has 2 backedges. One is frequently taken, the other is not. The loop head is cloned for the least frequent backedge by
ciTypeFlow. C2 then builds an outer Loop with the most frequently taken backedge and an inner counted loop with the least frequently taken backedge.
PreventingciTypeFlowfrom cloning any loop head causes C2 to split the loop head with 2 backedges and to pick the most frequent backedge for the inner loop, which becomes a counted loop and is fully optimized. That leads to the following performance numbers:StringBenchmark.safeDecoding 65.404 ± 0.723 ns/op
StringBenchmark.unsafeDecoding 73.004 ± 12.800 ns/opSo it would seem that in the case of multiple backedges,
ciTypeFlowshould not get in the way and leave C2 choose the inner loop.
Выводы
Внутри виртуальной машины всё ещё скрыты возможности для различных оптимизаций и улучшений, беда лишь в том, что их обнаружение по большей части дело случая.
Практический вывод для рядового разработчика только один: замеченный антипаттерн довольно распространён, в коде JDK кроме указанных выше методов я нашёл его также в
-
String.decodeASCII() -
StringLatin1.regionMatchesCI() -
StringLatin1.regionMatchesCI_UTF16() -
StringUTF16.replace() -
Long.toString(long, int) -
StringCoding.implEncodeAsciiArray() -
sun.nio.cs.*.Encoder.encodeArrayLoop() -
ZipFile.Source.getMetaVersion()
Если в вашем коде есть такой же шаблон в критически важном месте, то вы всегда можете неплохо улучшить производительность с помощью простого и элегантного костыля (или ждите, когда JDK-8278518 исправят должным образом).
На сегодня всё 
UPD: Ещё один случай, когда изменение условного выражения в цикле даёт прирост производительности.
Сегодня существует не так много хороших и стабильных лаунчеров для популярной игры Minecraft. Один из них — разработанный в 2013 году продукт TLauncher. Программа выполняет рад функций, без которых невозможно не только запустить игру в сессии онлайн, но и просто войти в свой аккаунт. TLauncher отвечает за идентификацию пользователя на сервере, следит за актуальностью версий, обновляет их. Скрипт автоматически подгружает все необходимые Java-библиотеки для стабильной работы клиента, позволяет бесплатно скачивать любые версии Minecraft с серверов разработчиков напрямую, а также запускать “пиратские” версии игры. Существуют платные и бесплатные версии TLauncher. Несмотря на все свои достоинства, у некоторых пользователей возникают ошибки tlauncher при запуске. Именно о том, как действовать в таких ситуациях, поговорим в данной статье.
Обновление библиотеки Java
TLauncher напрямую взаимодействует с программной платформой Java, по умолчанию предустановленной в Windows. В случае возникновения проблем с лаунчером, прежде всего следует актуализировать версию Джава. Предварительно удалите текущую версию, произведите очистку реестра. Затем скачайте актуальную утилиту с официального сайта java.com, инсталлируйте ее. Конфликт и ошибки чаще всего возникают у юзеров с ОС Виндовс 10, особенно при использовании устаревшей версии Java, после установки очередного мода от ненадежного разработчика.
Подробнее об этом читайте в статье: Как обновить Java в Windows 10.
Для полной уверенности после переустановки Java рекомендуется заново скачать TLauncher и клиент игры, установить их на компьютер.
Обновление операционной системы
Часто пользователи принудительно отключают автоматические обновления Windows, дабы избежать их работы в фоновом режиме. Это приводит к появлению различных ошибок в системе, особенно при регулярной установке на компьютер сторонних приложений и программ. Одной из проблем может стать ошибка запуска TLauncher. Чтобы проверить актуальность релиза Виндовс, выполните следующие действия.
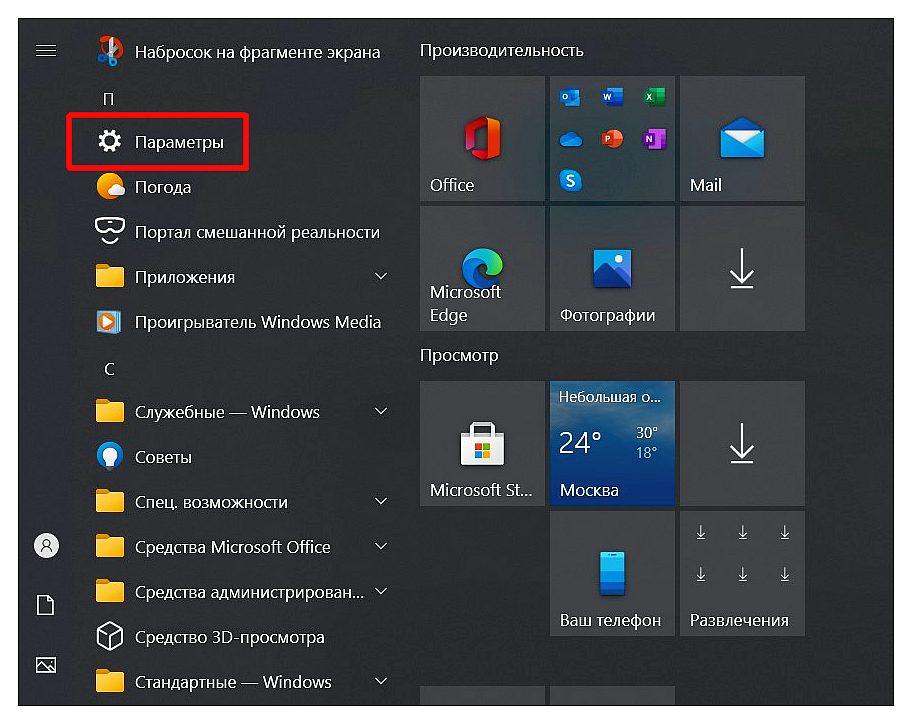
- В меню “Пуск” запустите приложение “Параметры”.
2. Перейдите во вкладку “Обновление и безопасность”.

3. Нажмите кнопку “Проверить наличие обновлений”.
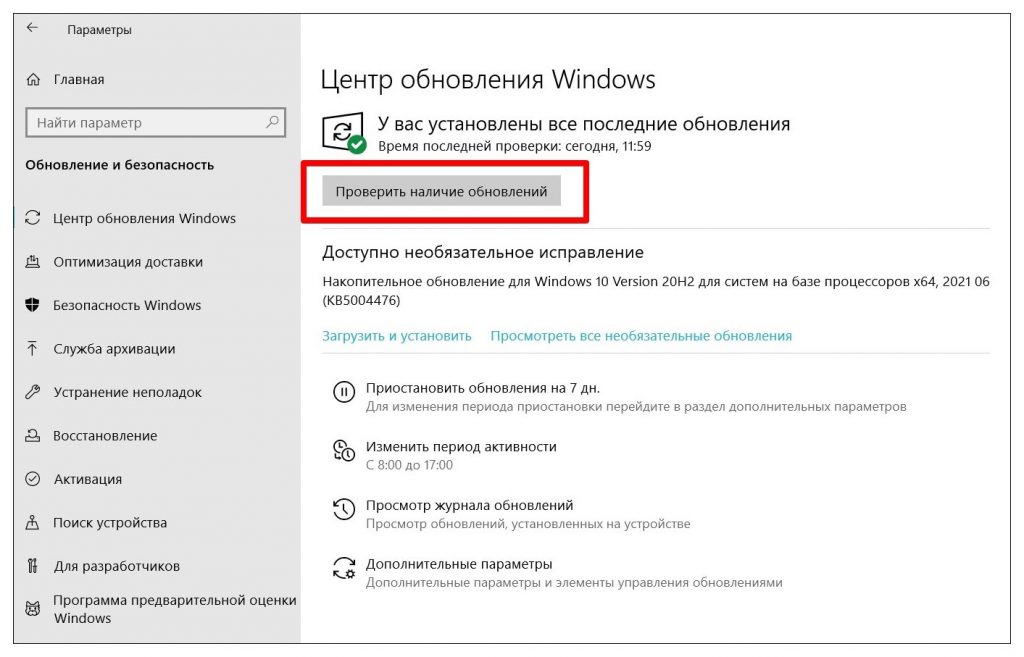
В следующем окне увидите рекомендации по обновлениям, также здесь можно поменять настройки политики обновления Виндовс. Выполните актуализацию операционной системы и перезагрузите компьютер.
Удаление обновления KB4515384
Парадоксальность взаимодействия TLauncher и Windows заключена в том, что установка всех обновлений ОС может привести к конфликту лаунчера с некоторыми из них. В частности, разработчики лаунчера рекомендуют удалить конкретный апдейт Виндовс с кодом KB4515384 в случае возникновения ошибок.
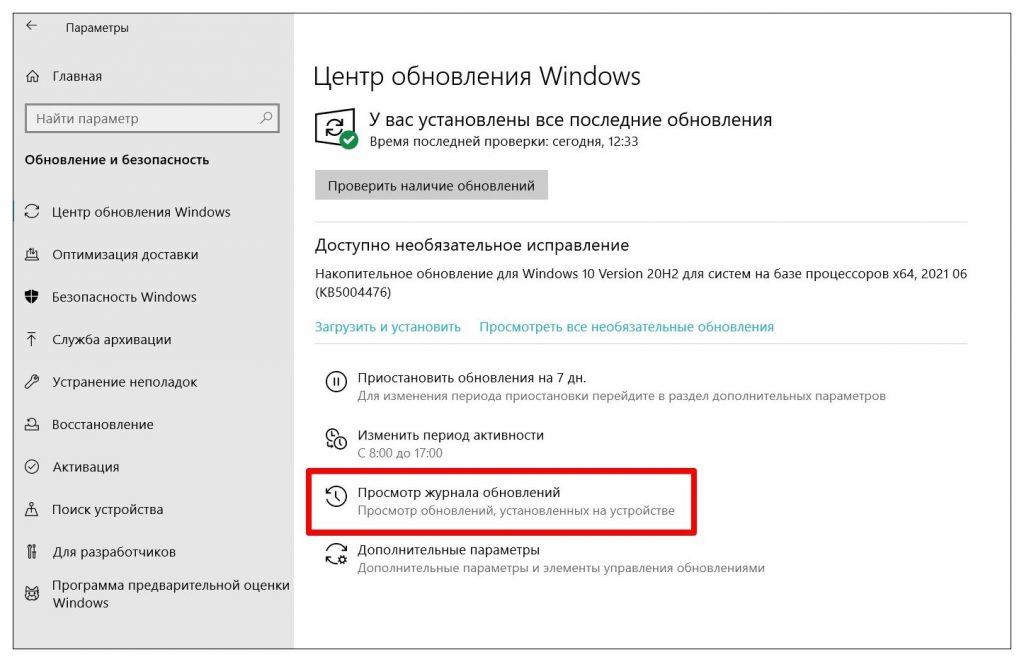
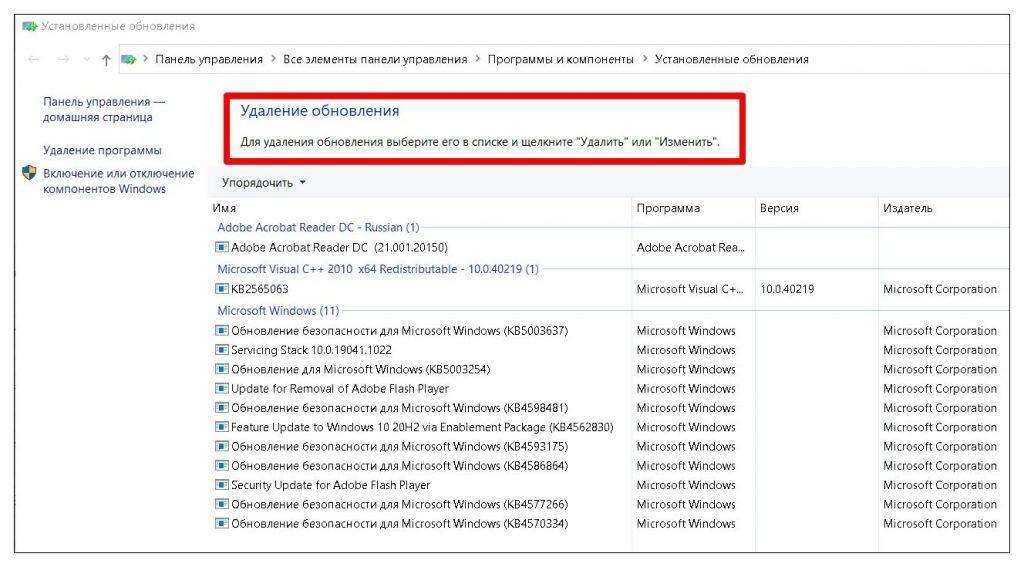
- Для этого также войдите в “Центр обновлений Windows”, как указано в предыдущем разделе, перейдите в “Просмотр журнала обновлений”.

- Активируйте вкладку “Удалить обновления”. Если в открывшемся списке присутствует строка с кодом KB4515384, дважды щелкните по ней и подтвердите удаление.
При регулярном появлении ошибок конфликта TLauncher с обновлениями Windows, настройте ручную установку, либо полную блокировку апдейта. В качестве проверки наличия данного конфликта можно приостановить обновления на 7 дней в “Центре обновления Windows”. Для полной блокировки обновлений воспользуйтесь сторонней утилитой Win Updates Disabler.
Примечание. Использование сторонних приложений, особенно для блокировки процессов ОС Виндовс, может привести к серьезным сбоям в работе системы. Будьте внимательны при их использовании.
Отсутствие поддержки UTF-8
Одним из вариантов возникновения ошибки TLauncher при взаимодействии с компонентами Windows может быть конфликт использования алгоритмов кодов. В частности, отсутствие поддержки символов Юникода UTF-8. Для устранения проблемы поменяйте соответствующие настройки операционной системы.
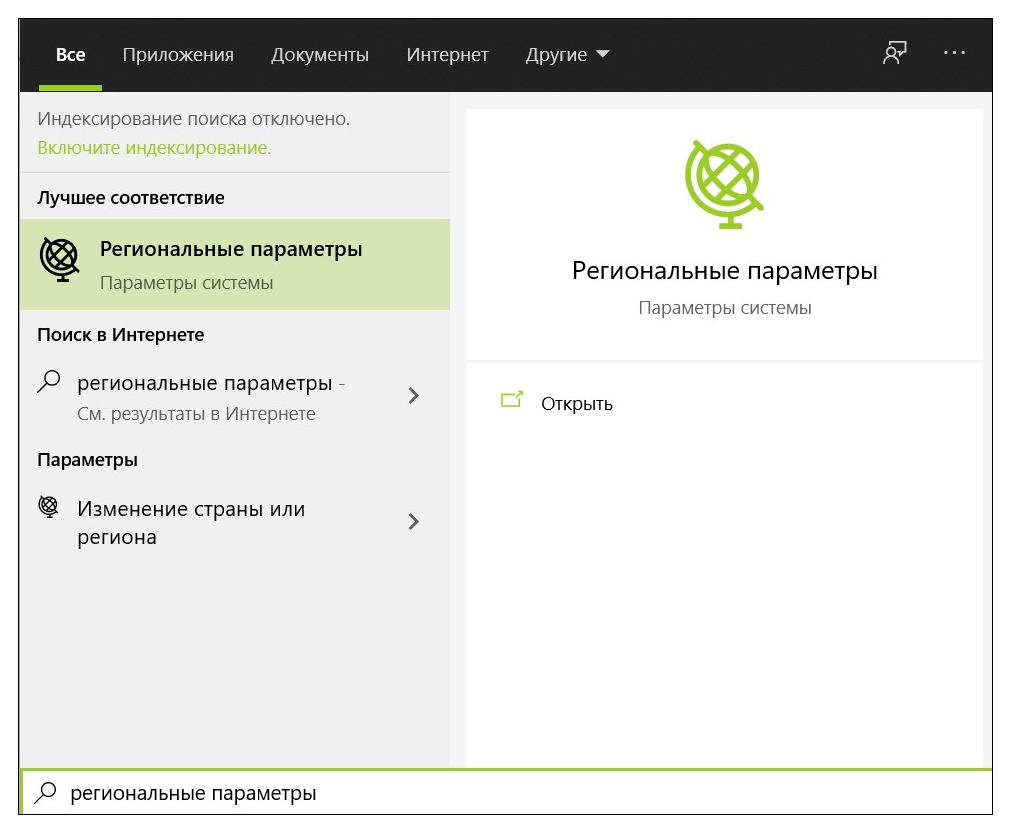
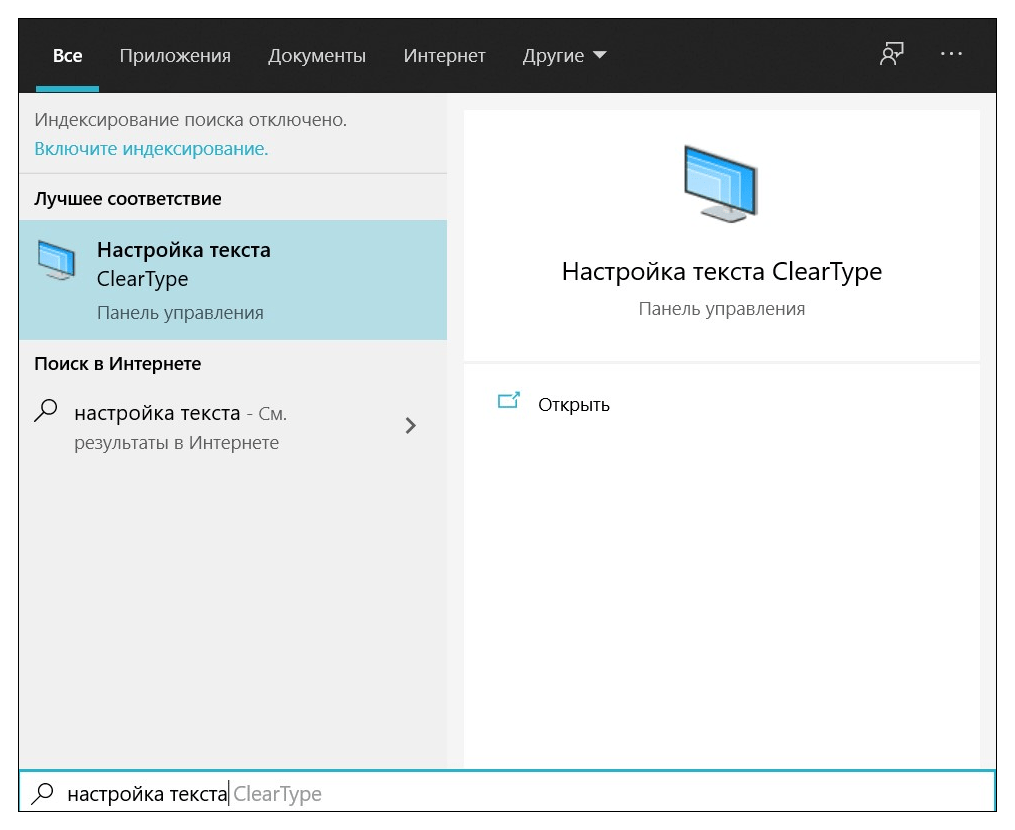
- Откройте “Поиск” и наберите “Региональные параметры”

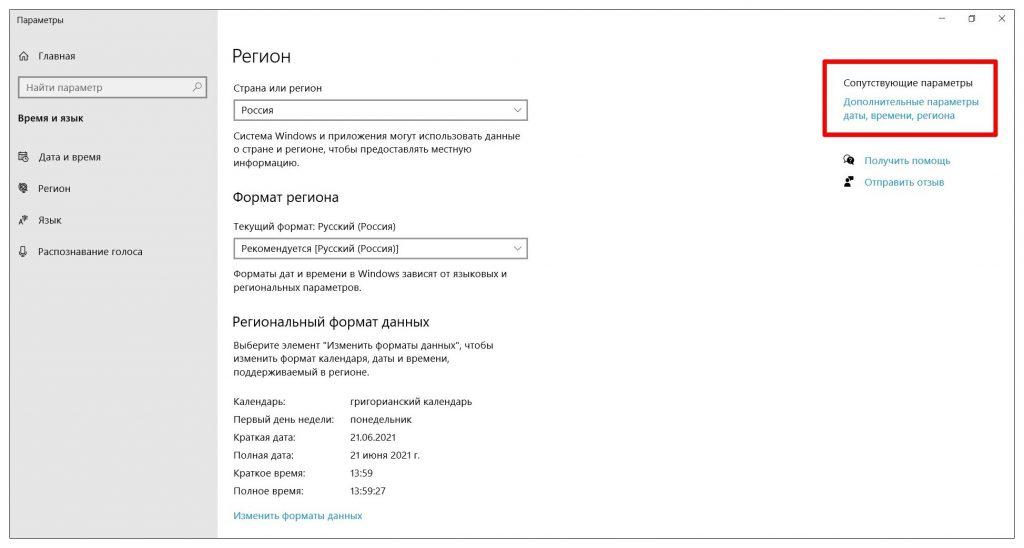
- В новом окне выберите “Дополнительные параметры даты, времени, региона” в “Сопутствующих параметрах”

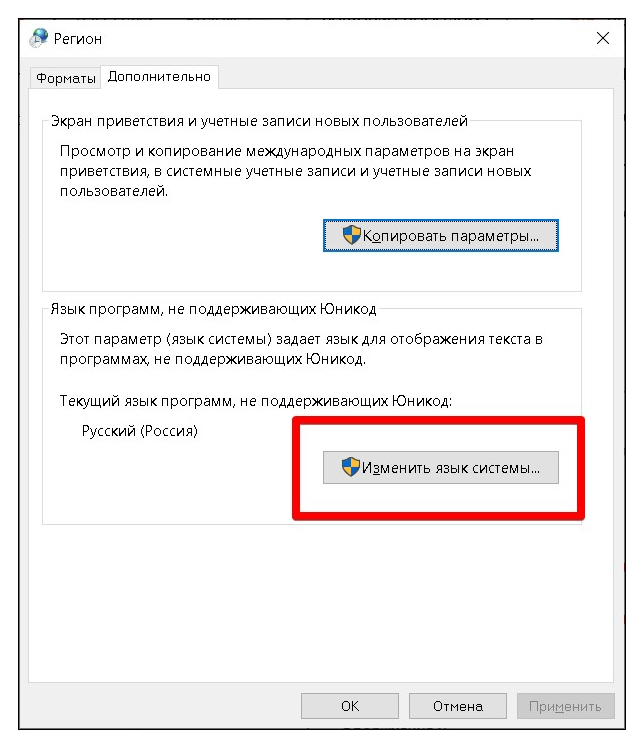
- В “Региональных стандартах” нажмите на строку “Изменение форматов даты, времени и чисел”.

- Во вкладке “Дополнительно” нажмите на кнопку “Изменить язык системы”.

- Теперь установите галочку напротив надписи “Бета-версия: Использовать Юникод (UTF-8) для поддержки языка во всем мире”, нажмите “ОК”.

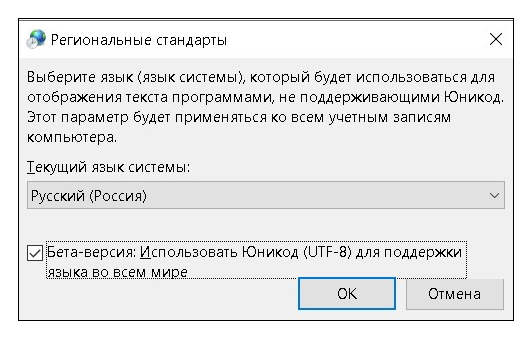
Чтобы изменения вступили в силу перезагрузите компьютер. Проверьте, как работает TLauncher.
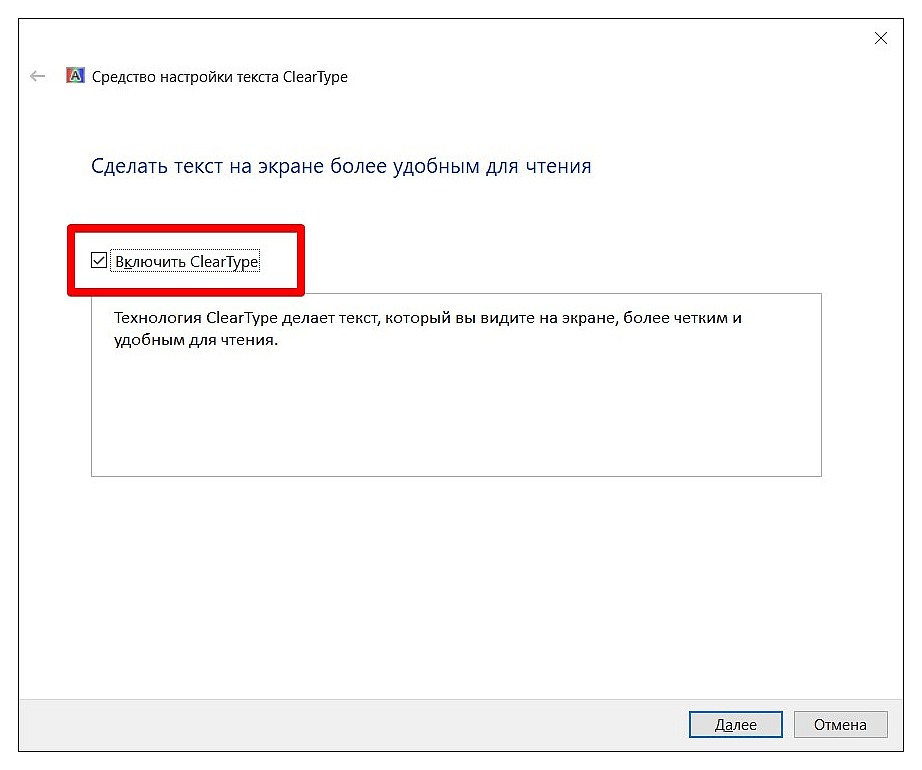
Активация ClearType
Проблема взаимодействия с кодировкой символов, способ ее решения описаны в предыдущем разделе. Иногда у TLauncher продолжает возникать конфликт со шрифтами даже после включения поддержки Юникода UTF-8. В этом случае решением может стать настройка функции ClearType.
- Через “Поиск” активируйте функцию “Настройка текста ClearType”.

- Поставьте галочку напротив “Включить ClearType” и нажмите “Далее”. Запустите процесс и выполните пошагово все инструкции. Перезагрузите компьютер, чтобы применить изменения.
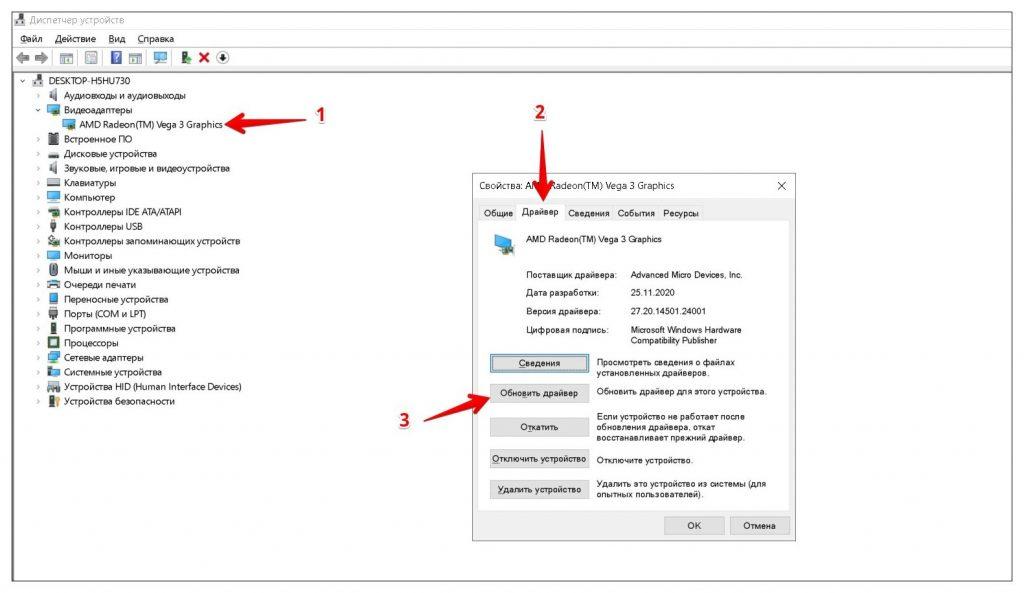
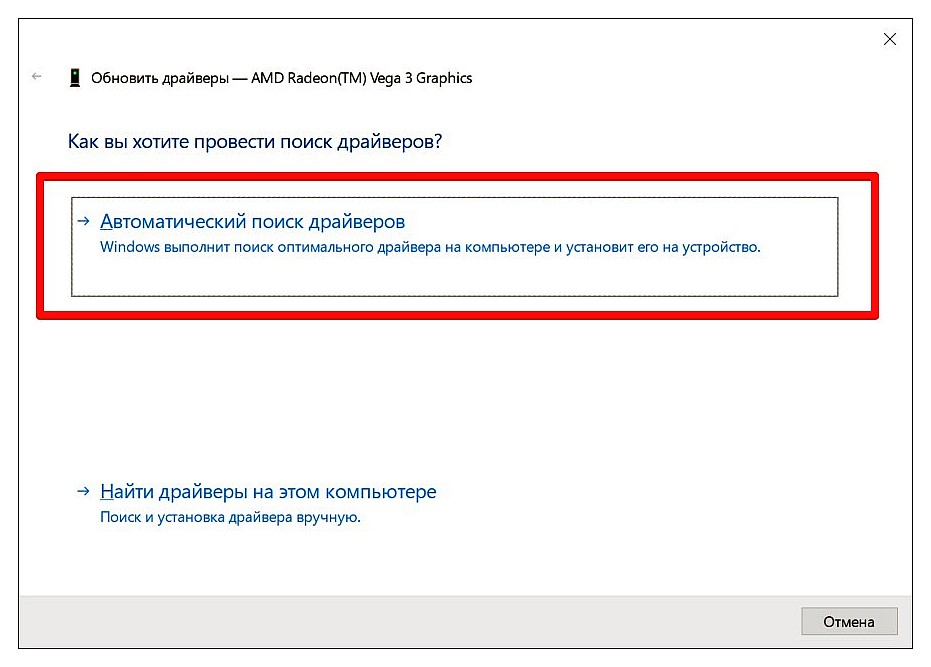
Устаревший драйвер видеоконтроллера может привести к различным проблемам, связанным с корректной работой Minecraft. В частности, на это указывает частое зависание игры, “черный экран”, мигание текстуры на экране. Попробуйте актуализировать драйвер видеокарты стандартными инструментами Windows.
- Кликните правой кнопкой мыши в левом нижнем углу экрана “Пуск” и откройте “Диспетчер устройств”.

- Выберите и откройте “Видеоадаптеры”, дважды кликнете по видеоконтроллеру. Далее во вкладке “Драйвер” нажмите “Обновить драйвер”.

- Запустите “Автоматический поиск драйверов” и дождитесь, когда система обновит программу. Далее перезагрузите компьютер.

Для более кардинального решения проблемы с актуализацией необходимо удалить текущий драйвер и произвести установку нового с официального сайта производителя вашего видеочипа. Для этого придется выяснить его параметры конфигурации.
Примечание. Старые модели видеокарт могут не поддерживать последние релизы Minecraft в силу маломощности и приводить к ошибкам TLauncher. В этом случае выходом будет только физическая замена видеоплаты на современную.
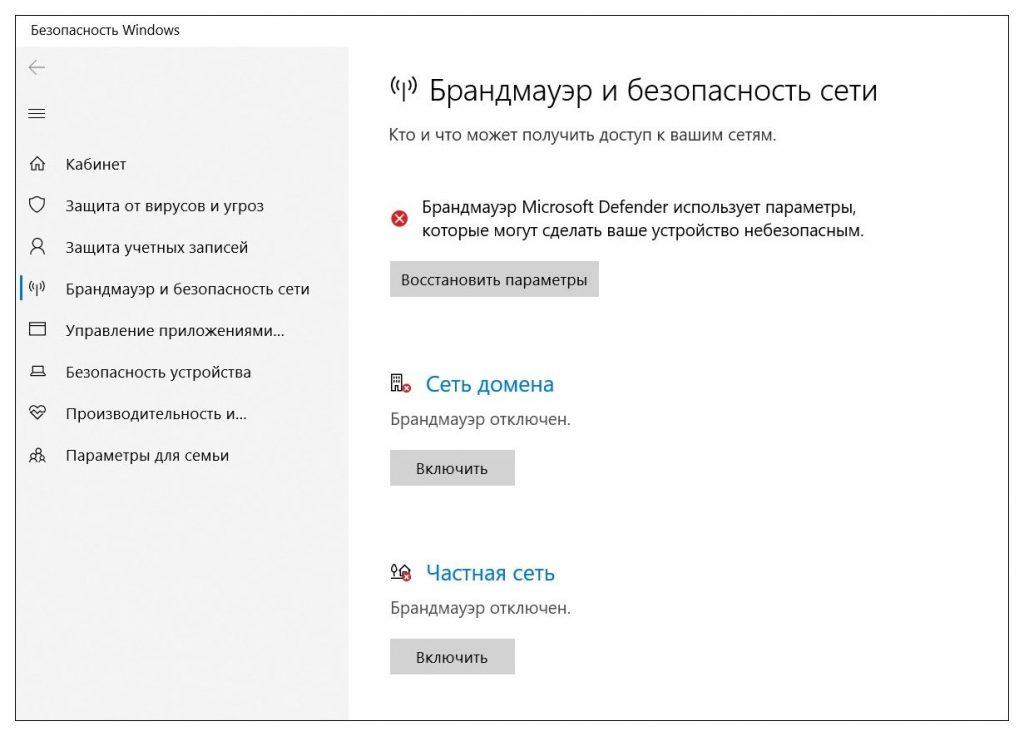
Проблемы с антивирусом и Брандмауэром
Иногда пользователи жалуются, что TLauncher вылетает в процессе игры, соединение с сервером прерывается по непонятной причине. Аварийное завершение работы клиента без объяснимых причин может быть следствием блокировки доступа со стороны антивирусной программы и других приложений-посредников. Для решения проблемы попробуйте предпринять следующие действия:
- полностью отключите антивирус на время игры, чтобы убедиться в том, что блокировка происходит по его причине;
- добавьте исполнительный файл Minecraft в «Доверенную зону» вашего антивируса;
- отключите полностью Брандмауэр Виндовс, либо запретите защитнику блокировку Майнкрафт.
Учитывайте, что полное отключение защиты компьютера от угроз может привести к заражению вредоносным ПО и серьезным проблемам. Обязательно проводите полную проверку после такой блокировки антивируса и Защитника Виндовс.
Нехватка оперативной памяти
Одна из ошибок, которая не дает запуститься игре, в консоли TLauncher выдает запись:
Error occurred during initialization of VM
Could not reserve enough space for 1048576KB object heap
Java HotSpot (TM) Client VM warning: using incremental CMS…
Для устранения проблемы следует в “Настройках” — “Дополнительно” увеличить объем доступной оперативной памяти во вкладке “Выделение памяти”. Процесс лучше выполнять пошагово, каждый раз производя пробный запуск игры. См. также: Как очистить оперативную память на Windows 10.
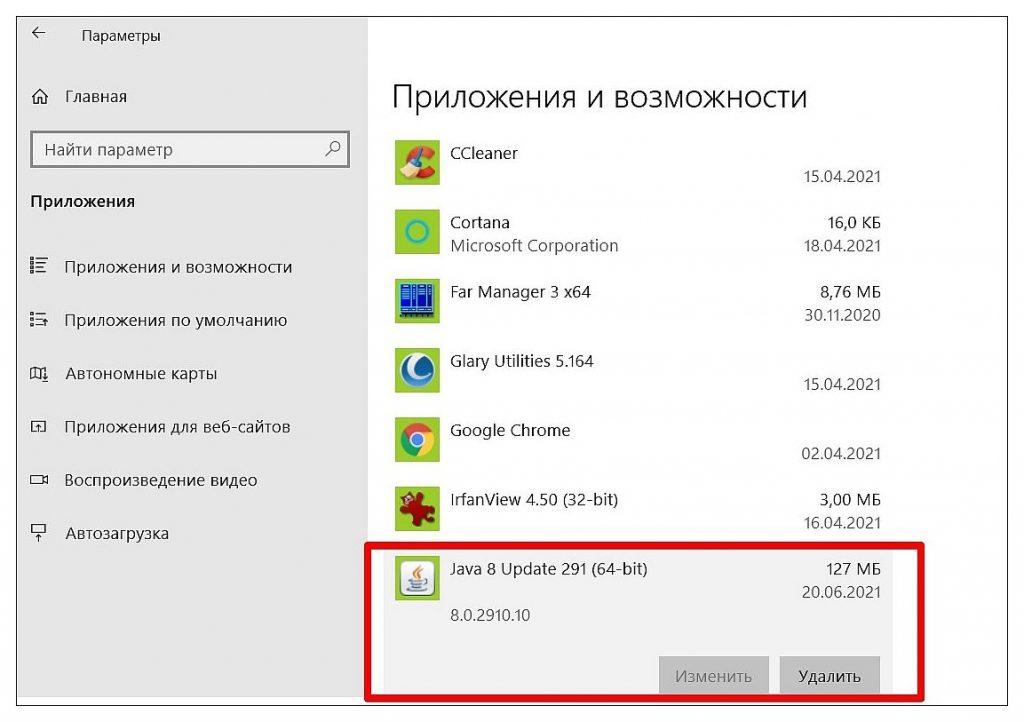
Переустановка TLauncher
Довольно “простой” способ решения многих проблем с запуском лаунчера заключается в его обновлении через переустановку. Для этого необходимо вначале удалить программу стандартными методами Windows.
Войдите в “Параметры” — “Приложения и возможности”, найдите запись программы TLauncher и корректно удалите ее. Так же как в случае с деактивацией Java-приложения, рекомендуется произвести очистку реестра от следов присутствия лаунчера.
Перезагрузите компьютер. Установите свежую версию TLauncher с официального сайта .

Все предыдущие настройки придется делать заново. Но иногда это единственный способ решения проблем с ошибками TLauncher.
В заключение
В статье перечислены не все ошибки TLauncher, с которыми сталкиваются геймеры. Если у вас есть примеры других сложных ситуаций при использовании данного лаунчера для игры в Minecraft, поделитесь способами их решения в комментариях. Уверен, ваши соратники будут благодарны за полезные советы.
Post Views: 3 080
How do I fix Java HotSpot TM 64 Bit Server VM warning?
To solve this we do the following steps:
- Open the standlone. conf file which under JBoss_or_wildflybin folder.
- Within this file find for #JAVA_HOME text.
- Remove the # character and set your installed JDK path as JAVA_HOME=”C:Program FilesJavajdk1. 8.0_65″ Hope this will solve your problem Thanks.
What is Java HotSpot TM 64 bit server?
HotSpot, released as Java HotSpot Performance Engine, is a Java virtual machine for desktop and server computers, maintained and distributed by Oracle Corporation. It features improved performance via methods such as just-in-time compilation and adaptive optimization.
What is Java HotSpot Server?
On all platforms, the JDK comes with an implementation of the Java virtual machine called the Java HotSpot Server VM (server VM). The server VM is designed for maximum program execution speed. It can be invoked by using the -server command-line option when launching an application.
What is MaxPermSize?
What it does. The -XX:MaxPermSize option specifies the maximum size for the permanent generation, which is the memory holding objects such as classes and methods. Properly tuning this parameter can reduce memory issues in the permanent generation.
Which is better HotSpot or OpenJ9?
Hotspot is the Java Virtual Machine (JVM) implementation developed by Oracle (before this was Sun Microsystem). However, OpenJ9 might be less known JVM implementation among the community, especially newcomers to the Java ecosystem. Nowadays, it gains more traction due to the cloud native movement.
Why JVM is called HotSpot?
Like a real machine, it has an instruction set, a virtual computer architecture and an execution model. It is capable of running code written with this virtual instruction set, pretty much like a real machine can run machine code. HotSpot is an implementation of the JVM concept.
What is the difference between HotSpot and OpenJ9?
Interpretation. OpenJ9: Switching from HotSpot to OpenJ9 makes ojAlgo faster, ACM slower and EJML fluctuates between roughly the same performance and much slower. It seems OpenJ9 is less stable in its results than HotSpot. Apart from the fluctuations with EJML it widens the gap between the slowest and the fastest code.
What does XX PermSize mean?
-XX:PermSize : It’s is initial value of Permanent Space which is allocated at startup of JVM. It will set maximum value of Permanent Space as 512 bytes to JVM.
What is XMS XMX MaxPermSize?
-Xms -Xmx -XX:MaxPermSize. These three settings control the amount of memory available to the JVM initially, the maximum amount of memory into which the JVM can grow, and the separate area of the heap called Permanent Generation space.
Is OpenJ9 faster than HotSpot?
OpenJ9 reaches peak throughput much faster than HotSpot making it especially suitable for running short-lived applications.
Which is the best JDK?
Without further ado, check out the following JDKs that are ready to download:
- Oracle JDK. This is the main distributor of Java 11 (already released).
- OpenJDK Build by Oracle.
- AdoptOpenJDK Build.
- AdoptOpenJDK OpenJ9 Build.
- Red Hat OpenJDK Build.
- Azul Zulu.
- Amazon Corretto.
- Conclusion.
How does JVM HotSpot work?
HotSpot is one implementation of JIT technology that starts by running interpreted, and watches the actual performance of the app. Parts of the app are then selected to be fully-compiled as native code and cached, for much faster execution.
Is there a 64-bit Java HotSpot VM warning?
Java HotSpot (TM) 64-Bit Server VM warning: Options -Xverify:none and -noverify were deprecated in JDK 13 and will likely be removed in a future release. I started getting this error after installing JDK 14.
How much RAM do I need for a Java HotSpot?
You’re running on a t2.micro, so you only have 1GB of RAM, which is not enough for java. Try a much bigger instance and see how much memory you use, then you can scale down. Thanks for contributing an answer to Stack Overflow!
Is the JDK 8 hotspot using native memory?
The JDK 8 HotSpot JVM is now using native memory for the representation of class metadata and is called Metaspace. The permanent generation has been removed. The PermSize and MaxPermSize are ignored and a warning is issued if they are present on the command line.
Is there insufficient memory for the Java Runtime Environment?
There is insufficient memory for the Java Runtime Environment to continue. # Native memory allocation (mmap) failed to map 536870912 bytes for committing reserved memory.