
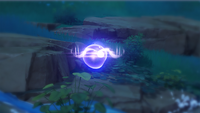
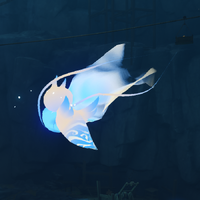
Благие — это голубые тонкие призрачные существа, и их любимое занятие — привести авантюристов к спрятанным сокровищам. Никто точно не знает, откуда они взялись и как оказались в Тейвате, но ясно, что что-то есть. потусторонний об этих дружелюбных феях. Однако они не злые и не агрессивные, и просто будут спокойно плавать вокруг, пока не наткнутся на дружелюбного авантюриста, который в этом нуждается.
Благие существуют по всей земле Тейват, и их можно найти в каждой нации. Энканомия не является исключением, так как есть старше 35 Сили можно найти в этой чужой стране в одиночестве. Они функционируют так же и здесь внизу — каждый Благий ждет, чтобы вести игроков к различным богатствам, таким как Primogems и Electro Sigils, среди прочего. Однако их может быть немного сложно отследить из-за размера Энканомии, поэтому мы составили список, который поможет вам их найти.
Вот все локации Благих в Энканомии в Genshin Impact.
Благие локации
Змеиные кишки
Всего есть четыре Светлых которые можно найти в Змеином кишечнике. Места расположения Благих следующие:

- Один: В небольшом туннеле к северу от входа в Змеиные кишки.
- Два: В маленьком туннеле под входом в Змеиные кишки.
- Три: В углу руин возле выхода из Змеиных кишок.
- Четыре: На вершине сломанной арки рядом с выходом из Змеиных кишок.
Связанный: Когда в 2022 году состоится Фестиваль обряда фонарей?
Узкие
Всего есть 11 Светлые которые можно найти вокруг The Narrows. Места расположения Благих следующие:

- Один: Плавание вокруг небольшой сломанной колонны возле главной дороги к юго-западу от библиотеки.
- Два: Рядом с рушащейся стеной возле главной дороги к юго-западу от библиотеки.
- Три: В овраге к западу от библиотеки.
- Четыре: Парит вокруг дерева к западу от библиотеки.
- Пять: Парит рядом со сломанной колонной к югу от библиотеки.
- Шесть: В небольшом бассейне к югу от библиотеки.
- Семь: Внутри руин к югу от библиотеки.
- 8: Через портал в Библиотеке.
- Девять: Рядом со сломанной колонной к северу от библиотеки.
- Десять: На дереве к северу от библиотеки.
- 11: В небольшом туннеле к северу от библиотеки.
Дайничи Микоши
Всего есть шесть Светлых которые можно найти вокруг Дайнити Микоши. Места расположения Благих следующие:

- Один: Рядом с парой Стражей Руин к западу от Дайнити Микоши.
- Два: Рядом с лестницей к западу от Дайничи Микоши.
- Три: В коралловом лесу к северу от Дайничи Микоши.
- Четыре: На скале к северу от Дайничи Микоши.
- Пять: На вершине большой сломанной колонны на острове к северу от Дайнити Микоши.
- Шесть: На скале к северо-востоку от Дайничи Микоши.
Змеиное сердце
Всего есть девять Светлых можно найти в Змеином Сердце. Места расположения Благих следующие:

- Один: Рядом с главной дорогой рядом со сломанной колонной к востоку от Храма Змеиного Сердца.
- Два: На вершине небольшой сломанной колонны возле дерева к востоку от храма Змеиного Сердца.
- Три: На скале к северо-востоку от Храма Змеиного Сердца.
- Четыре: На вершине небольшой колонны к востоку от храма Змеиного Сердца.
- Пять: Парит вокруг сломанной колонны к юго-востоку от Храма Змеиного Сердца.
- Шесть: Парит вокруг дерева на скале к западу от храма Змеиного Сердца.
- Семь: В подземной пещере под Храмом Змеиного Сердца.
- 8: Парит вокруг сломанной колонны к югу от храма Змеиного Сердца.
- Девять: На вершине дерева на острове к югу от храма Змеиного Сердца.
Связанный: Как пройти испытание Ячиматахиме в Энканомии в Genshin Impact
Вечный храм
Всего есть 11 Светлые которые можно найти вокруг Храма Вечной Ночи. Места расположения Благих следующие:

- Один: Внутри сундука на вершине утеса к юго-западу от Храма Вечной Ночи.
- Два: В траве у небольшого пруда с водой к юго-западу от Храма Вечной Ночи.
- Три: Рядом с небольшим водоемом к юго-западу от Храма Вечной Ночи.
- Четыре: Разблокируйте три печати ключей и откройте сундук, который появляется к юго-западу от храма Вечной ночи.
- Пять: Внутри сундука под аркой к юго-западу от Храма Вечной Ночи.
- Шесть: Возле разрушающихся стен к юго-западу от Храма Вечной Ночи.
- Семь: Возле дерева на небольшой поляне к юго-западу от Храма Вечной Ночи.
- 8: На вершине небольшой сломанной колонны к югу от Храма Вечной Ночи.
- Девять: На полуразрушенном мосту к югу от Храма Вечной Ночи.
- Десять: Рядом с выходом из руин к югу от Храма Вечной Ночи.
Это только Благие, доступные в настоящее время в Enkanomiya в Genshin Impact. Со временем может быть добавлено больше, так что не забудьте заглянуть сюда, в Pro Game Guides, чтобы узнать о будущих обновлениях! Ищете больше отличного контента Genshin Impact? Обязательно загляните Как очистить Обитель Морского Глязя в The Crane Returns on the Wind Archon Quest Genshin Impact.
На чтение 2 мин Просмотров 54 Опубликовано 14 ноября, 2022
Сили — одно из загадочных существ в Genshin Impact, которые играют решающую роль в исследовании игры, поскольку они связаны с головоломками, прогрессом квестов, наградами из сундуков с сокровищами, и знания. Судя по внутриигровым описаниям и диалогам, это ушедшая раса, которая когда-то обладала прекрасными формами и огромной мудростью и использовала их, чтобы направлять человечество. Но какие-то события произошли, и осталось только воспоминание. В этом руководстве представлены все локации Видимых на острове Ватацуми в Genshin Impact.
Все локации Благих на острове Ватацуми в Genshin Impact
Изображение предоставлено: Hritwik
Всего на острове Ватацуми можно найти шестнадцать Видимых. Из шестнадцати трое — обычные Благие, а остальные 13 — Благие Электро, эксклюзивные для региона Инадзума в Тейвате. Независимо от типа Благих, вы получите сундуки с сокровищами или другие награды, если будете следовать за Благими.
Изображение предоставлено: интерактивная карта Genshin Impact
Когда вы идете в отмеченные места, следуйте за Благими, пока они не вознаградят вас сундуком или не помогут решить головоломку.
Изображение предоставлено Ритвиком
Небольшой совет, который поможет обнаружить Благих в Genshin Impact, — изменить игровое время на ночное.nbsp;
На этом пока все. Обязательно ознакомьтесь с нашим обзором обновления Genshin Impact версии 3.2.
Genshin Impactnbsp; – это бесплатная гача-игра. ролевая игра, в настоящее время доступная на ПК, PS4, PS5, Android и iOS.nbsp;
Другие руководства Genshin Impact:nbsp;Genshin Impact: How To Get Guide To Praxisnbsp;|nbsp;Genshin Impact: как отправиться в приключение с Aranaranbsp;|nbsp;Genshin Impact: лучшая сборка Collei Buildnbsp;|nbsp;Все архонты в Genshin Impact — полный списокnbsp;|nbsp;Genshin Impact: кто такие Descenders? Отвеченоnbsp;|nbsp;Лучшее гайд по сборке Nahida для Genshin Impactnbsp;|nbsp;Коды Genshin Impactnbsp;|nbsp;Как добраться до Dendro Hypostasis в Genshin Impactnbsp;|nbsp;Событие Star-Seeker Sojourn в Genshin Impactnbsp;|nbsp;Как найти Драффа в Genshin Impact Расположение Драффа Guidenbsp;| Как получить гайд по элегантности в Genshin Impact

Последнее обновление 11.01.2023 —
Несоизмеримо быстро сориентироваться с любой сложностью вам несомненно поможет гайд для новичков с названием — Genshin Impact: все локации Благих лесов Апама
Благие — это маленькие белые существа, похожие на призраков, которые могут подкрасться к вам, если вы не знаете, где их найти. В этом руководстве по локациям Благих Лесов Апам мы поговорим обо всех Благих и их местонахождении в Лесах Апам. Давайте найдем всех 4 вместе!
Все локации Apam Woods Seelie — Genshin Impact
Местонахождение Первого Благого Апамского Леса
Чтобы найти первого Благих Лесов Апама, вам нужно будет войти в эту глубокую пещеру, показанную на картинке ниже.
Просто введите выделенный кружок, показанный выше. Однако при падении нужно быть осторожным. Вам нужно будет продолжать скользить и быть осторожным, чтобы не удариться о стены, поскольку вы тоже идете вниз. Падение может привести к гибели!
Когда вы внутри, просто продолжайте идти по дороге впереди. Вы будете продолжать видеть деревья с водой вокруг. Благие будут под деревом. Вы начнете ходить по этому упавшему дереву в воду. Тогда вы заметите Благих здесь:
Все, что вам нужно сделать сейчас, это просто следовать за ним. Он начнет двигаться влево, а затем вправо. Когда он достигнет места назначения, вы получите бесплатный сундук для грабежа! Поздравляем! К следующему Видимому.
Расположение второго Благого Апамского леса
Именно здесь будет расположен второй Видимый в Апамском лесу. Это на самом деле самый простой из всех. Этот Благий будет полностью открыт.
Дело в том, что вы можете пропустить его, потому что он немного приподнят. Таким образом, вам нужно будет подняться на возвышенность — просто доберитесь до того места, где находится курсор игрока на картинке выше, — а затем начните плавать к выделенному кругу.
Таким образом, вы можете увидеть Благих за милю!
Самое важное с этим Благим на самом деле заключается в том, что он следует за ним повсюду. Он доставит вас повсюду! Вам нужно будет подняться на деревья, затем под деревья, а в какой-то момент вам даже нужно будет скользить.
Ключевая и конечная цель — следить за ним и не терять его из виду. Это довольно легко сделать.
Как только он достигнет своего конечного пункта назначения, который будет далеко внутри какого-то случайного куста, он раскроет спрятанный сундук, в котором есть все для вас! Наслаждайтесь добычей.
Местонахождение Третьего Благого Апамского Леса
Чтобы иметь возможность получить третье Видимое в локации Апам Вудс, вам нужно будет сначала завершить квестовую линию Варуна Гатха. Мы уже написали руководство по этому поводу, поэтому вы можете ознакомиться с ним, просто нажав здесь. Пожалуйста!
Затем, как только эта квестовая линия будет завершена, вам нужно будет отправиться в это место здесь:
Он будет находиться в центре озера Апам Вудс и прямо на его среднем острове. Вы найдете небольшое отверстие в пещере, которое приведет вас под землю. Прыгайте внутрь и доберитесь до дна пещеры.
Находясь внутри, просто продолжайте следовать по главной дороге, которую сможете найти. Вы будете продолжать идти, пока не дойдете до вот этой структуры:
Так вы узнаете, что вы на правильном пути. Если вы можете внимательно рассмотреть, даже на картинке выше, вы найдете маленькую плавающую вещь на заднем плане! Да, вы правильно угадали! Это тот Благий, которого вы ищете! Давайте сделаем вам крупный план.
Теперь может начаться следующее! Следуйте за ним снова и снова, пока он не достигнет конечного пункта назначения. Когда это произойдет, вы обнаружите сундук из-под земли. Наслаждайтесь добычей!
Четвертая локация Благого Апамского леса
Это тоже может быть самым простым! Просто доберитесь до этого места, как показано на картинке выше, и вы обнаружите, что Благие плывут посреди дороги.
Вот как это должно выглядеть и где вы сможете его найти.
Следуйте по нему, и вы доберетесь до конечного пункта назначения и получите сундук! Это немного сложно, так как вам также придется иметь дело с врагами.
Вот оно! Мы надеемся, что это руководство было полезным и принесло вам всю добычу с Видимых в Апамском лесу! Получайте удовольствие, следуя за ними!
Витая Бездна — это серия испытаний в Genshin Impact, за прохождение которых вы получите ценные награды. Всего вас ждет 36 уровней Бездны, каждый из которых разделен на 3 комнаты, что в сумме дает 3 испытания на уровень — всего 36.
Витая Бездна расположена в юго-восточном углу региона Мондштадт, на маленьком острове под названием Риф Маска. Чтобы попасть туда, отправляйтесь на мыс Веры, идя к востоку от Врат Орла (вы окажетесь здесь во время сюжетной кампании), и когда вы подниметесь на холм, то увидите черную дыру в небе.


Осмотревшись вокруг, вы увидите 3 маленькие статуи. Вам нужно найти 3 Благих и переместить их к соответствующей статуе, чтобы вызвать сильный ветер, который унесет вас вверх в черную дыру. Она приведет вас прямо к Рифу Маска, где находится Бездна.
Чтобы попасть в Витую Бездну, вам нужен минимум 20 ранг приключения. Да, можно прийти сюда раньше, но вы ничего не сможете сделать.
Учтите, что в Бездне действует ряд ограничений:
- Нельзя лечить и вообще открывать свой инвентарь.
- Нельзя менять членов группы между комнатами, даже если вы покидаете средний этаж.
- Нельзя менять оружие и артефакты.
- Нет кооператива.
- Нельзя переключаться между персонажами.
Seelie (plural Seelie or Seelies) are mysterious beings throughout Teyvat. Each Seelie belongs to its respective Seelie Court, a statue the Seelie seem to finally rest at. Electro Seelie will instead «generate» their own court once they reach their destination.
Seelie can often be found around treasure, puzzles, or locations of interest. Seelie and Seelie Courts can be out in the open or hidden behind breakable objects, such as the large rock formations with cracks in them. Chests will appear once the Seelie has settled back into the court. The player can activate their Elemental Sight near an empty Seelie Court and a blue trail will lead in the direction that the Seelie currently is and vice versa. Seelie will return to their starting location if they have not been led back to their court after a certain amount of time.
History
«The chirping of insects on a long-gone autumn night is the chorus of exiles, singing mankind’s most ancient song as they live out their plight…»
«Stripped of all that the body once held close and the soul once held dear, song, and memories are all that now remain of yesteryear.»
«The last singers, the first Seelie, they played their final tune in the halls of angels.»
Part of «a song of Seelie»[1]
According to legend, Seelie are the remnants of a bygone race that once held beautiful forms and immense wisdom and used it to guide mankind; travelling alongside them and teaching them languages and «philosophies of nature».[2][3][4] They had palaces outside the realm the gods currently hold authority over,[1] which may be referring to Celestia or, more likely, the Dark Sea.
The ancestor of the Seelie once met a traveler from afar, with whom they married. Their marriage was witnessed by the three sisters of the Lunar Palace — Aria, Sonnet, and Canon. Thirty days after the union, a disaster struck; the Seelie and their lover fled into exile, but the disaster eventually caught up with them. As punishment, they were separated, and their memories were wiped.[2]
Their previous form, voice, and wisdom are now lost, and now all they will offer is small treasures to those willing to follow them.
Old Aranara stories claim this fate befell the Seelie because they were cursed at birth to lose their intelligence and form if they ever fell in love with humans. Furthermore, according to Arama, there was at least one «survivor» of the fall, who came to dwell in «the golden desert,» befriended Queen Aranyani (Greater Lord Rukkhadevata) and the ruler of the desert (King Deshret).[4] It is possible that this survivor was Nabu Malikata, the Goddess of Flowers, who was friends with both figures.

Other Types
Warming Seelie

In Dragonspine, a unique type of Seelie have evolved to survive the harsh colds.[5] These Seelie are different to the average Seelie, having a red appearance resembling flames. They produce enough heat to keep nearby travelers warm and insulated from Sheer Cold.
Additionally, once settled in their Seelie Courts, the Warming Seelie will continue to produce heat.
The Warming Bottle that players can craft were made to imitate the heat that Warming Seelie produce, to better help adventurers survive in cold climates.
Electro Seelie
In Inazuma, Electro Seelie are a variant that moves at a high speed when the player moves close to them. Upon approaching it, it will unleash an Electro shockwave that applies a non-volatile Electro element to nearby players and enemies. This Electro application does not deal DMG and is incapable of causing Elemental Reactions.
Electro Seelie may also appear as part of other puzzles. These Electro Seelie do not wait for player proximity, come to rest in a Seelie Court, or lead directly to chests as usual. Instead, they fly in a path to help the player solve a puzzle, such as indicating the order in which to light up Elemental Monuments. They may appear when a mechanism is activated and disappear at the end of their path, or they may persist and only disappear when the puzzle is completed.
Luminous Seelie
In the unique climate of the Underground Mines of The Chasm, Seelie have mutated to Luminous Seelie. Being close to a Luminous Seelie will gradually recharge the Lumenstone Adjuvant’s energy. They can also activate Lumentorches when nearby.
Seelies of Life

Seelies of Life (unofficial name) appear in Withering Zones and have the same effects as Candles of Life. They will remove units of Decay when in close proximity.
Mini Seelie
Main article: Mini Seelie

Mini Seelie appear to be infant versions of the Seelie. They only have the «head» part of an adult Seelie and do not possess the pointed lower body, the flowing «scarf,» or the two trailing whiskers. They also lack the typical chime-like sounds associated with the presence of an adult Seelie, instead occasionally bursting out with very excited squeaky noises.
A notable one is a Treasure-Seeking Seelie, which actively searches for treasures (namely Iron Coins) instead of going back to their Court. Ulman formerly had one who aided him but unfortunately stopped responding to him, and he instead lent it to the Traveler (whom the Mini Seelie was rather fond of).
By attaining enough Silver Coins, one of the variations of Mini Seelie can be exchanged. Unlike the Treasure Seeking Seelie, these Seelie have an idle animation and make noises.
Locations
An interactive map of Seelie locations can be found on the Teyvat Interactive Map. Videos of their locations, including their Courts, can be found here.
There are currently 321 Seelie (208 Mysterious Seelie, 32 Warming Seelie, 81 Electro Seelie) throughout the land of Teyvat:
- 51 Seelie in Mondstadt
- After version 1.2, the Seelie located east of the Temple of the Falcon no longer counts towards achievement; the total is 52 if Travelers followed this Seelie prior to version 1.2.
- For the achievement «Guiding Wind,» follow 10/20/40 Seelie back to their courts.
- 32 Warming Seelie in Dragonspine
- For the achievement «Seelie in the Snow,» follow 5/10/20 Warming Seelie back to their courts.
- 81 Seelie in Liyue
- There is a total of 84 if Travelers participated in The Illumiscreen: II event World Quest.
- For the achievement «Lithic Guide,» follow 20/40/60 Seelie back to their courts.
- Seelie in The Chasm and The Chasm: Underground Mines do not count towards Liyue.
- 37 Seelie and 73 Electro Seelie in Inazuma
- For the achievement «Naku Weed Whacker (I),» follow 10/20/40 Electro Seelie back to their courts on Narukami Island, Kannazuka, and Yashiori Island (max total is 43).
- For the achievement «Naku Weed Whacker (II),» follow 4/8/16 Electro Seelie back to their courts on Watatsumi Island and Seirai Island (max total is 19). Please note: 17 are available through exploration, and 2 additional Electro Seelie can be obtained as part of the hidden exploration objective, «Komaki’s Spiritherb Fortune».
- For the achievement «Flashes in the Night,» follow 6 Electro Seelie back to their courts on Tsurumi Island (max total is 11)
- For the achievement «Lights Will Guide You Home (I),» follow 4/8/16 Seelie back to their courts on Narukami Island, Kannazuka, and Yashiori Island (max total is 21).
- For the achievement «Lights Will Guide You Home (II),» follow 6 Seelie back to their courts on Watatsumi Island and Seirai Island (max total is 7).
- For the achievement «Foggy Guidance,» follow 6 Seelie back to their courts on Tsurumi Island (max total is 9)
- 39 Seelie in Enkanomiya
- For the achievement «Phosphoros’ Guidance,» follow 6/15/30 Seelie back to their courts.
- 3 of these Seelie come out from chests at Evernight Temple and may not be registered as part of the achievement count, so the total might amount to 36 instead.
- 10 Seelie and 30 Luminous Seelie in The Chasm and The Chasm: Underground Mines respectively
- For the achievement «Gorge Guide,» follow 6/12/24 Seelie back to their courts.
- Seelie in both the surface and underground mines count towards the achievement.
- 3 of the underground Seelie are from a puzzle in the Perils in the Dark World Quest and may not be registered as part of the achievement count, so the total will be 37 instead.
- 153 Seelie in Sumeru
- For the achievement «Woodland Guide», follow 10/20/40 Seelie back to their courts on Avidya Forest, Lokapala Jungle, Ardravi Valley, Ashavan Realm, Vissudha Field, Lost Nursery, and Vanarana (max total is 54; 55 if bugged)
- For the achievement «The Desert Will Guide You Home (I)», follow 10/20/40 Seelie back to their courts on Hypostyle Desert, Land of Upper Setekh, and Land of Lower Setekh (max total is 52; 53 if bugged)
- For the achievement «The Desert Will Guide You Home (II)», follow 4/8/16 Seelie back to their courts on Desert of Hadramaveth (max total is 27)
- For the achievement «Dune Guide», follow 4/8/16 Seelie back to their courts on Gavireh Lajavard, and Realm of Farakhkert (max total is 20)
Time-Limited Seelie
- 3 additional Seelie are available during the The Illumiscreen: II event World Quest. These 3 Seelie count towards the Lithic Guide achievement.
- 14 Seelie are available during the Three Realms Gateway Offering event. These Seelie do not count towards the Phosphoros’ Guidance.
Trivia
- They resemble a will-o’-the-wisp from classic folklore. They also resemble the real-life sea creatures called clione in terms of appearance.
- The Seelie Courts in Enkanomiya, The Chasm, The Chasm: Underground Mines, the Great Red Sand, the Desert of Hadramaveth, and the Girdle of the Sands are still intact — not broken or ruined — unlike most Seelie Courts in Teyvat.
- When Seelie settle in a damaged court, the court will be repaired. However, this sometimes will not occur. It is unknown whether or not this behavior is intended.
- This is also the case when the player returns to a court that had repaired itself upon a Seelie’s arrival, which will appear broken again upon return.
- There is currently a bug in-game that will incorrectly count progress towards the «Guiding Wind» and «Lithic Guide» achievements, where the game may miss a Seelie that has already been followed back to their court or may count some additional times.
- These loading screen tips relate to the Seelie:
- «Now you see them; now you don’t. Once a mighty race that lived to guide mankind, now the most Seelie offer is a little treasure to willing followers.»
- «Seelie all want to return to their Seelie Courts. If you see the remains of a small statue like this, you can use Elemental Sight to find traces of the Seelie…»
- «Dragonspine’s unique climate has caused even the Seelie to mutate. The gentle warmth of a Warming Seelie can help alleviate the effects of the bitter cold. Perhaps its warmth can also be used to trigger mechanisms…»
- «The Chasm’s unique climate has caused even the Seelie to mutate. Being close to a Luminous Seelie will gradually recharge the Lumenstone Adjuvant’s energy. The light from such a Seelie can also activate some devices.»
Etymology
- The Seelie and their statues are named after the Seelie Courts of Scottish Folklore. They are described as fairies who seek help from humans and would return kindness favors of their own. The behavior of the Seelie in Genshin Impact (rewarding with treasures if they are followed back to their statues) alludes to this folklore.
Gallery
")
A damaged mossy Seelie Court without a Seelie in it
")
A Seelie in a repaired mossy Court
")
Electro Seelie Court
")
")
Video Guides
All 52 Mondstadt Seelie
All 32 Dragonspine Warming Seelie
All 83 Liyue Seelie
Other Languages
| Language | Official Name | Literal Meaning |
|---|---|---|
| English | Seelie | — |
| Chinese (Simplified) |
仙灵 Xiānlíng |
Fairy |
| Chinese (Traditional) |
仙靈 Xiānlíng |
|
| Japanese | 仙霊 Senrei[6] |
Adeptus Spirit |
| Korean | 선령선령 Seonryeong |
Adepti Spirit |
| Spanish | Seelie | — |
| French | Fée | Fairy |
| Russian | Фея Feya |
Fairy |
| Thai | Seelie | — |
| Vietnamese | Tiên LinhTiên Linh | Fairy |
| German | Seelie | — |
| Indonesian | Seelie | — |
| Portuguese | Seelie | — |
| Turkish | Peri | |
| Italian | Seelie | — |
Change History
Version 3.6
- Added 20 Mysterious Seelie to the Girdle of the Sands in Sumeru.
Version 3.4
- Added 27 Mysterious Seelie to the Desert of Hadramaveth in Sumeru.
Version 3.1
- Added 52 Mysterious Seelie to the Great Red Sand in Sumeru.
Version 3.0
- Added 2 Mysterious Seelie in Liyue.
- Added 54 Mysterious Seelie in Sumeru.
Version 2.6
- Introduced Luminous Seelie in The Chasm: Underground Mines area.
- Added 9 Mysterious Seelie in The Chasm.
- Added 30 Luminous Seelie in The Chasm: Underground Mines.
Version 2.4
- Added 39 Mysterious Seelie in Enkanomiya.
Version 2.2
- Added 9 Mysterious Seelie and 11 Electro Seelie to Tsurumi Island in Inazuma.
Version 2.1
- Added 7 Mysterious Seelie and 25 Electro Seelie to Watatsumi Island and Seirai Island in Inazuma.
Version 2.0
- Introduced Electro Seelie in Inazuma region.
- Added 22 Mysterious Seelie and 45 Electro Seelie to Narukami Island, Kannazuka, and Yashiori Island in Inazuma.
Version 1.6
- Added 1 Mysterious Seelie in the Golden Apple Archipelago. Following the Seelie as part of the quest The Winding Homeward Way will increase exploration progress towards Mondstadt. (This Seelie does not count towards the Guiding Wind achievement)
Version 1.3
- Added 3 Mysterious Seelie in Liyue region as part of the The Illumiscreen: II World Quest.
Version 1.2
- Introduced Warming Seelie in Dragonspine area.
- Added 1 additional Mysterious Seelie in Mondstadt and 1 additional Mysterious Seelie in Liyue.
- In related texts such as a Loading Screen message and some Achievements, the term «Seelie Gardens» was renamed into «Seelie Courts»
Version 1.0
- Seelie were released with 130 Mysterious Seelie.
References
- ↑ 1.0 1.1 Book: A Drunkard’s Tale
- ↑ 2.0 2.1 Book: Records of Jueyun, Vol. 4 — Mountain Spirit
- ↑ Loading Screen Tip: Seelie
- ↑ 4.0 4.1 World Quest, Aranyaka: Part III — Nursery of Lost Dreams, Part 2: For the Children of the Past
- ↑ Consumable: Warming Bottle
- ↑ Traveler’s Japanese Voice-Over: 「仙霊」について… (About Seelie)
Navigation
| Exploration | |||||||||||||
|---|---|---|---|---|---|---|---|---|---|---|---|---|---|
|
|||||||||||||
|
|||||||||||||
|
|||||||||||||
|
|||||||||||||
|