While Find the Markers may seem like just another scavenger-hunt-style experience, it actually offers quite an intricate map, with more than a handful of challenging secrets to find. Inside the Difficulty Dimension are five markers for players to discover, including the one we’ll cover in this brief guide, Difficulty Chart Marker.
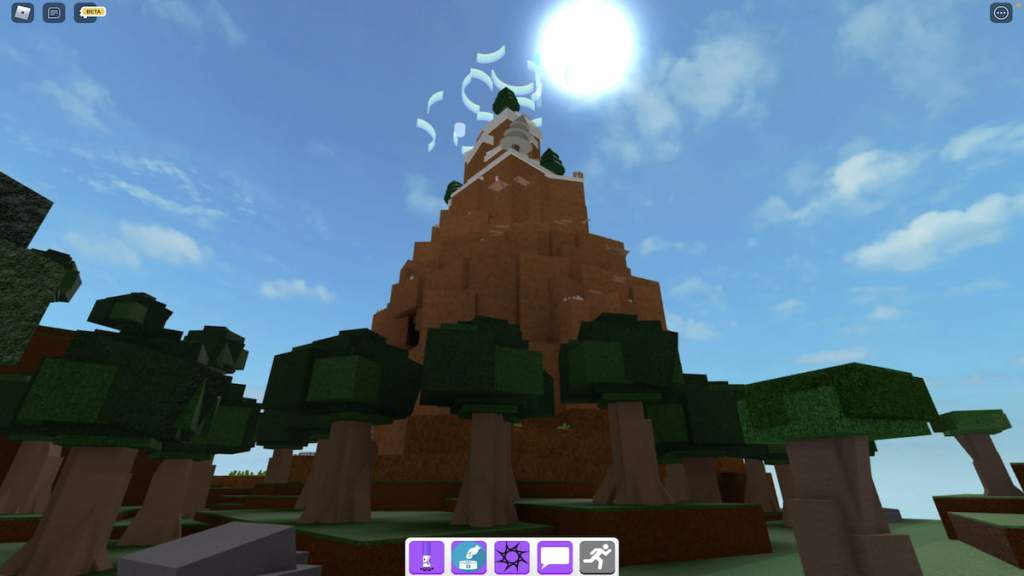
Once you’ve spawned into Find the Markers, head toward the forest area of the map and approach its large mountain.
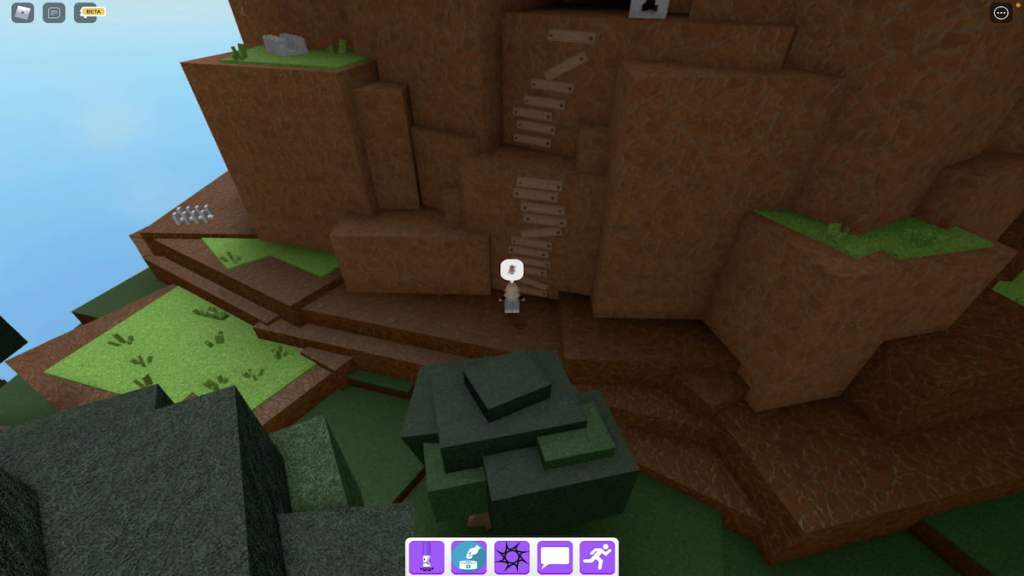
At the bottom of this mountain is a makeshift wooden ladder—climb it and enter the cave it leads to.
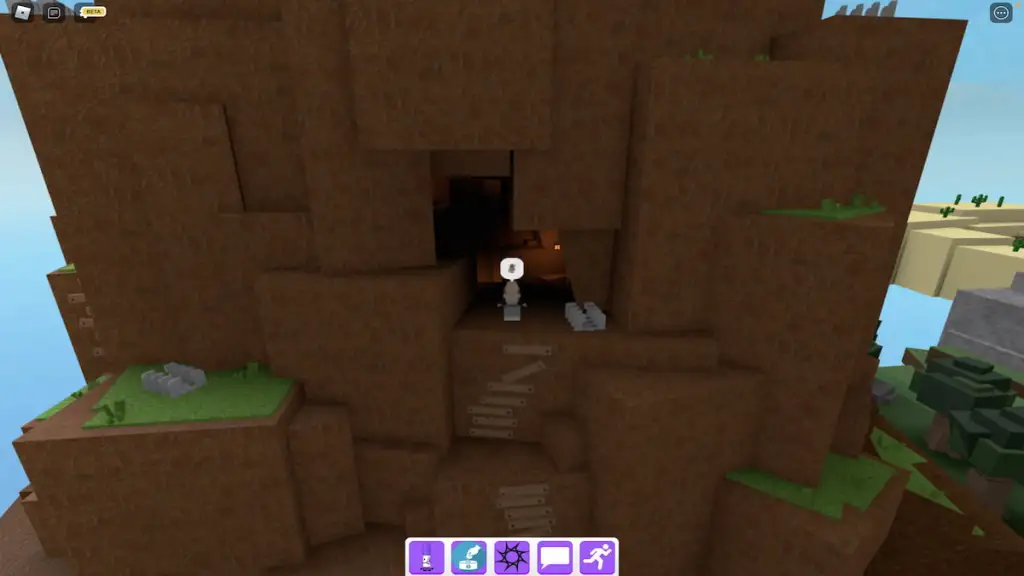
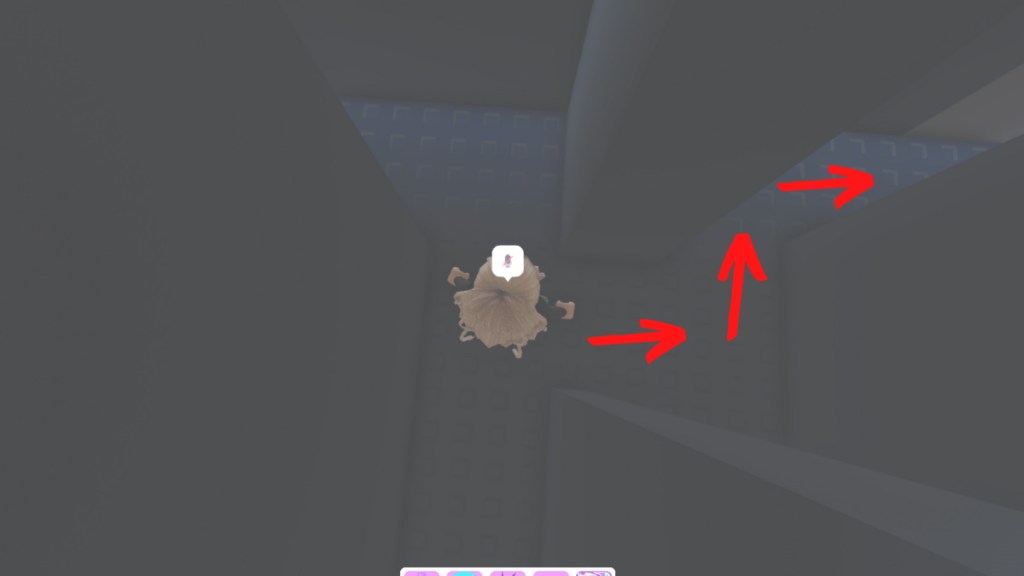
As you walk into this cave, you should notice a dark tunnel with two lanterns at the start of it.
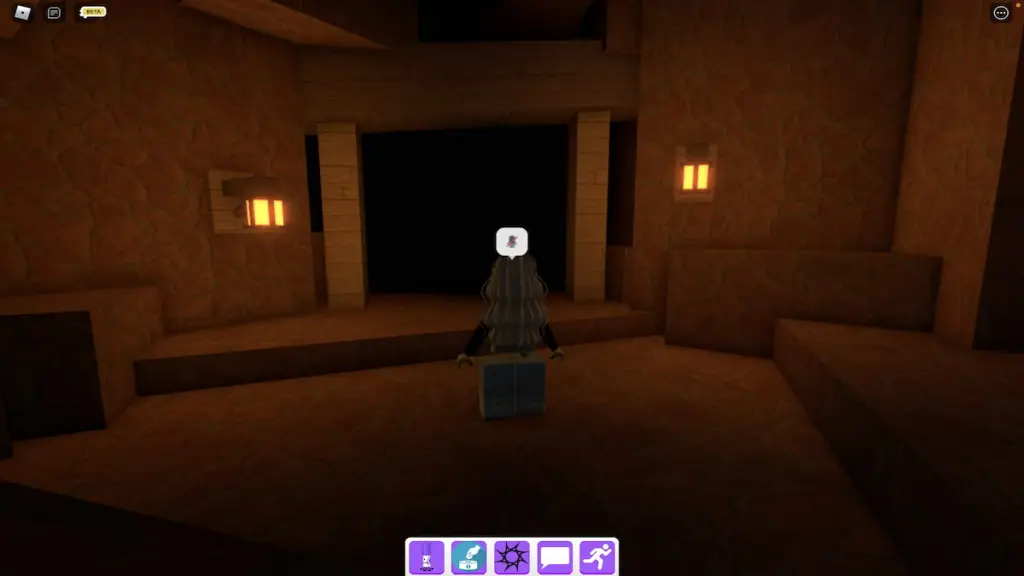
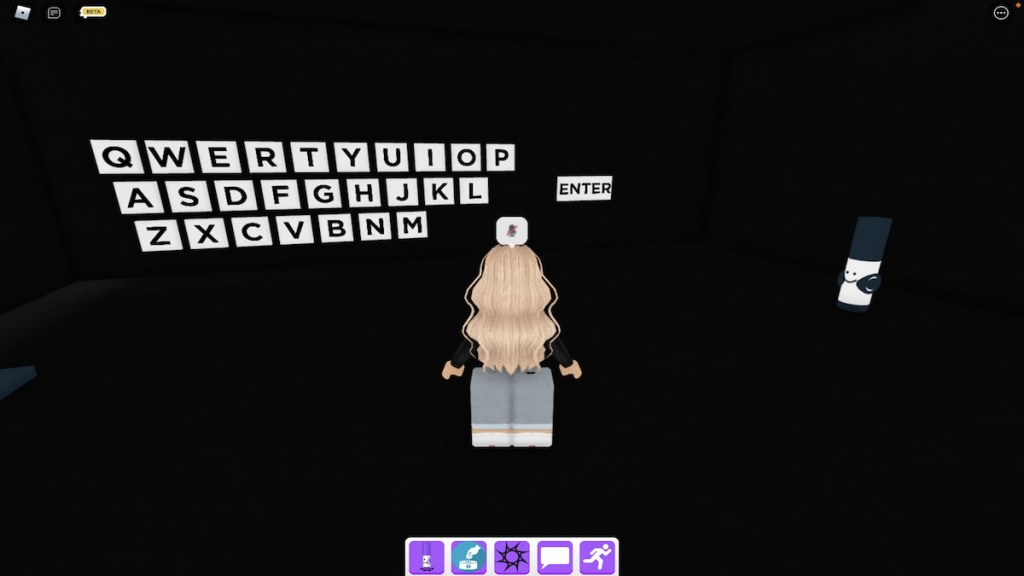
Upon walking into this tunnel, you will enter a secret room that features a wall of letters. To continue toward the Killbrick Marker, click on the letters D, I, F, F, I, C, U, L, T, and Y, in that order, to spell the world DIFFICULTY, and then click on the Enter button. If you entered the code correctly, you will automatically be teleported to the Difficulty Dimension.
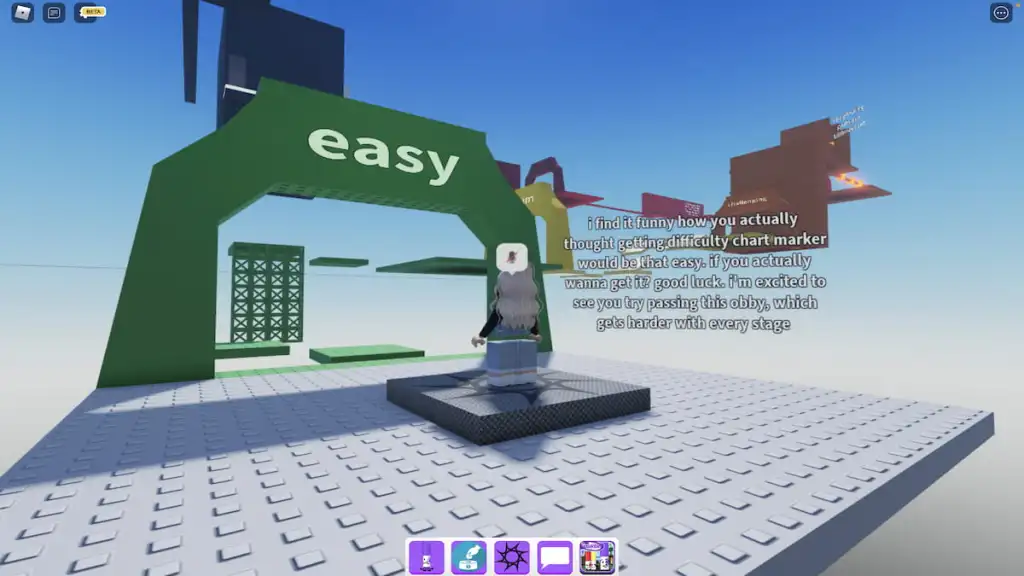
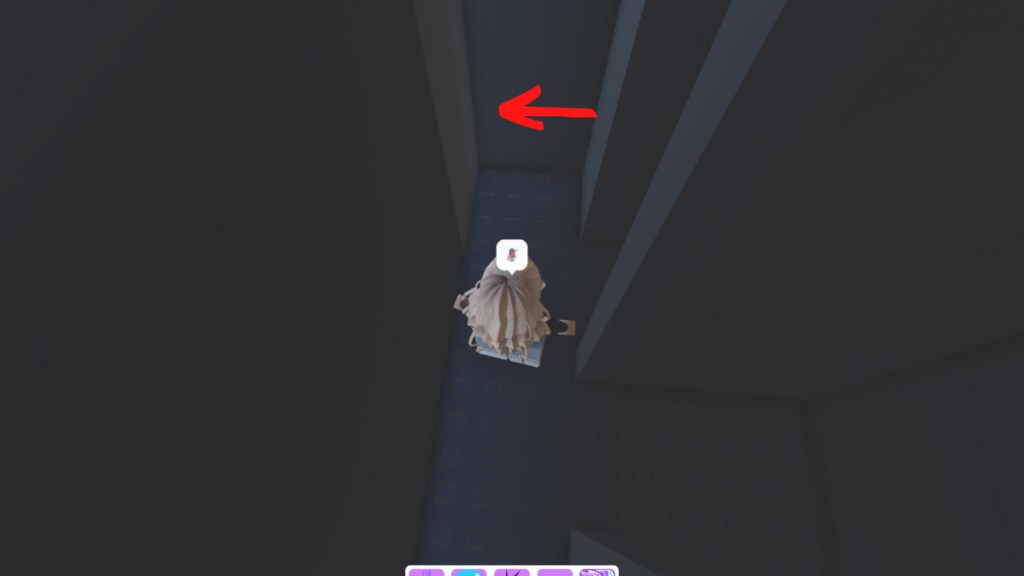
To obtain the Difficulty Chart Marker, players will need to complete the entirety of the Difficulty Dimension’s obby. There are eight levels in this obby, easy, medium, challenging, hard, difficult, insane, terrifying, and MARKEROUS, and each varies in length and difficulty. The first few levels are pretty simple, with terrifying and MARKEROUS being the hardest of them all. To get started on your journey of completing this obby, walk and jump your way through the easy level to reach medium.
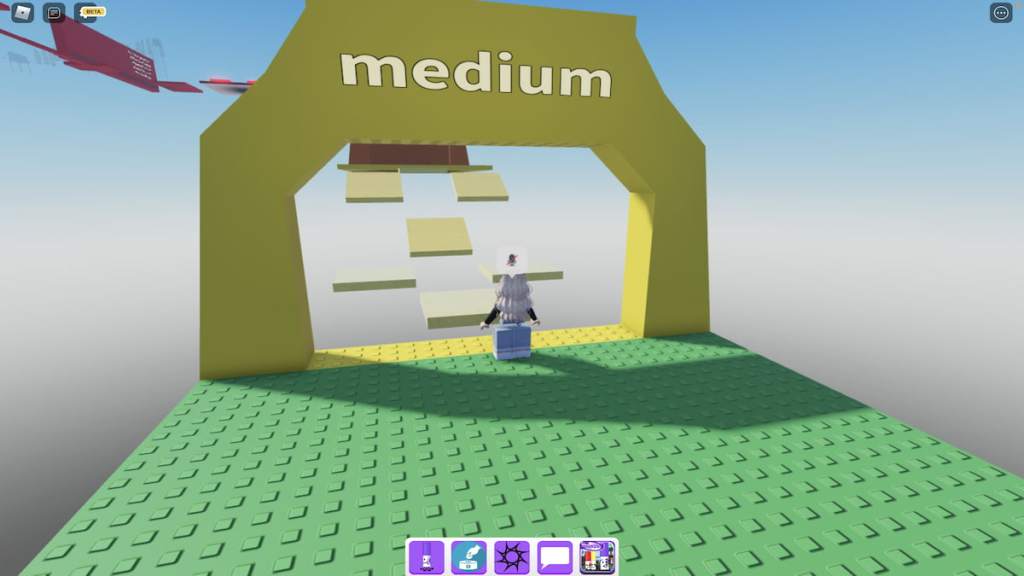
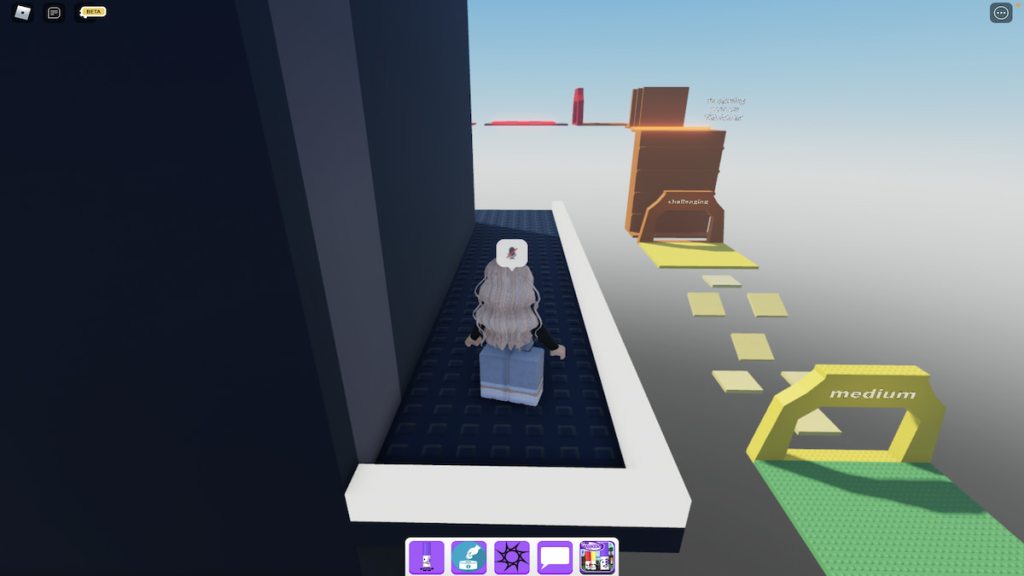
To survive medium, you’ll need to jump across a set of slippery tiles and reach the platform above. If you slide off and fall to your death, you will be restarted at the beginning of the easy level, so be careful! Once you’ve made it to the start of the challenging level, hop across the small gap and onto the first ledge in front of you.

Now, jump out and up from this ledge to reach the next one and repeat this strategy until you’re at the top of the wall.
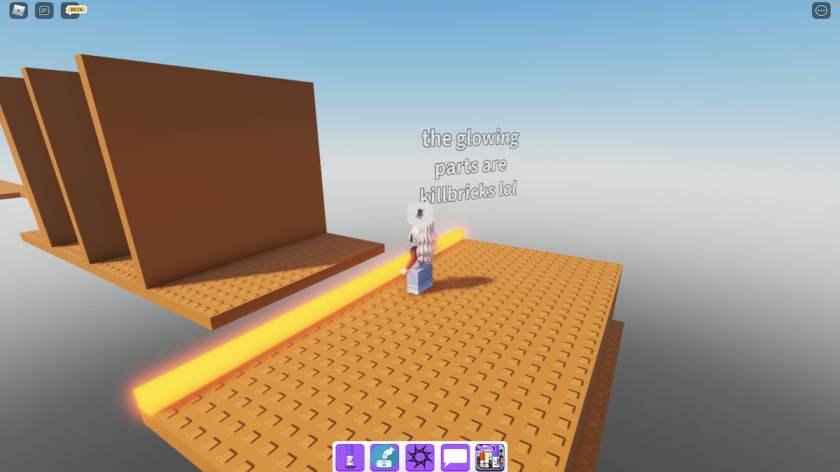
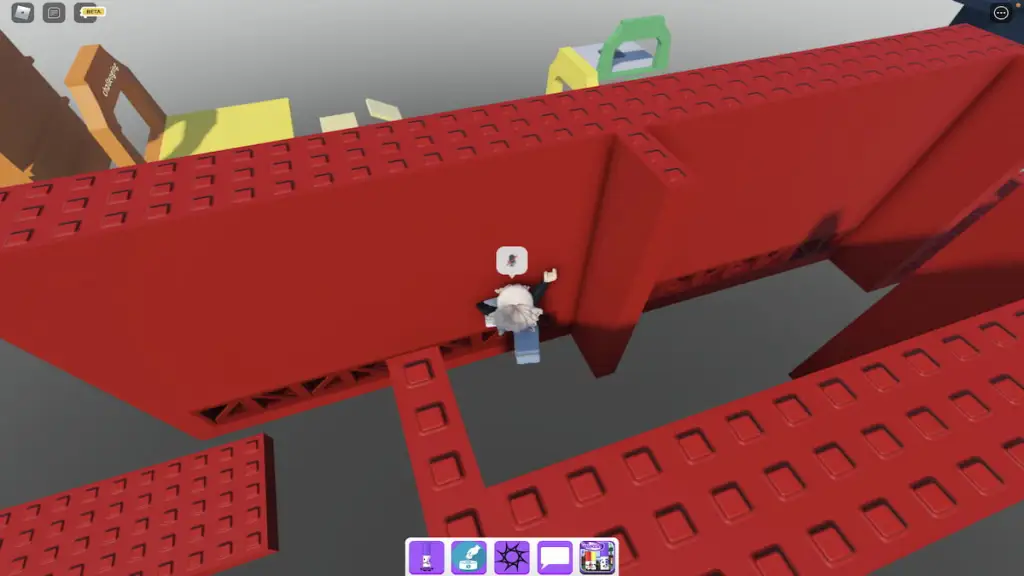
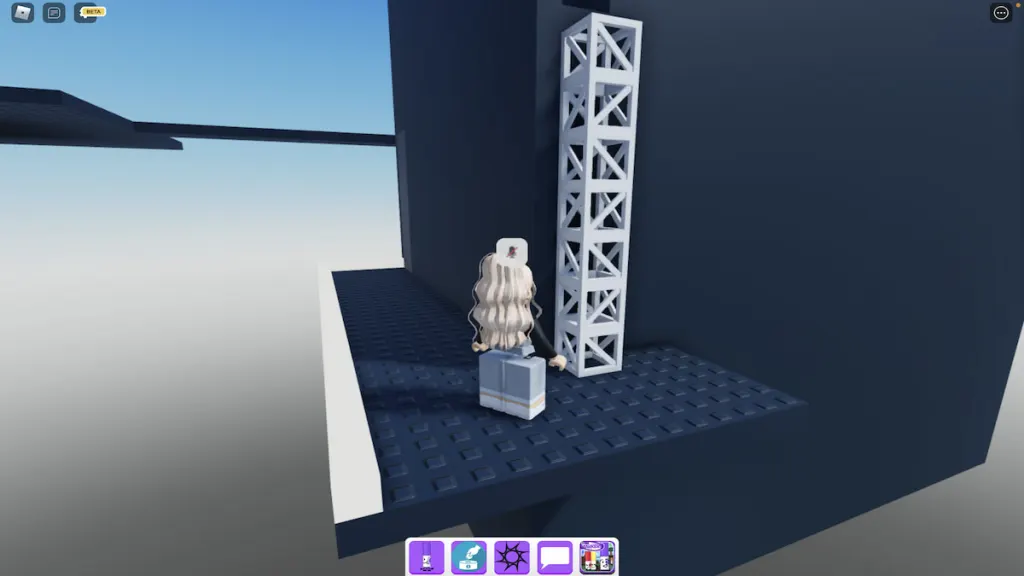
From here, jump over the glowing killbrick, out and around the small walls, and to the start of the hard level.
Similar to the medium level, the hard level uses a slick base for its first obstacle, making it hard to avoid the glowing killbrick squares as you attempt to jump between them. To complete this obstacle easily, we’d recommend running and jumping through it in one quick motion rather than trying to jump and stop repeatedly. If you can pick up a solid momentum, you should be able to run and jump between the squares without hitting any of them.
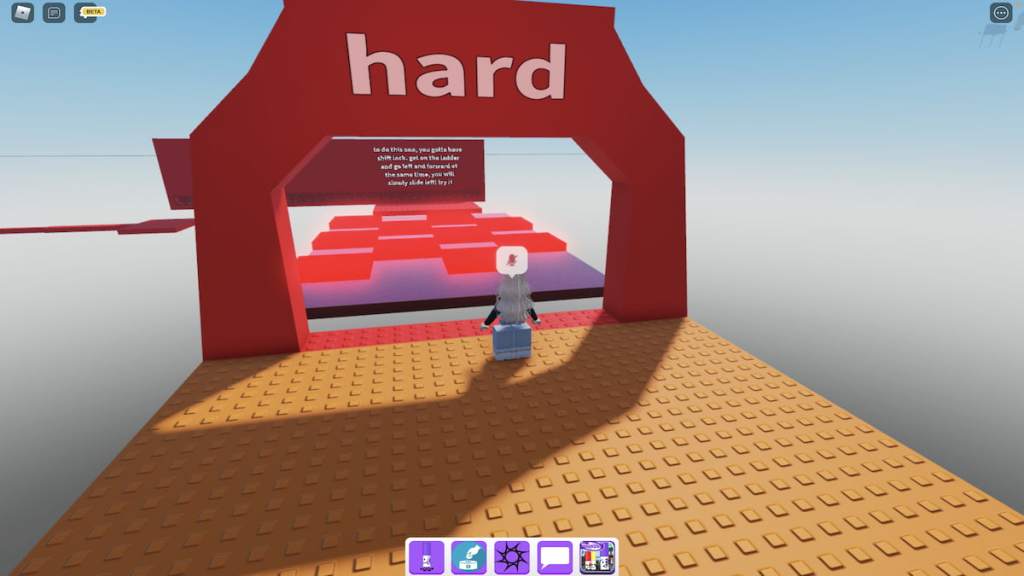
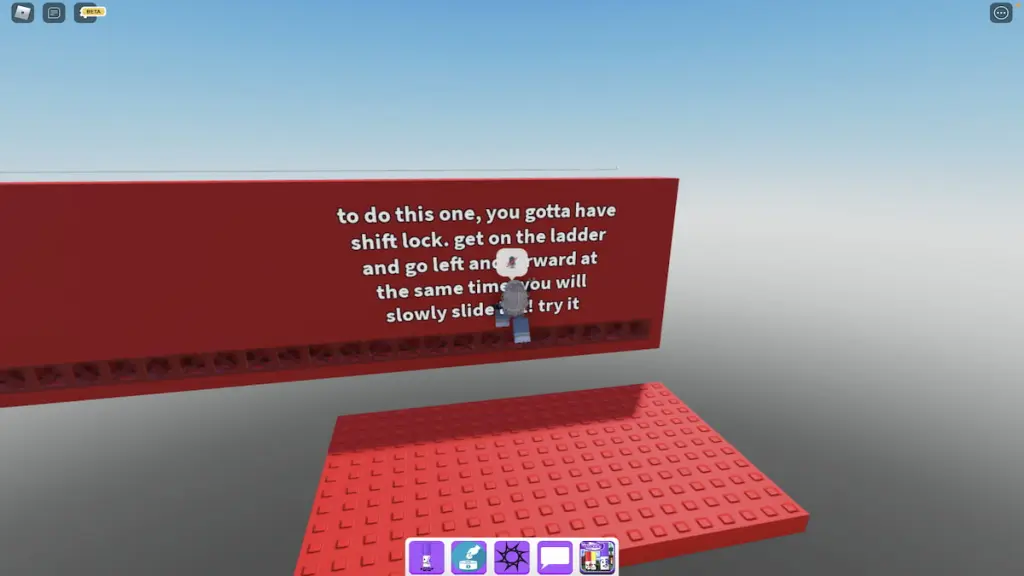
Once you reach the end of the first obstacle, you’ll immediately be faced with the second, which requires you to jump and latch onto a horizontal ladder and slide your way to a small platform on your left. Though the experience says otherwise, using shift lock isn’t required—if you find that just turning your camera and moving to the left is easier than using shift lock, that can totally work too.
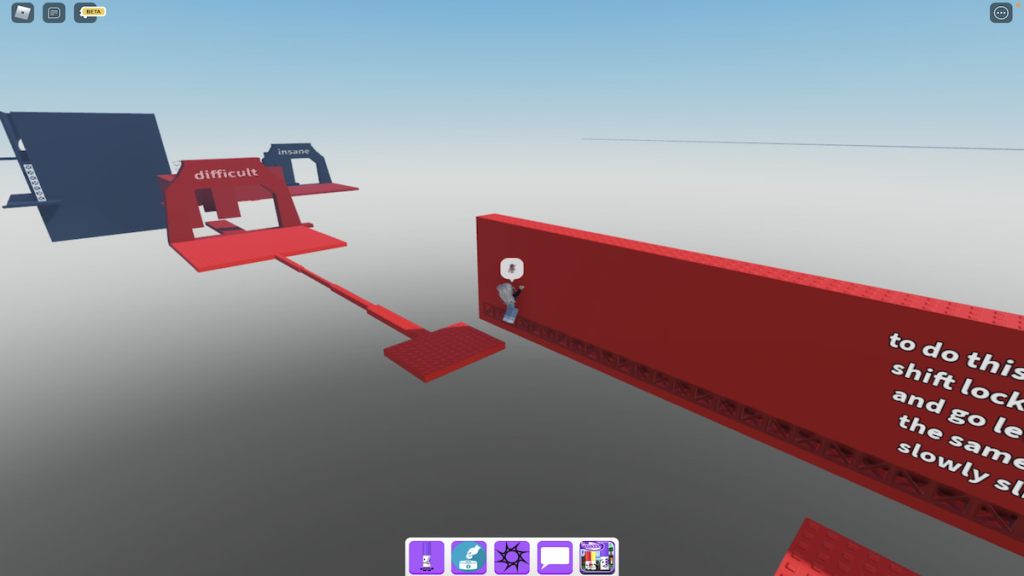
To reach this small platform, either climb down the ladder using the downward movement key or press the Spacebar to jump off. Then, simply walk across the thin bridge to reach the entrance to the difficult level.
This level uses the same type of obstacle as hard, the horizontal ladder, but takes it up a notch by making players jump across a large gap from one ladder to another. Again, if shift lock is easier for you, turn it on, but if not, feel free to leave it off. Just be sure to move at your own pace!
Related: How to get Dark Markery in Roblox Find the Markers
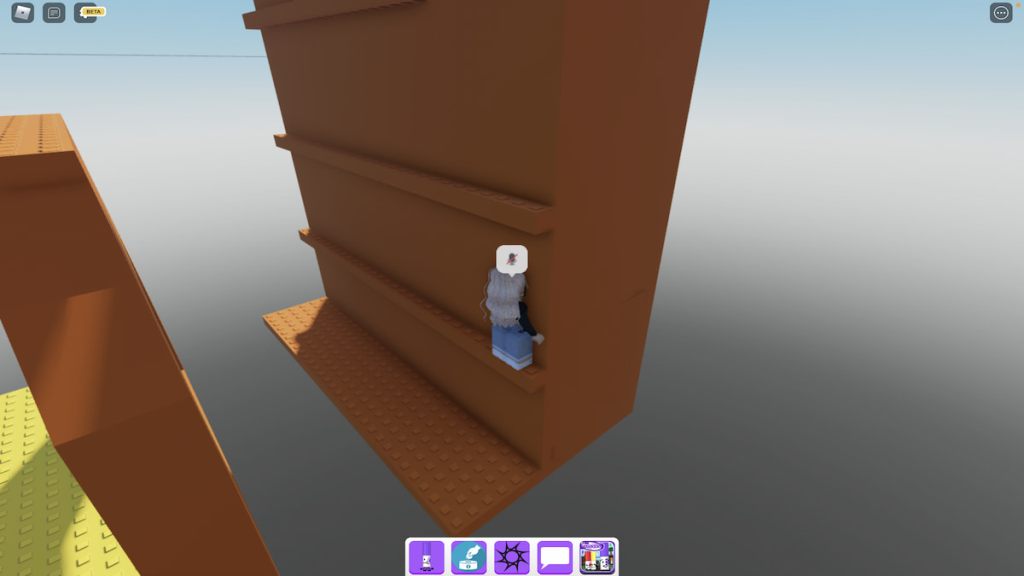
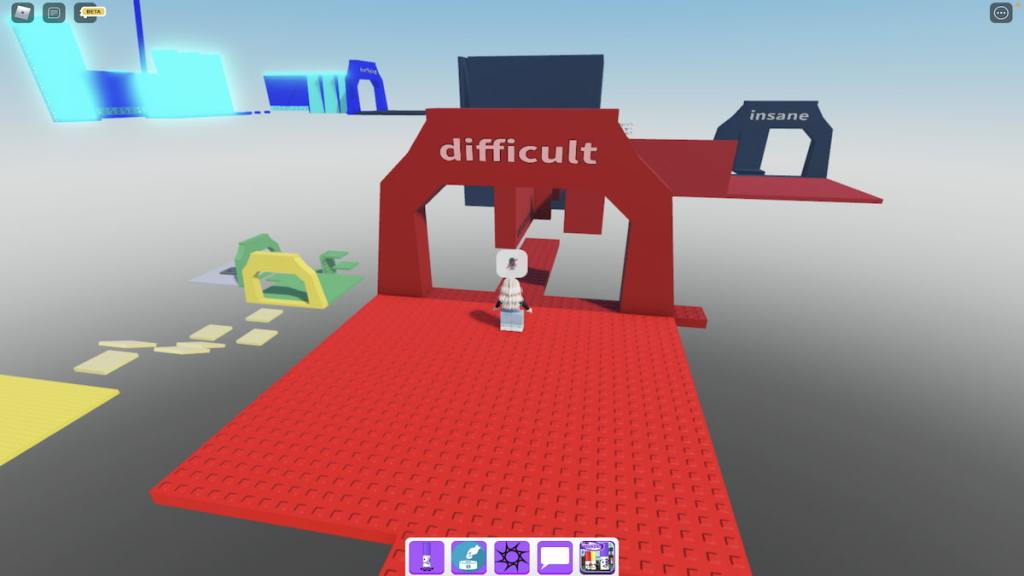
Once you’ve cleared the ladder obstacle, you’re basically at the end of the difficult level—all that’s left to do is jump over a few killbricks. After jumping over the third killbrick, you should be in front of the insane level entrance.

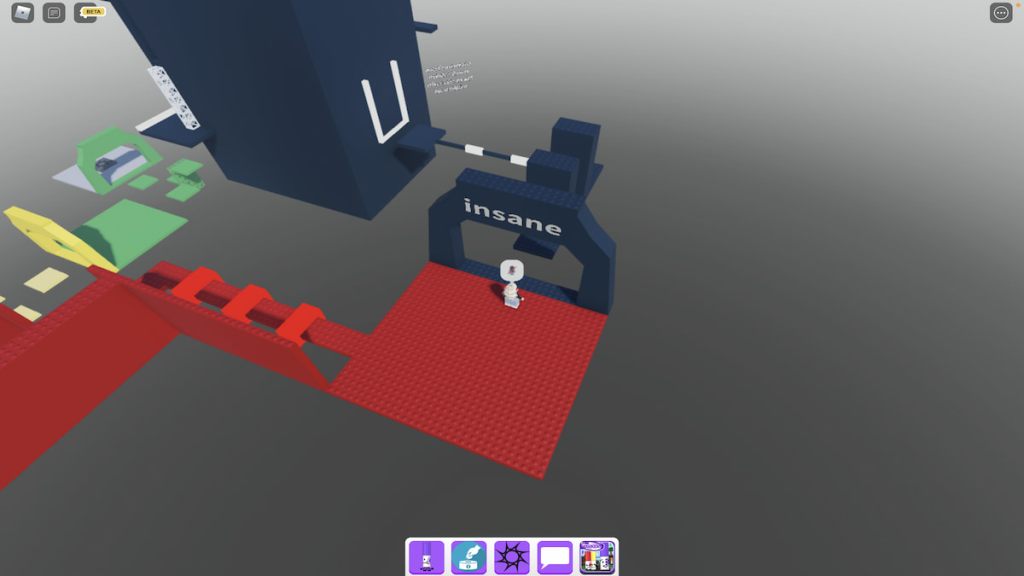
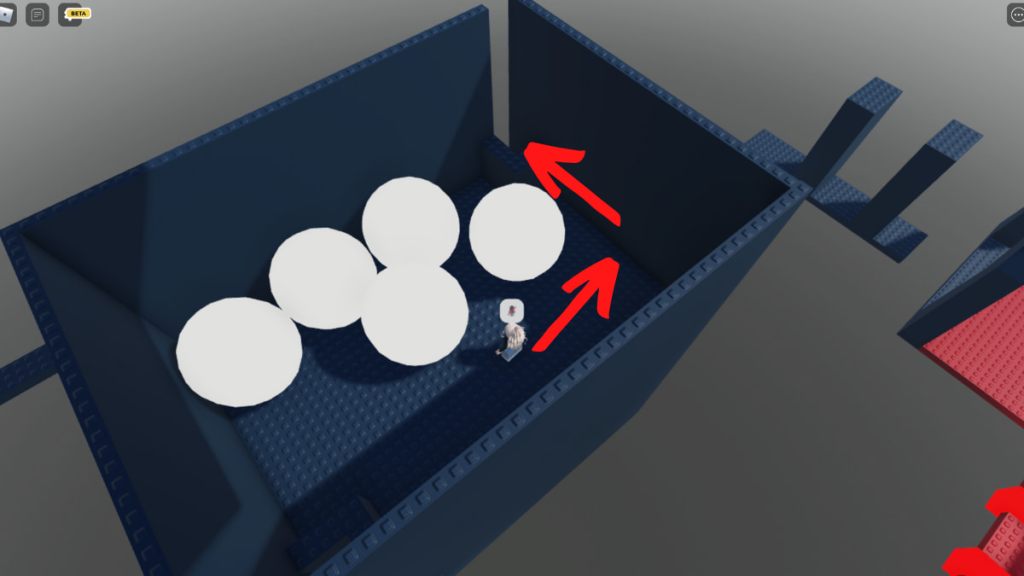
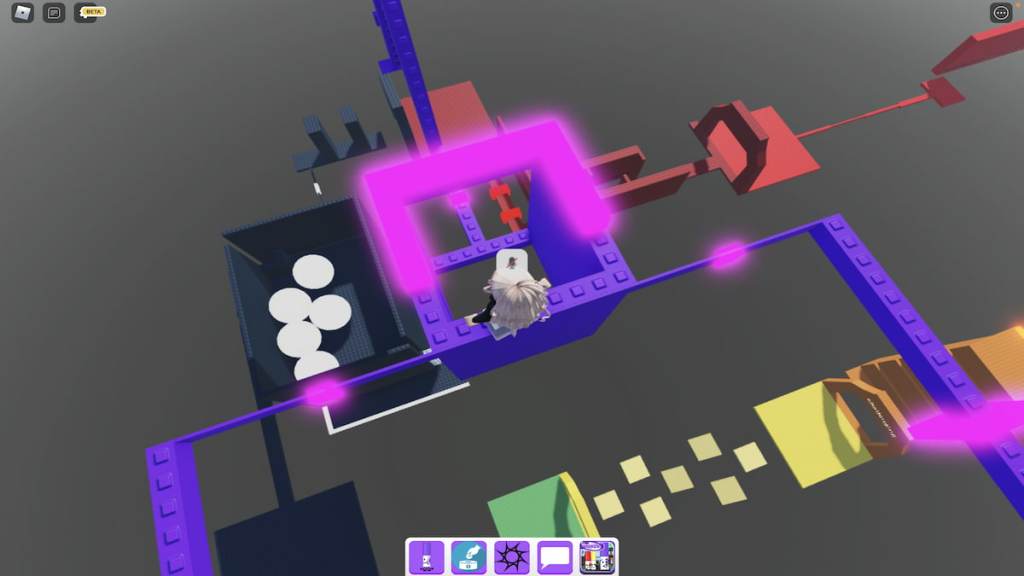
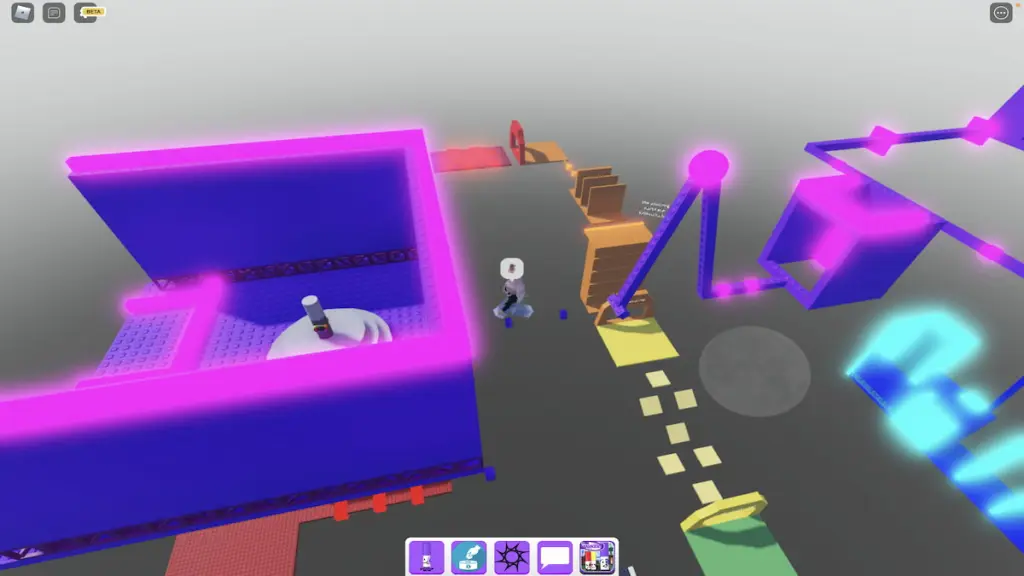
As seen from the image above, the insane level is mostly contained inside of a building rather than spread out across various platforms. To reach this building, you’ll need to jump around two obstacle walls, over two thin killbricks, and then through the building’s transparent entrance.
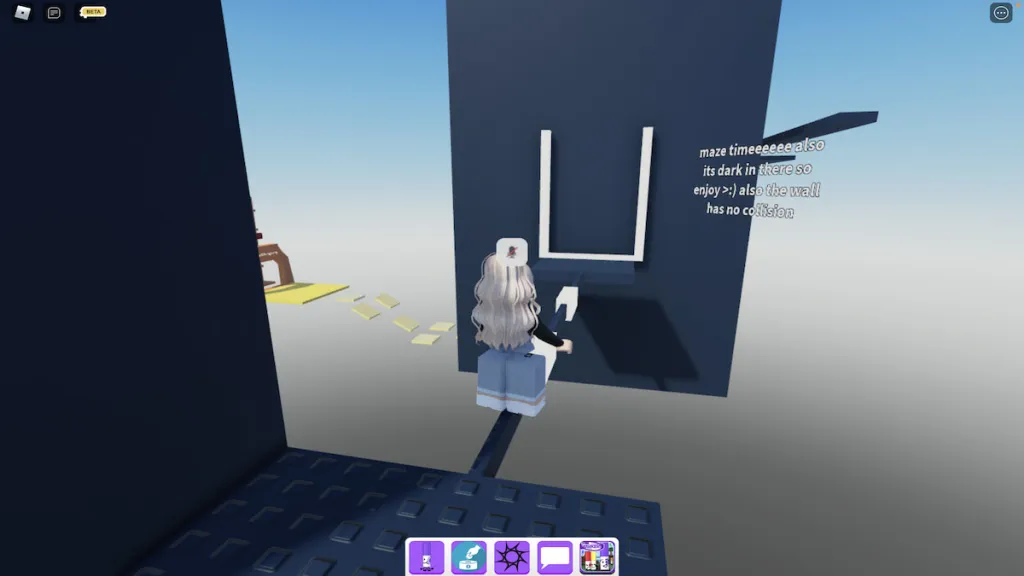
Inside of this building is an exceptionally dark maze that can lead you to two different exits, one that leads you to the rest of the standard obstacle course and another that teleports you to the Danger Marker’s obstacle course. In the images below, we’ll show you the path you need to take to continue along the standard course and reach Difficulty Chart Marker. To help you see the path better, we’ve increased the brightness on these images—it’s nowhere near this bright inside of the maze!
As soon as you hop through the transparent entrance, turn left and walk straight until you run into a wall. At this wall, turn right.
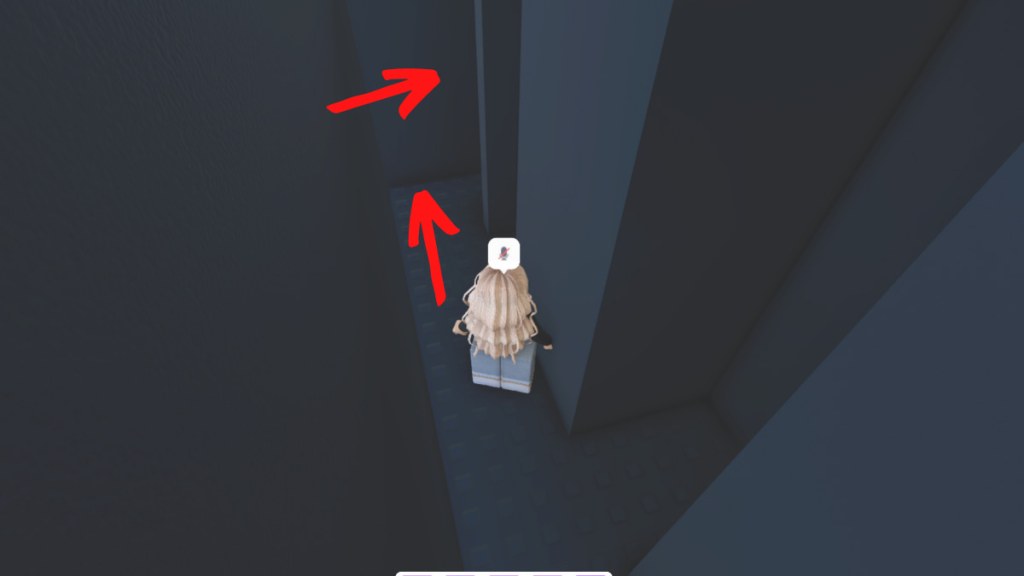
Continue straight and then turn right before running into the next wall.
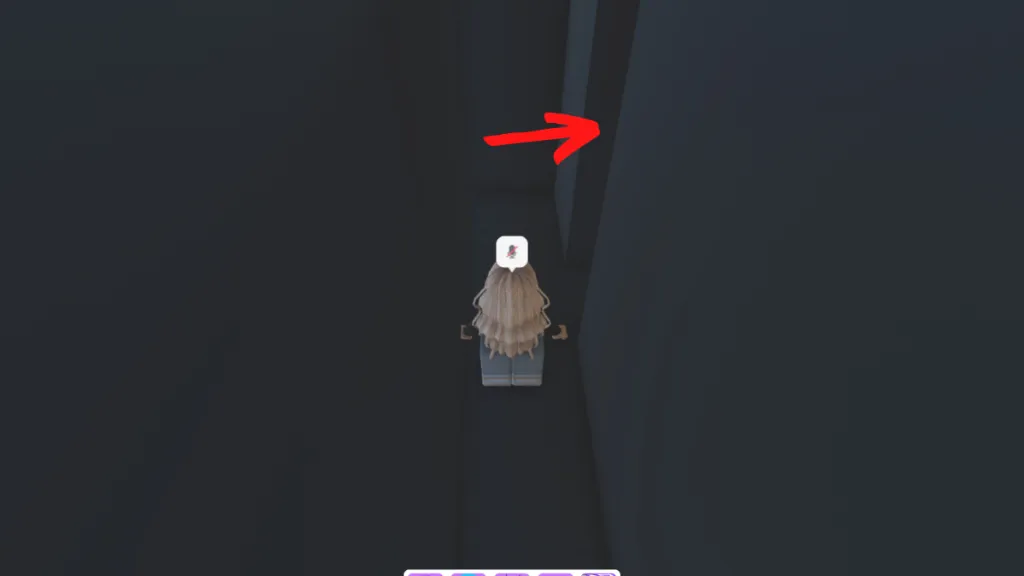
Now, walk straight again until you reach the first turn on your left. Take this turn and continue forward.
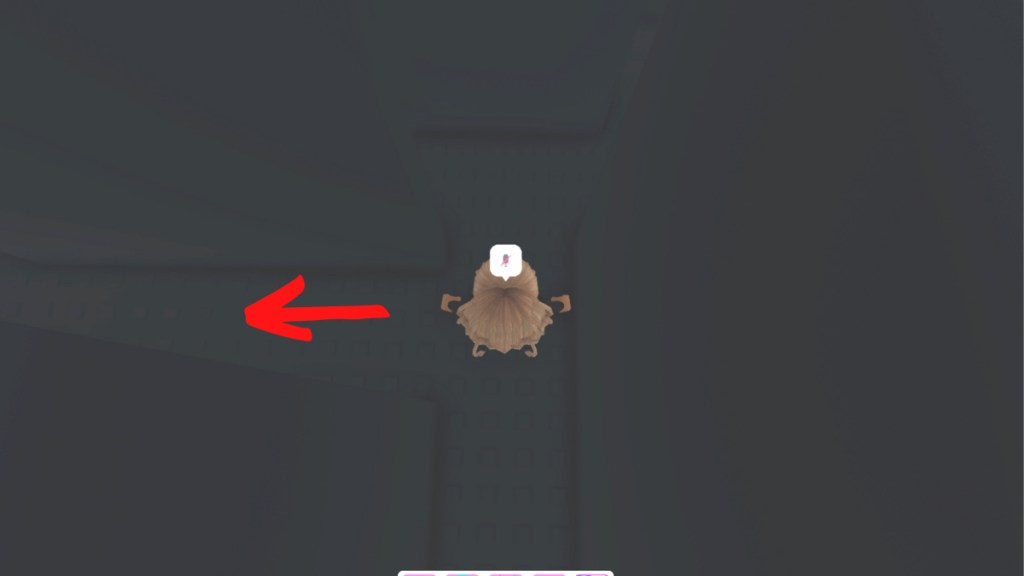
After a few steps, you should see a turn on your right—take this turn, then immediately turn left, and follow the path to the right.
At the end of this path should be a transparent part of the wall that you can walk through—this section will be lighter in color when compared to the rest of the wall and will lead you outside of the maze.
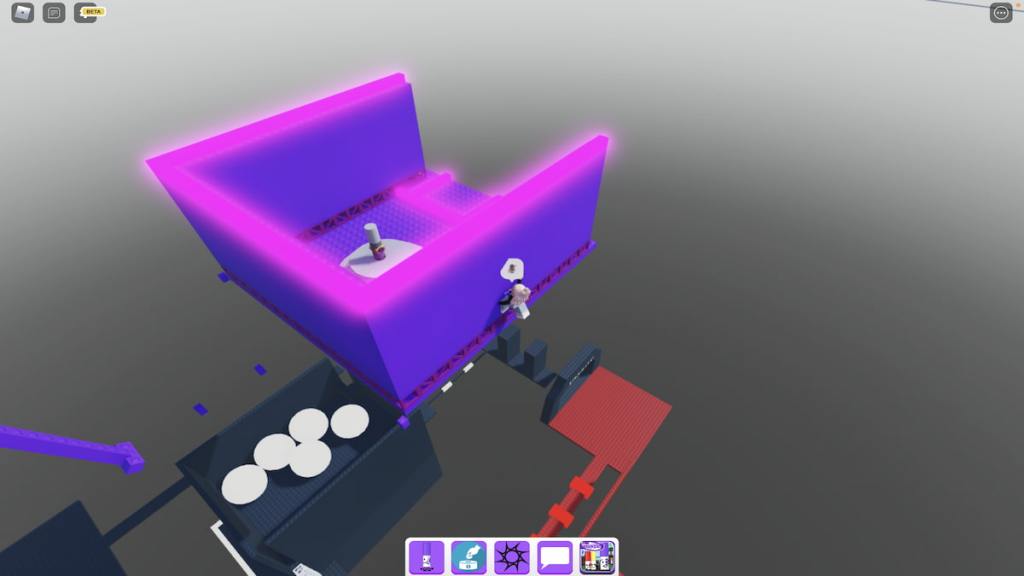
Now that you’re outside the maze, walk to the end of the platform and turn left—around the corner will be a white ladder. Climb this ladder and squeeze through the small opening to reach the next obstacle at the insane level.
This next section of the insane level is super easy to beat, simply follow the path we’ve outlined below to avoid the killbrick balls and leave the obstacle. Then, walk forward along the thin platform to reach the terrifying level’s entrance.
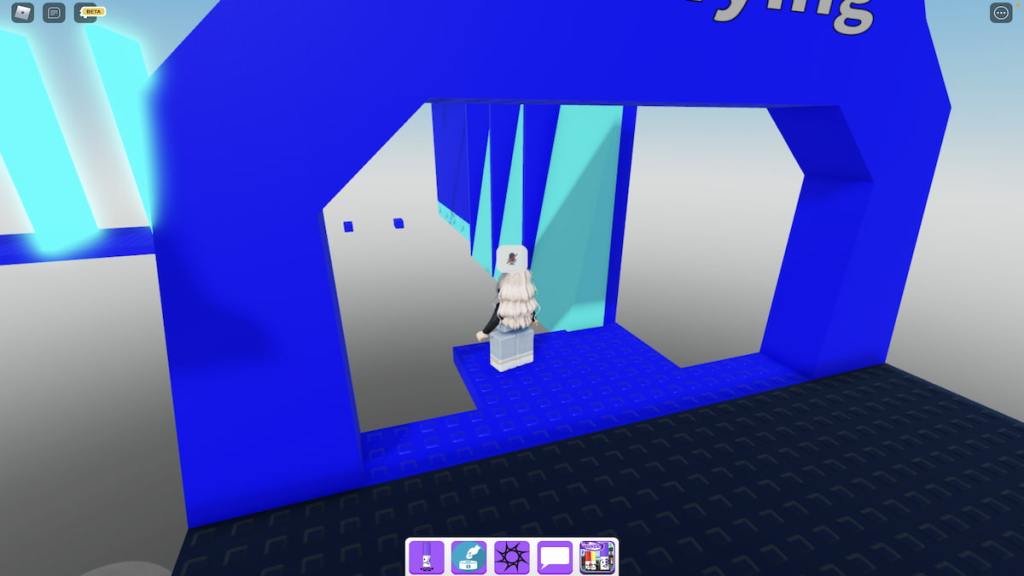
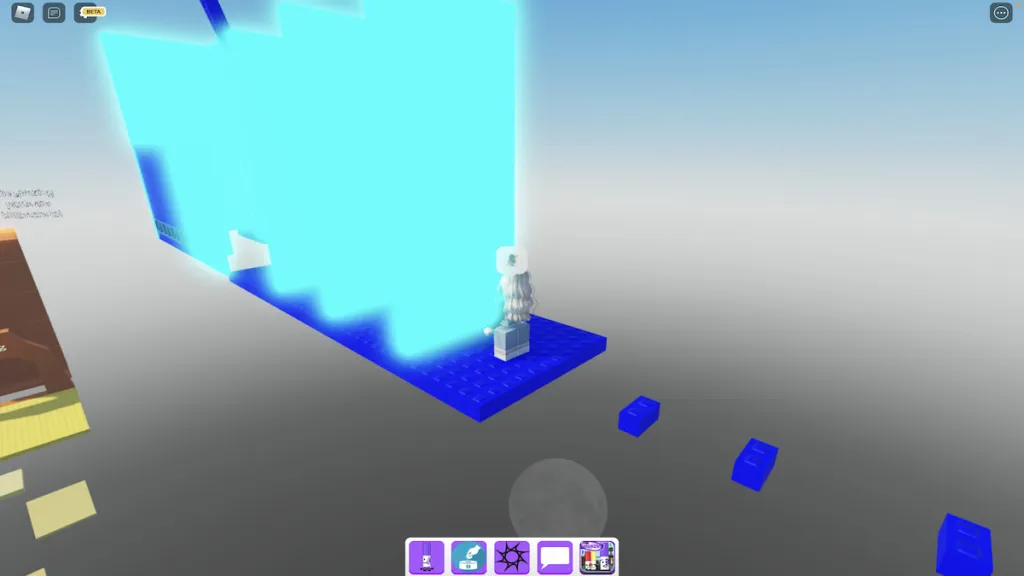
To make it through terrifying, players must avoid a hefty amount of killbricks while jumping, climbing, and stepping in all the right places. To clear the first obstacle, jump around the dark blue blockades and onto the cyan parts of the wall in front of you. Be careful as you jump—if you get too close to the top of the cyan wall, your Robloxian will hit a killbrick and get reset.
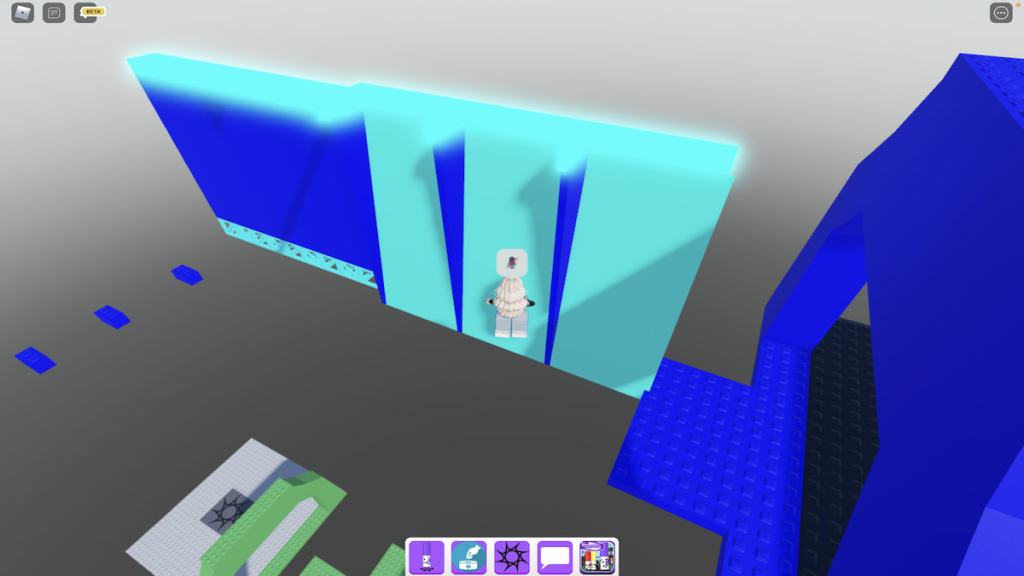
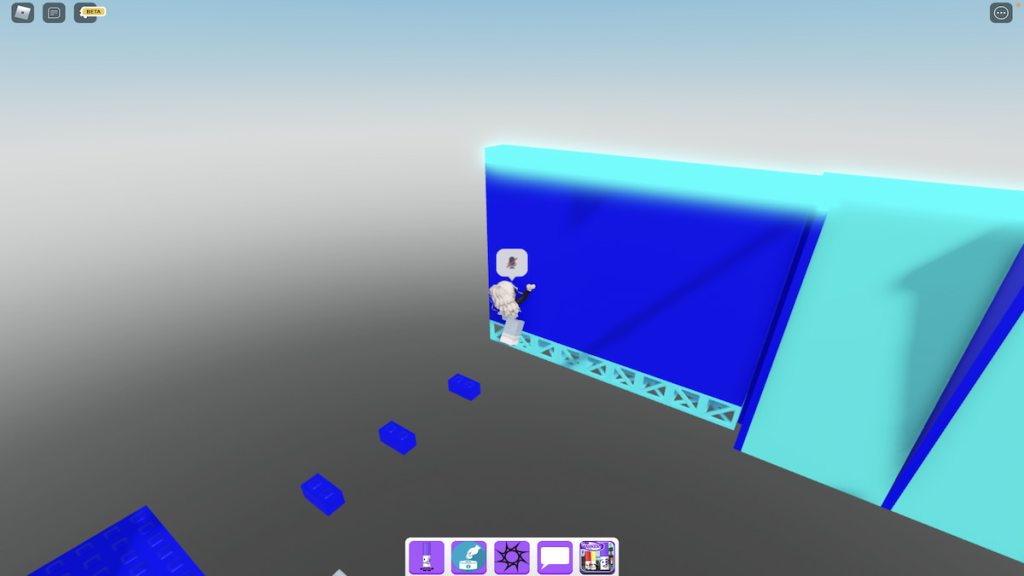
Once you’ve made it to the last cyan wall, carefully jump onto the horizontal ladder to your left and climb to the very end of it. From here, jump backward onto the small platform behind you and continue jumping forward onto the next ones until you reach the large platform.
Related: How to get the Zen Marker in Roblox Find the Markers
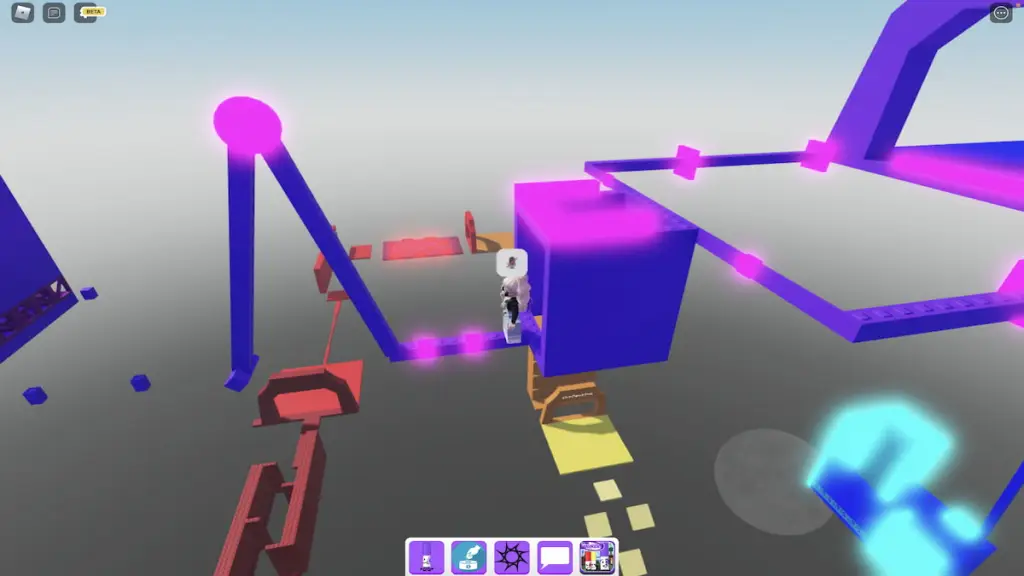
This next obstacle is one that we’ve seen multiple times throughout this obby—jumping out and around blockade walls. The only difference with this obstacle is that the blockades also serve as killbricks, meaning that you will insta die upon touching them. Once you’ve passed these blockades, your next challenge is to repeat the ladder obstacle from the difficult level while avoiding an added twist: more killbricks.
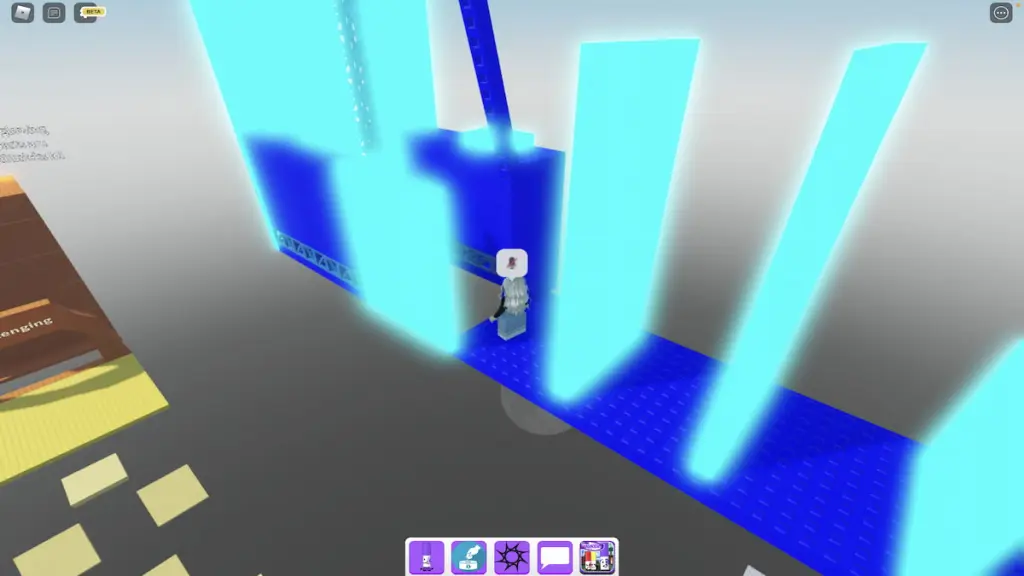
To complete this obstacle successfully, scoot your Robloxian as close to the killbricks as you can without actually touching them—that way, you have more room to turn around and jump from one ladder to the other across the large gap.
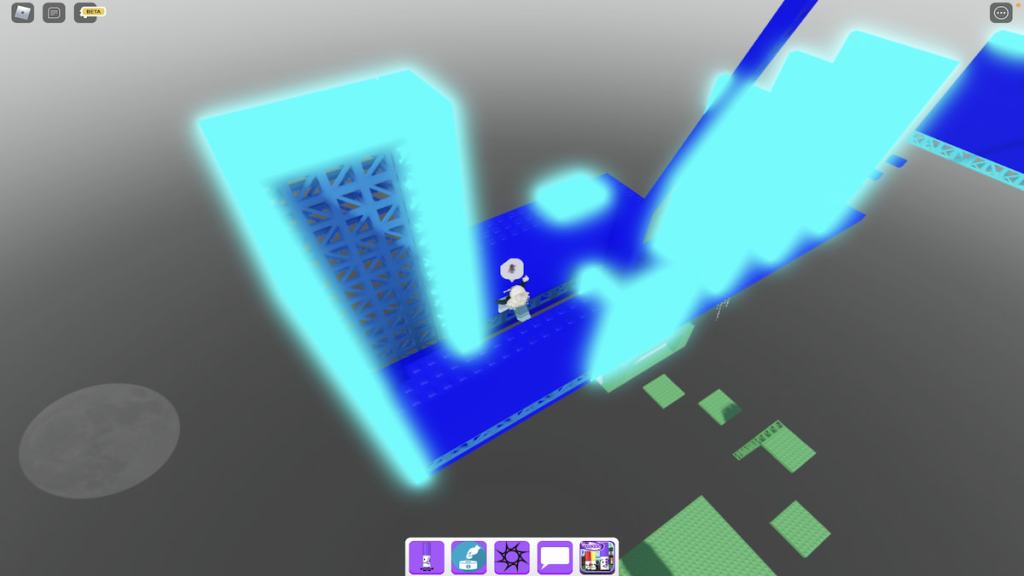
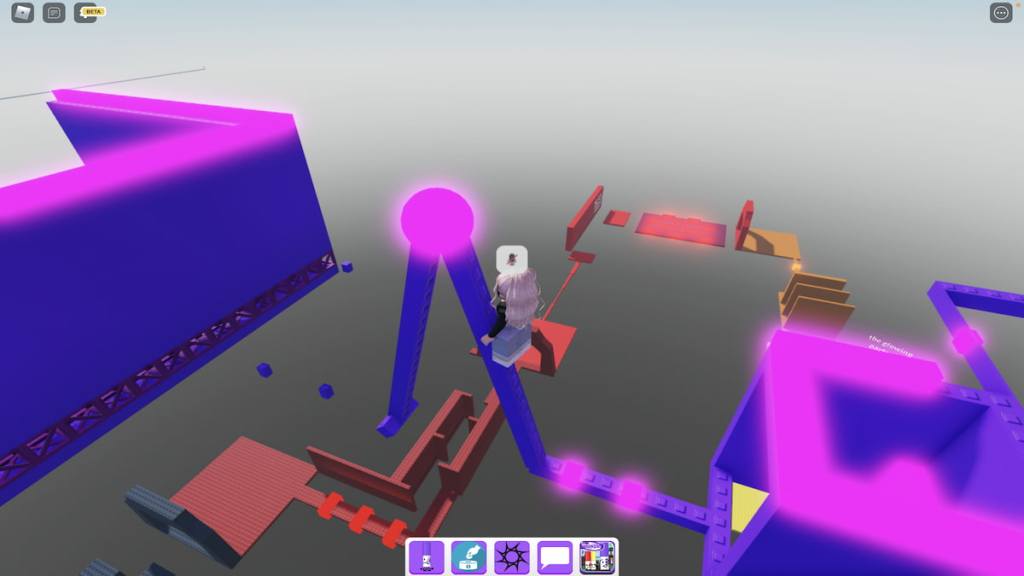
After successfully avoiding these killbricks and climbing across all the horizontal ladders, your Robloxian will need to grab onto and climb a vertical ladder with killbricks surrounding it. To make it off this ladder, jump backward and onto the dark blue platform behind you.
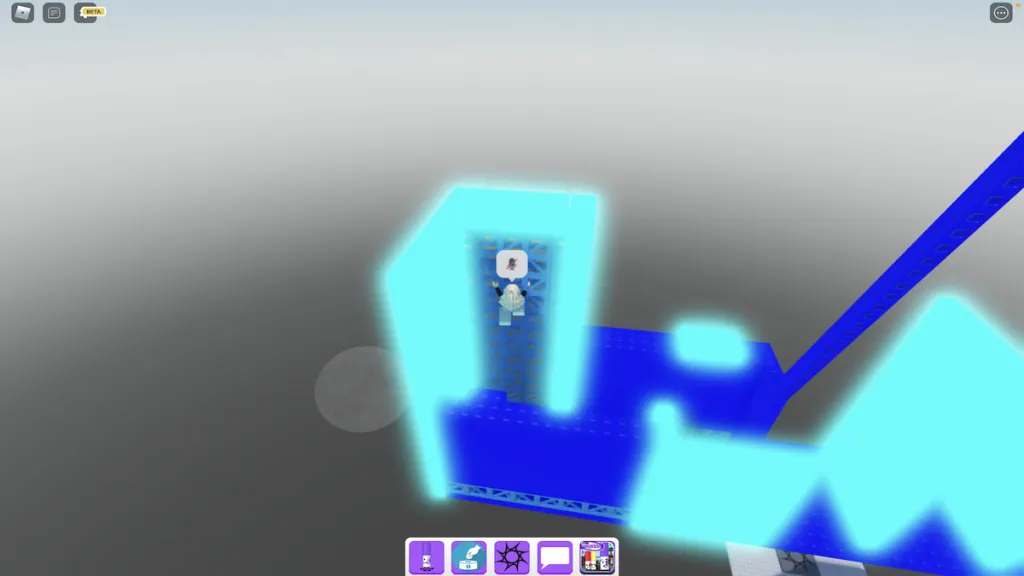
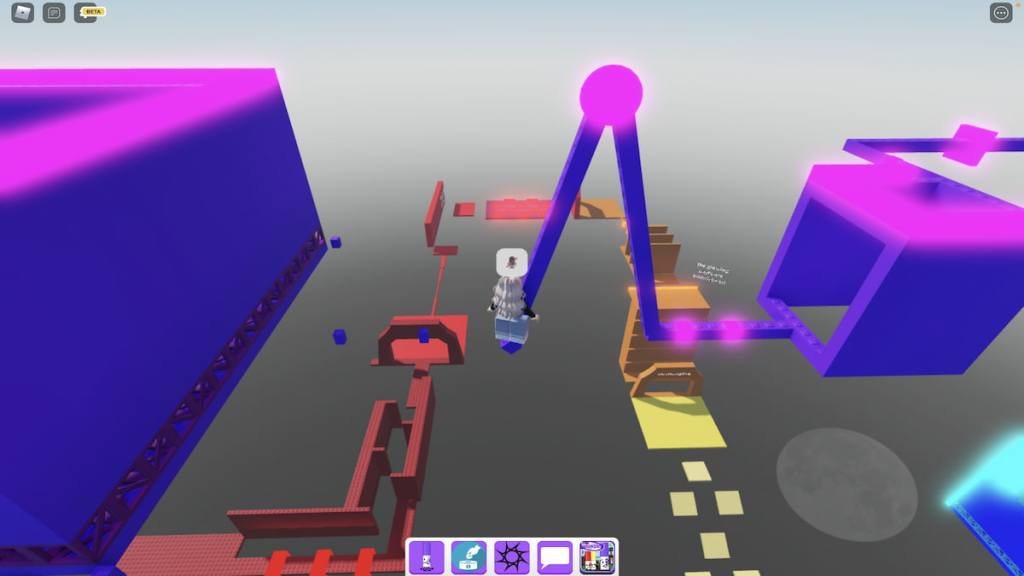
Then, make your way toward the thin, angled platform and climb it carefully.
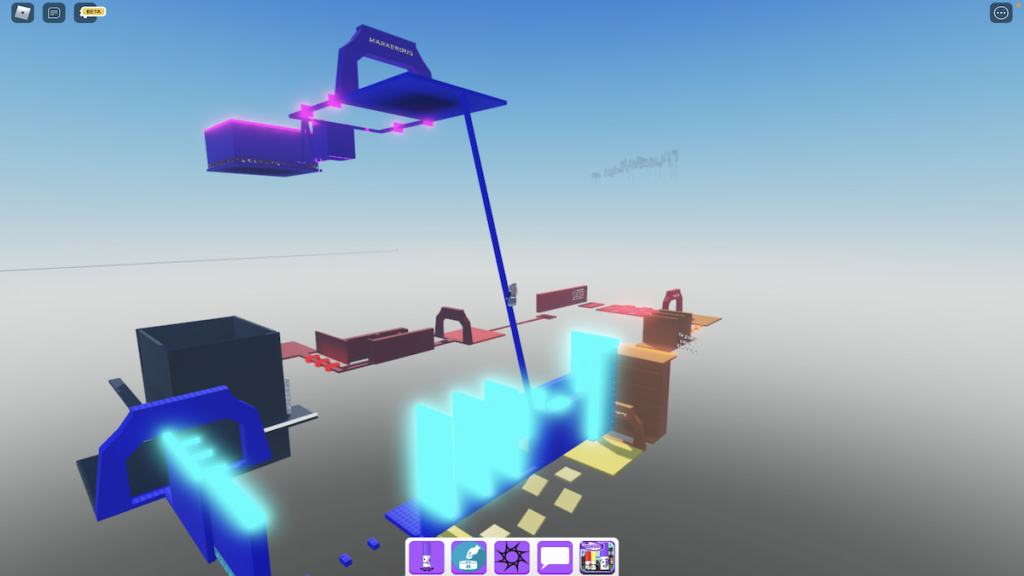
At the top of this platform is the entrance to the final level, MARKEROUS.
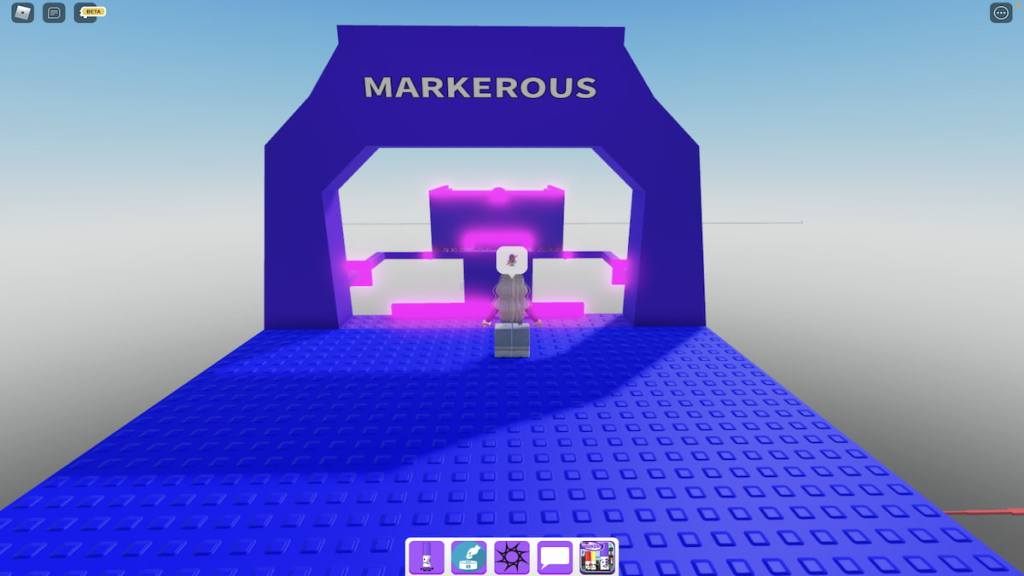
Though this is the Difficulty Dimension’s finale, this level isn’t super difficult in and of itself. While some of the other levels took us over ten tries, MARKEROUS was completed in only two or three. To start, walk to either side of the entrance’s arch, carefully maneuver around the killbrick in front of it, jump to the platform to the side of it, and then walk along the rest of the path to the point below.
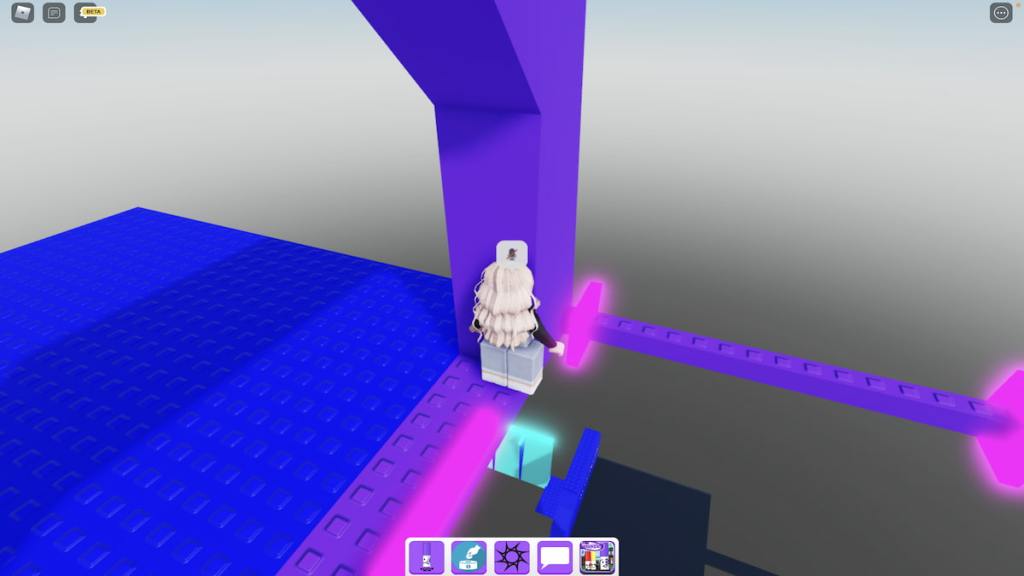
From here, your first instinct is likely to try and jump down onto the platform below—do not do this! Instead, simply walk off the ledge you’re currently standing on. Upon doing so, your avatar will automatically grab onto the platform’s ledge below you, making it easy to walk forward and climb onto it.
Now, you’ll need to carefully jump between the glowing killbricks and onto the slanted platform.
On top of this platform is a spherical killbrick that will insta kill you if you get too close to it. So how do you continue through the MARKEROUS level? You’ll need to jump off this platform, around one of its sides, and onto the small platform at the base.
Take a deep breath, you did it! Now, jump onto the minuscule platform pieces in front of you and use them to reach the horizontal ladder. This may seem simple enough, but it can easily become frustrating, so take your time and jump carefully!
Climb this ladder to the right and carefully step onto the edge of the final platform.

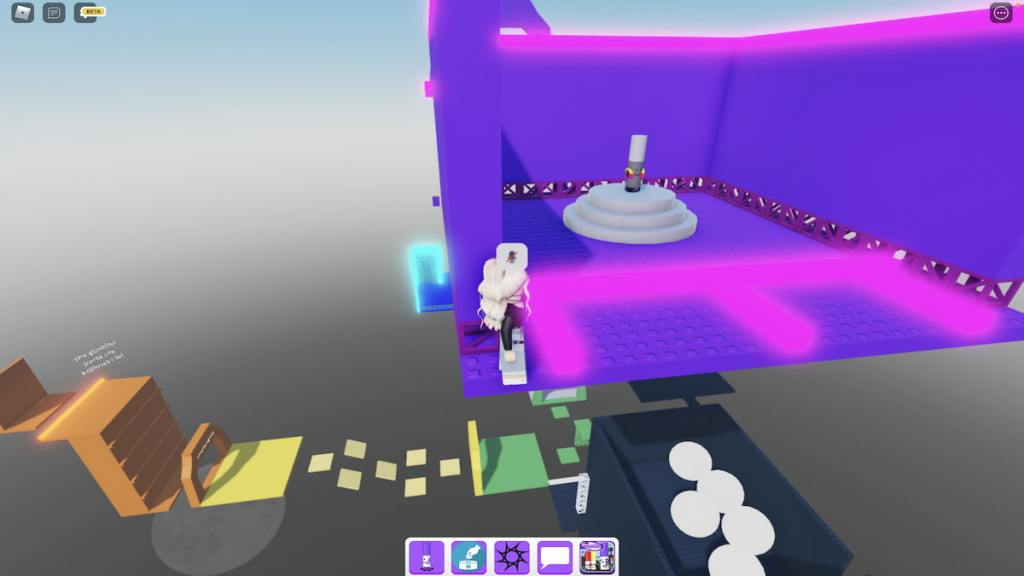
Now, carefully jump toward the Difficulty Chart Marker while avoiding the glowing killbricks. Don’t worry, there’s no last-minute tricks or hidden obstacles in your way!
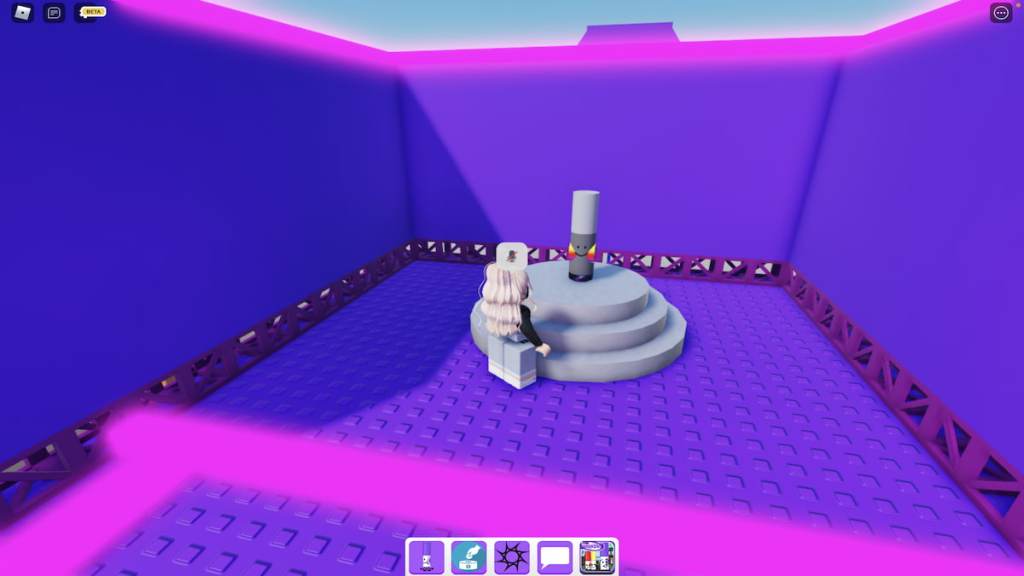
You made it! To add this marker to your Markerdex, simply walk up and touch it. Upon doing so, you should receive the pop up below. Pat yourself on the back—you now own the marker with the hardest difficulty in all of Find the Markers!
Looking for more Find the Markers content? Check out our recent guides on How to get the Atmosphere Marker in Roblox Find the Markers or How to get the Ceramic Marker in Roblox Find the Markers here on Pro Game Guides!
Get Roblox codes and news as soon as we add it by following our PGG Roblox Twitter account!
Find the Markers is one of Roblox’s games that allows you to find the markers in a certain location. That means, each marker will spawn in different places. It is known that there are currently 150 markers that you can find all over 12 regular Biome maps and 6 Washable Kingdom areas.
There are a number of markers that are very hard to find. One of them is the Difficulty Chart Marker that allows you to take some extra steps ahead. Thankfully! This post will give you a guide to find the Difficulty Chart Marker. Here you go!
Where to Find the Difficulty Chart Marker?
Since the Difficulty Chart Marker is a really hard obby, you may find it hard to find it. We may not be able to explain the ways of finding the Difficulty Chart Marker in detail. Instead, we’ll inform you of the guide based on YouTube videos uploaded by some pro Roblox players.
Certainly, you will find a number of tutorial videos that will give you a guide to find out the Difficulty Chart Marker. However, not all videos explain the way to get the Difficulty Chart Market clearly. No worries! We will inform you which YouTube video will give you a clear and easy guide.
One of the YouTube videos that you can watch is entitled ‘Find the Markers| How to Get “DIFFICULTY CHART MARKER” – Roblox’ uploaded by Eugene’s Playtime channel. If you really want to know how to get the Difficulty Chart Marker, you can watch the video here.
In short, the channel guides you to find this hard obby by following some steps. In the video, the avatar is seen trying to try climbing through the plat of woods mounted on the cliff. This first step may be longer for you to successfully reach the top of the cliff.
![]()
After successfully climbing the cliff, there will be a number of obstacles that you should pass. The most obstacles you should pass is to continuously climb the cliff. On your way, you will find a lobby that provides a light switch.
After turning on the light switch, you will be taken into a dark place where you will find a big keyboard. Here, you need to type ‘DIFFICULTY’ and then click the ‘Enter’. After clicking it, you will be taken into the Difficulty Chart Place, a place where you can find a number of Difficulty Chart Markers.
On the Difficulty Chart Place, you also have to pass any obstacles as the lobby is a really hard lobby. You may find the blue lobby that is literally impossible. In the blue lobby, you will find a checkpoint and this is the insane part.

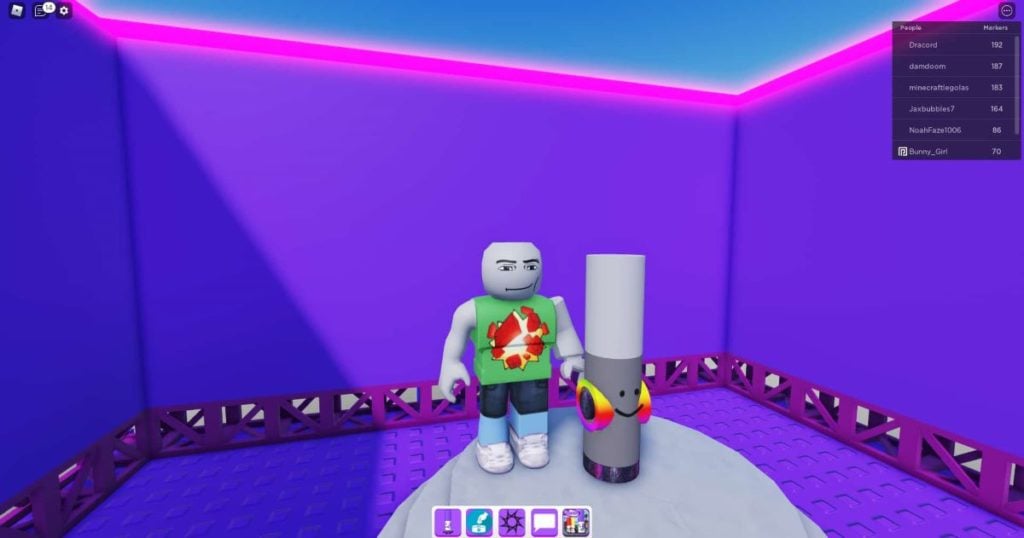
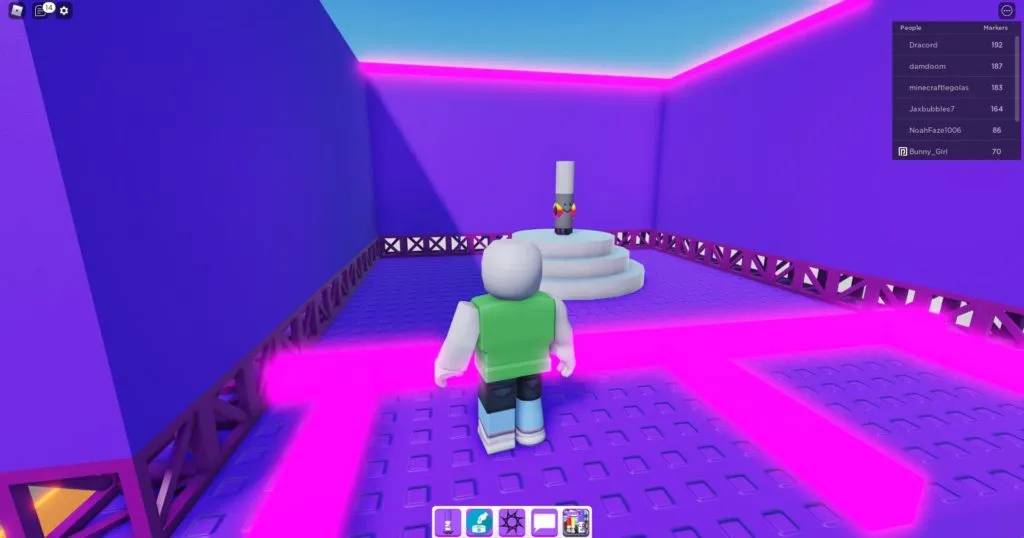
After entering the blue lobby, you can then enter the purple one. The channel stated that this lobby is literally a nightmare, as you will fall down anytime if you don’t be careful when jumping. Once you pass any obstacles in the purple lobby, you will then find the Difficulty Chart Marker in one place where this hard obby is standing on a circle stage.

Congratulations! You successfully find the Difficulty Chart Marker after passing any obstacles ahead. If you need more YouTube videos to guide you on how to find the Difficulty Chart Marker, you can try to watch the following YouTube videos:
-
- A video entitled ‘How to get DIFFICULTY CHART MARKER in Find The Markers’ uploaded by Matthews Goated channel that you can watch here.
- A video entitled ‘ROBLOX FIND THE MARKERS DIFFICULTY CHART OBBY!’ uploaded by TussyPlays channel that you can watch here.
- A video entitled ‘How to get Difficulty chart marker in Find The Markers | ROBLOX’ uploaded by the Nicky64 channel that you can watch here.
- A video entitled ‘How to get the difficulty chart marker in find the markers roblox!’ uploaded by the Brutal Boss channel that you can watch here.
- A video entitled ‘Find the Markers – Difficulty Chart Marker’ uploaded by Cookie Dispenser channel that you can watch here.
How to Find All Markers in Roblox Find Markers?
The goal of Roblox Find Markers is to get the markers as much as possible. As we’ve mentioned, the markers available in this game are roughly 150 scattered all over 12 regular Biome maps and 6 Washable Kingdom areas.
Certainly, there are certain tricks you can take to get the markers in each area. As Washable Kingdom is a main objective to find the 18 hidden markers. We think it would be better to explore the Washable Kingdom areas.
In Washable Kingdom areas, each marker will have its own theme that can hint where you should look for each one. It is known that the first few items will be easy to find, since you can continue to uncover more.
You can look for the easy-level marker called the Torch Marker (1) that is within the towering stone structure on the east of the map. You can then find Dragon Marker (2) in a room on the right.
You can find King Marker (3) by entering the Castle in the center of Washable Kingdom and need to walk straight down the hallway. You can then find the Mud Marker (4) in the swamp area to the southeast of the map. Then, the Periwinkle Marker (5) can be found in the flower bed right beside the spawn point.
You need to find the Archer Marker (6) in the archery range to the right of the central Castle. The Firefly Marker (7) can be found by returning to the swamp and then jumping on the southernmost lily pad in the water.
The Princess Marker (8) is hidden in the bush directly south of the respawn point. You can then find the Lilypad Marker (9) in a secret underground room that can be accessed by jumping on the only lilypad with flowers in the swamp area. Then, the Primrose Marker (10) can be found by checking the market stalls on the western side of the map.
Well, those are 10 Markers that you can find in Washable Kingdom areas, Certainly, there are 8 remaining markers that you can find in this area, but we only share some of them.

AUTHOR BIO
On my daily job, I am a software engineer, programmer & computer technician. My passion is assembling PC hardware, studying Operating System and all things related to computers technology. I also love to make short films for YouTube as a producer. More at about me…

Таблица сложности Обби, также называемая многими «измерением сложности», представляет собой область в Roblox «Найди маркеры» за пределами материка, содержащую один из самых сложных маркеров, которые когда-либо существовали.
Маркер таблицы сложности, один из трех предметов коллекционирования уровня Markerous в игре, является наградой за преодоление чрезвычайно сложной платформы с препятствиями в измерении сложности. Маркер Malding или даже маркер Sunlight не соответствуют ярости игроков, которую большинство игроков, вероятно, испытают при попытке получить этот Markerous Markerous.
Разблокировка таблицы сложности Obby в Roblox Find the Markers

Чтобы разблокировать и войти в измерение сложности Obby «Таблица сложности» в Roblox Find the Markers, вы должны войти в скрытую комнату в пещере Горы, биоме, граничащем с Лесом на Материке. Начиная со Спауна, идите к Горе и используйте деревянные доски впереди, чтобы подняться ко входу в грот.
Оказавшись внутри, спуститесь на нижний уровень и войдите в темный вход в шахту. Вы окажетесь в секретной комнате с гигантской клавиатурой, где вы должны ввести правильный пароль, чтобы телепортироваться в измерение сложности в Roblox Find the Markers.

Пароль для разблокировки таблицы сложности Obby — «difficulty». После ввода этого слова вы должны нажать Enter, чтобы мгновенно телепортироваться в измерение сложности в Roblox Find the Markers. На протяжении всего курса есть несколько уровней, которые вы должны пройти, чтобы достичь маркера таблицы сложности, начиная с легкого.
В нашем случае мы смогли добраться до «Ужасающего» за десять минут и около двадцати смертей. Не забудьте включить «Shift Lock» в настройках; в противном случае пройти несколько областей невозможно. Однако в итоге мы застряли в Ужасе и не смогли пройти опасную зону после 70+ смертей. Излишне говорить, что уровень сложности в Find the Markers определенно не для слабонервных.
Find the Markers is a huge Roblox “find the” passion project. With 200 markers to collect, dedicated completionists will find satisfaction with the abundance of easy and difficult ones to obtain. But of all the markers, there is one that ascends above the rest in terms of difficulty. The insanely difficult Difficulty Chart Marker is one of two markerous difficulty markers – and for good reason. Here is your guide on finding the markerous difficulty Difficulty Chart Marker in Find the Markers.
Finding the Difficulty Chart Marker in Find the Markers
Travelling to the Difficulty Dimension
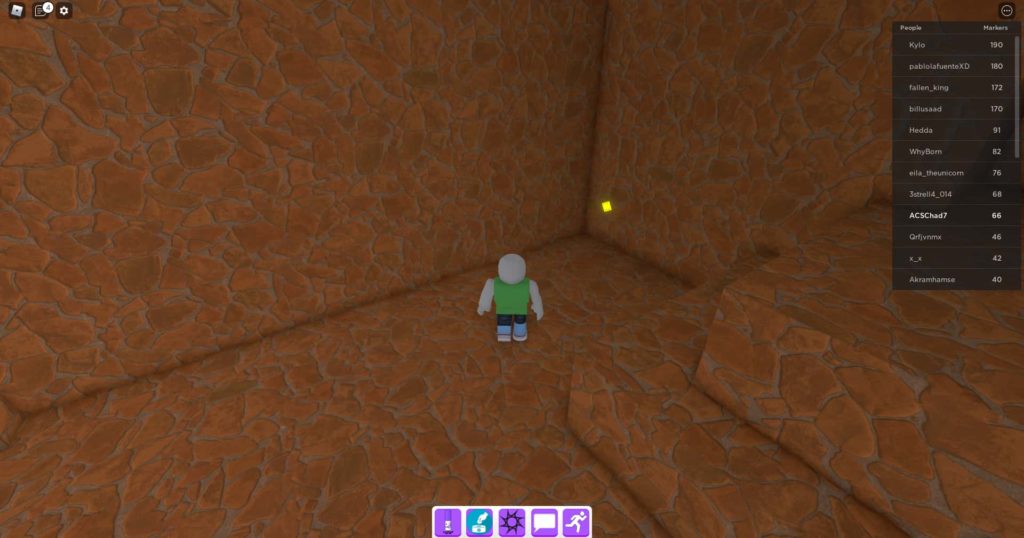
Ironically, it is not difficult to access the difficulty dimension. You must travel to the cave inside the mountain by climbing the wooden ladder, past the chicken eggs. In the corner of the shallow cave is a diamond-shaped button. Press it. Nothing will visibly happen (aside from the button turning yellow), but you have just unlocked a gate.
Turn around, to the alcove with suspiciously nothing in it and walk into it. You will be teleported to a dark room with a marker in it and a white keyboard on the wall. You must type in the password ‘Difficulty’.

You will be teleported to the infamous difficulty dimension. Prepare yourself.
Related: How to find the Zen Marker in Find the Markers
Navigating the Difficulty Dimension
The Difficulty dimension is home to five markers, but the Difficulty Chart Marker is the most sought after. You must complete the obby in front of you – which is easier said than done, trust me. There are numerous stages which exponentially ramp up in difficulty. You will dodging kill blocks, wall jumping through wall trusses, navigating a maze, and trying not to bang your head against the wall repeatedly.
At the end of the obby lies the Difficulty Chart Marker, almost mocking you.
A word of advise – do not give up, as tempting as it may seem. With each defeat, your hand and brain muscles are gathering a muscle memory, so, over many attempts, you will actually find a general positive trend.
Also, as annoying as it sounds, take a few minute breaks every now and then. It is frustrating, but it will actually improve your general performance and give your muscles a moment to get used to the movements required.
Once you have completed the obby (well done, by the way), you will be able to claim the infamous Difficulty Chart Marker. Give yourself a pat on the back and keep your eyes on Gamer Journalist for more Roblox content!
About the author
Хотя «Найти маркеры» может показаться просто еще одним опытом в стиле охоты за мусором, на самом деле он предлагает довольно сложную карту с более чем несколькими сложными секретами, которые нужно найти. В измерении сложности есть пять маркеров, которые игроки могут обнаружить, в том числе тот, который мы рассмотрим в этом кратком руководстве, Маркер опасности.
После того, как вы появились в Find the Markers, направляйтесь к лесу на карте и подойдите к его большой горе.

У подножия этой горы находится импровизированная деревянная лестница — поднимитесь по ней и войдите в пещеру, к которой она ведет.


Когда вы войдете в эту пещеру, вы должны заметить темный туннель с двумя фонарями в начале.

Войдя в этот туннель, вы попадете в секретную комнату со стеной из букв. Чтобы продолжить движение к маркеру Killbrick, нажмите на буквы D, I, F, F, I, C, U, L, T и Y в указанном порядке, чтобы составить мир. СЛОЖНОСТЬа затем нажмите кнопку Войти кнопка. Если вы ввели код правильно, вы будете автоматически телепортированы в Измерение сложности.


Чтобы получить маркер опасности, игроки должны достичь безумный уровень сложности измерения сложности и найти секретный выход в темном лабиринте. Чтобы начать это путешествие, идите и прыгайте через легкий уровень для достижения средний.

Выжить средний, вам нужно будет перепрыгнуть через набор скользких плиток и добраться до платформы выше. Если вы соскользнете и упадете насмерть, вы будете перезапущены в начале легкий уровне, так что будьте осторожны! Как только вы добрались до начала испытывающий уровне, прыгайте через небольшой зазор и на первый уступ перед вами.


Теперь выпрыгните и поднимитесь с этого уступа, чтобы добраться до следующего, и повторяйте эту стратегию, пока не окажетесь на вершине стены.

Отсюда перепрыгивайте светящийся кирпич-убийцу, обходите небольшие стены и идите к началу жесткий уровень.

Подобно средний уровень, жесткий Уровень использует гладкую основу в качестве первого препятствия, из-за чего сложно избежать светящихся квадратов-кирпичиков, когда вы пытаетесь прыгнуть между ними. Чтобы легко преодолеть это препятствие, мы рекомендуем бежать и прыгать через него одним быстрым движением, а не пытаться прыгать и останавливаться несколько раз. Если вы можете набрать солидный импульс, вы сможете бегать и прыгать между квадратами, не задев ни одного из них.
Связанный: Как получить мимический маркер в Roblox Find the Markers
Как только вы доберетесь до конца первого препятствия, вы сразу же столкнетесь со вторым, для которого вам нужно прыгнуть и зацепиться за горизонтальную лестницу, а затем проскользнуть к небольшой платформе слева от вас. Хотя опыт говорит об обратном, использование блокировки переключения не требуется. Если вы обнаружите, что просто повернуть камеру и двигаться влево проще, чем использовать блокировку сдвига, это тоже может сработать.


Чтобы добраться до этой небольшой платформы, либо спуститесь по лестнице, используя клавишу движения вниз, либо нажмите кнопку Пробел спрыгнуть. Затем просто пройдите по тонкому мосту, чтобы добраться до входа в сложно уровень.

На этом уровне используются те же препятствия, что и на жесткий, горизонтальная лестница, но поднимает ее на ступеньку выше, заставляя игроков перепрыгивать через большой промежуток с одной лестницы на другую. Опять же, если блокировка переключения передач для вас проще, включите ее, но если нет, не стесняйтесь оставить ее выключенной. Просто убедитесь, что двигаться в своем собственном темпе!

После того, как вы преодолеете препятствие с лестницей, вы практически окажетесь в конце пути. сложно уровне — все, что осталось сделать, это перепрыгнуть через несколько кирпичиков-убийц. Перепрыгнув через третий кирпич, вы должны оказаться перед безумный уровневый вход.


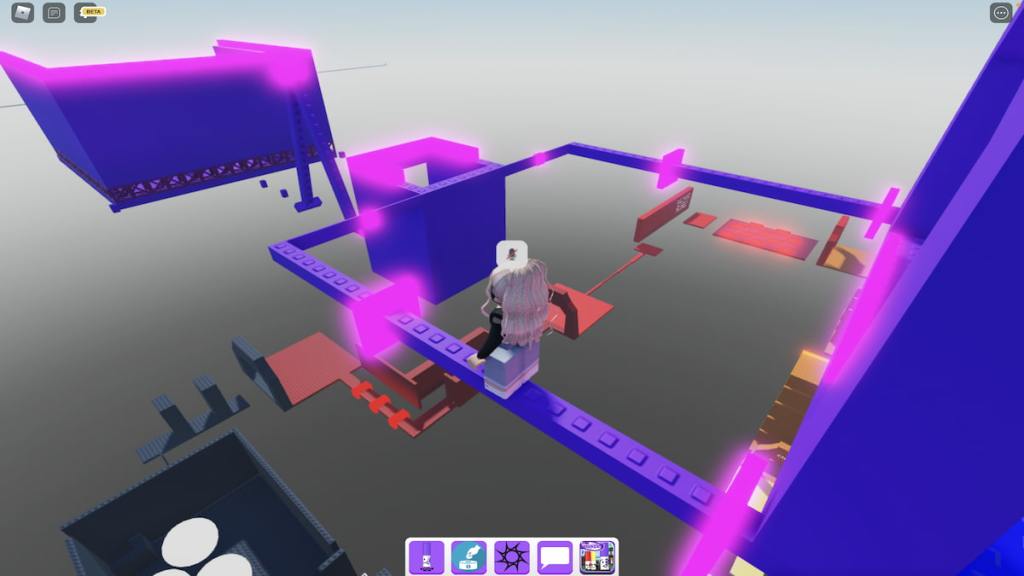
Как видно из изображения выше, безумный уровень в основном содержится внутри здания, а не разбросан по различным платформам. Вам нужно будет перепрыгнуть через две стены с препятствиями, через два тонких кирпича-убийцы, а затем через прозрачный вход в здание, чтобы добраться до этого здания.

Внутри этого здания находится исключительно темный лабиринт, который может привести вас к два разных выхода, один из которых ведет вас к остальной части стандартной полосы препятствий, а другой телепортирует вас на полосу препятствий Маркера опасности. На изображениях ниже показан путь, по которому вам нужно пройти, чтобы найти секретную полосу препятствий Danger Marker. Чтобы помочь вам лучше видеть путь, мы увеличили яркость этих изображений — к сожалению, внутри лабиринта не так ярко!
Как только вы прыгнете через прозрачный вход, поверните налево и идите прямо, пока не упретесь в стену. У этой стены поверните направо.

Продолжайте движение прямо, а затем поверните направо, прежде чем столкнуться со следующей стеной.

Теперь снова идите прямо, пока не дойдете до первого поворота слева. Возьмите этот поворот и продолжайте идти вперед.

Связанный: Как получить Vitellary Marker в Roblox Найти маркеры
Через несколько шагов вы должны увидеть поворот направо — игнорируйте этот поворот, продолжайте движение вперед, а затем поверните налево.

Как только вы повернете за этот угол, вы должны увидеть вдалеке белую лестницу. Подойдите к этой лестнице и используйте ее, чтобы спуститься на этаж ниже.

Оказавшись на нижнем этаже, идите вперед, поверните налево за угол, а затем сразу же поверните направо.


На этом Т-образном перекрестке поверните налево, а затем снова поверните налево.


На следующем перекрестке повернуть направо.

Отсюда идите вперед и поверните налево.

Повернув налево, вы должны увидеть желтый свет на расстоянии. Подойдите к этому желтому свету, чтобы найти телепорт Маркер опасности. Войдите в этот телепорт, чтобы попасть на полосу препятствий «Маркер опасности».

Чтобы начать эту полосу препятствий, вам нужно нажать Е на кнопку с надписью Активировать ОПАСНОСТЬ.

После нажатия этой кнопки дверь полосы препятствий откроется, что позволит вам начать первую попытку ее прохождения. Однако имейте в виду, что это, по нашему мнению, самая сложная задача из всех «Найти маркеры». Даже по сравнению с победой над Dark Markery или поиском Marker Chomik, которые мы успешно выполнили, этот obby берет верх.
Чтобы найти маркер опасности, игрокам нужно будет ходить, прыгать, карабкаться, балансировать, переключать блокировки и избегать смерти под любым углом, одновременно обгоняя движущуюся стену смерти. Звучит легко, правда?

Чтобы лучше понять, как выполнить этот обби, посмотрите видео ниже от NoobBlox.
После того, как вы завершили обби и достигли маркера опасности, его можно добавить в ваш маркердекс, просто подойдя к нему и коснувшись его. Когда, или, что более реалистично, мы, наконец, разблокируем этот маркер, мы соответствующим образом обновим это руководство с нашими собственными изображениями. Мы просто должны продолжать попытки!
Ищете больше контента Find the Markers? Ознакомьтесь с нашими недавними руководствами о том, как получить маркер зелий в Roblox, найти маркеры или как получить маркер дзен в Roblox, найти маркеры здесь, в руководствах по играм!