If you are using the Exchange Server to manage your emails, then you do not need to know the address of the Exchange Server as it is quite robust to manage the environment itself. But some circumstances such as bad Exchange Server performance, need to create a new Outlook profile or configure Exchange Server account again force you to locate the address of your Exchange Server account and use the details.
Exchange administrators can utilize the Exchange Management Shell to get the Server details by running the following cmdlet.
Get-ExchangeServer
This command would display the attributes of the Exchange Server as the result.
After finding your Exchange Server address, user can utilize the Exchange Server address to fix issues with the incoming and outgoing messages.
There are other easy ways to find the Exchange Server address as described below.
Using Microsoft Outlook
Here is the simple procedure to know the Exchange Server address of your account;
- When an Outlook application is connected with the Exchange, then you can identify the connection by checking the status shows as ‘Connected to Microsoft Exchange’ at the bottom of the Microsoft Outlook home page.
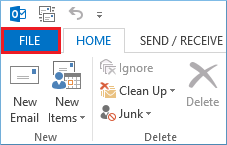
- Now click the File option present at the top left-hand side.
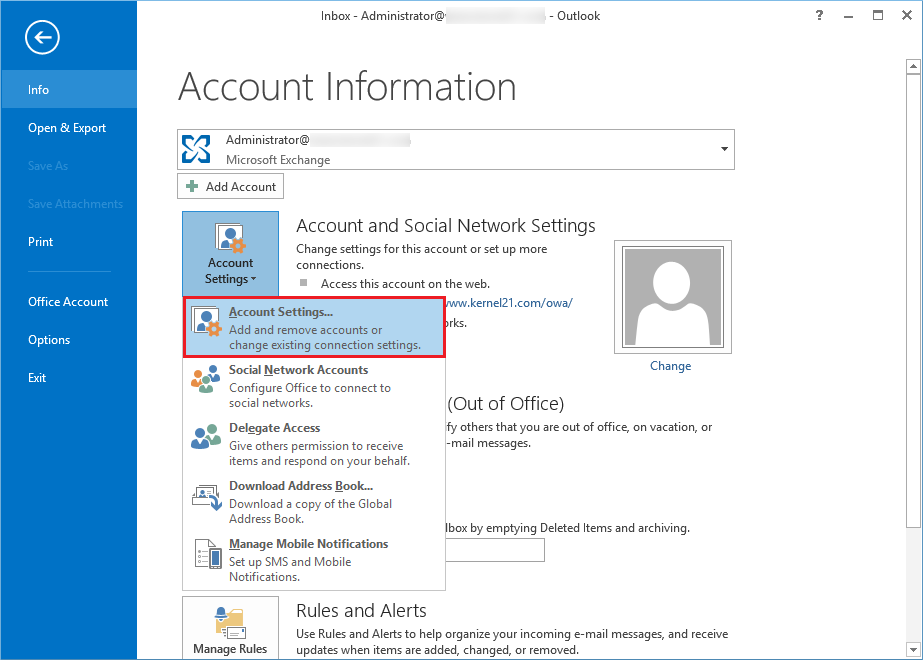
- In the Info category, click Account Settings, and again click Account Settings.
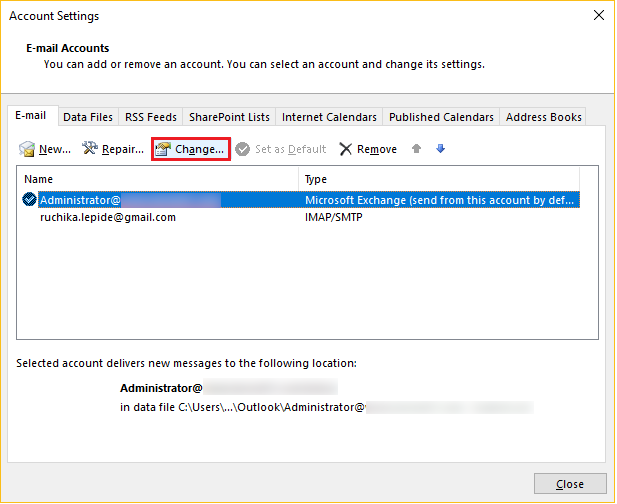
- Select your Exchange Server account and click Change.
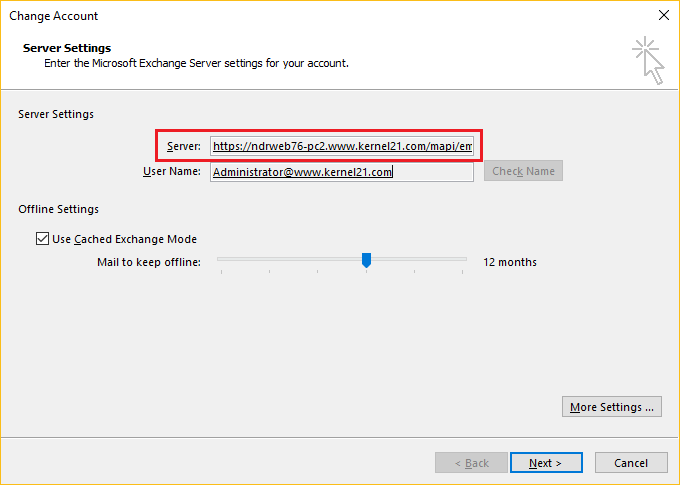
- In the Server Settings, check the Server field where the full Exchange Server address is displayed to you.
Using Outlook for Mac
For the Outlook for Mac users, you need to follow the steps a little differently;
- Click Outlook, then Preferences.
- Select ‘Accounts.’
- In the details of your account, click the Advanced button.
- In the Microsoft Exchange Section on the Server tab, you will find the whole server name and address in the Server field.
iPhone Mail
The Outlook is also accessible to your mobile device and the iPhone users will find the Exchange Server Address by following the below steps;
- Click the Settings option in the menu.
- Then select the Mail section.
- Choose the account that is your work mail.
- In the Exchange area, select your account.
- In the Server field, you will find the whole address of your Exchange Server account.
Now you are aware of the address of the Exchange Server, then you can engage with various activities. You can further check the settings of the Exchange Server Settings.
| Setting Type | Setting Value |
|---|---|
| Exchange Server Address | outlook.office365.com |
| Exchange Port | 443 |
| Exchange username | Full account name |
| Exchange Password | Full account password |
| Exchange TLS/SSL Encryption Required | Yes |
Cached Mode
When you had accessed the Exchange Server in the Microsoft Outlook, then you must have seen the cached mode. The cached mode allows you to work on account’s messages even when there is no active connection with the Exchange Server. This offline mode is called the cached mode.
Outlook saves a copy of all your emails and contacts in the offline file in the computer in the OST (Offline Storage Table) file. The OST file is actively synchronized with the Exchange Server connected with your organization. The OST file is the exact copy of your Exchange Server mailbox.
If you connect the Exchange Server with any other account on a different computer, then it will create a new OST file again, so you do not need to have a backup file on your computer. Similarly, you can use the OST file to open your mailbox data to another Outlook application in a different account.
When your organization chooses the Exchange Server to manage your emails, then there are following types of email account that the Exchange Server will support;
Exchange ActiveSync
In the Exchange ActiveSync, there are MAPI/HTTP methods to access the emails from any remote device like a smartphone, tablet, or laptop. When you access your Exchange emails, then you are not downloading them to your system, but are accessing them from the Exchange Server itself. ActiveSync also allows you to access your emails even when you are not connected to the Internet.
IMAP
IMAP follows the same suite of the ActiveSync that allows you to access your emails from any remote device like laptop, tablet, or smartphone. Here you are accessing the emails from the Exchange Server rather than downloading them to your system.
Moreover, the IMAP account synchronizes all your account’s emails, deleted items, sent items with the Exchange Server. It also facilitates you to with limited calendar storage, but you cannot collaborate your calendar entries with another.
POP
The POP account has limited functionality than the previous two. When you are accessing your emails from the Exchange Server in the POP account, then you are downloading the email to your local computer. Then the email is deleted from the Server. Now you can access the email at the local computer only. When you access the email account from any other computer, then you will not find the deleted email there.
You can launch Outlook Web Access (OWA) email client which can be used to know the Exchange Server address. The navigating path as follows-
Settings > Mail > Options > Mail > Accounts > POP and IMAP > Please note down values from POP Setting and IMAP Setting.
There are some following secure troubleshooting methods which any user can perform without dependency on Exchange Administrator.
- Restart your Outlook: It’s very easy method to resolve the connection issue. If restarting your Outlook does not work, then you can restart the computer. At times, when the Internet is slow down, the connection between Outlook and Exchange Server also does not establish. So, after restarting the Outlook may fix the connection issue. If this method does not work, then move to the other troubleshooting method.
- Run a repair installation: If you want to remove the connection issues, you can run a repair installation from the Control Panel. Steps are as follows –
- First close the Outlook application and open the Control panel.
- Click on Programs and Features.
- Select Microsoft Office and then click Change.
- Click on Repair and then select Continue.
- After completion of the repair process restart the computer.
- At last Run Outlook and check its connection status.
- Disable the offline mode: Sometimes, the user set the Outlook mode to the offline by mistake; it stops all incoming and outgoing emails. So, you need to disable outlook mode option and connect Outlook with Exchange. Steps are as follows-
- Click on the Send/Receive option on the menu.
- Go to the Work Offline button and click on it.
- Now the Outlook will change to ‘Trying to Connect’ from ‘Offline.’ After some time it will shows connection between outlook and exchange.
- Create again the OST file: The OST file is stored on the local computer, so high chance that it may get corrupt due to any virus attacks or hardware issues. A corrupt OST file can cause the Outlook application connecting failure with Exchange Server. So, you need to recreate the OST file again, and it may resolve the connection failure issue of the Outlook. Steps are as follows-
- Open Control Panel and select the Mail option.
- Now click on the E-mail Accounts option.
- Then select your account and click Open File Location to locate OST file. It will redirect to the location of the respective OST file.
- Now select the OST file, right-click on it and then select the Delete option.
At last start the Outlook again. After recreating the OST file it allow you to connect with Exchange Server.
Finally
Exchange Server is a robust and self-dependent platform to manage your professional emails effectively. You will hardly find any issue related to its security or management. But whenever there are issues in the Exchange, then you should never take chances with your precious emails and use the professional assistance from any export. You can either consult with the Exchange Server expert or use any third-party Exchange Server Recovery software to recover the data.
Download Now
Read Related Blogs
- Perform Soft & Hard Exchange Recovery using Eseutil Commands
- Free Methods to Convert Exchange EDB to PST File
- Cached Exchange Mode in Outlook & How to Enable or Disable?
- On-Premises Exchange Vs Microsoft 365 Differences
- Quick Fix for Exchange Server is Unavailable Error

Read time 5 minutes
Microsoft Exchange Server handles the substantial amount of business communication of enterprises and allows them to get emails without any latency. But, when there is an issue related to the performance of Exchange, then Outlook users need to run some troubleshooting like creating a new Outlook profile. Sometimes, they need to know the address of the Exchange Server too. In the present article, we will go through how to find out Exchange Server address; also, we will go through some simple methods for resolving our common connectivity issues.

Instant Solution
Try automated tool Kernel for OST to PST Converter recover data from corrupt or inaccessible OST file and make its accessible again.
Find Exchange Server Address
- Start the Outlook. When Outlook has an active connection with Exchange Server, then it shows its status as ‘CONNECTED TO: MICROSOFT EXCHANGE.’ Ensure this connection to proceed further in the process.
- Click the File option on the menu.
- Click Account Settings>>Account Settings.
- Here, select the Exchange Account with the Server name you want to check and click Change.
- In the Server Settings section, you can see the full name of your Exchange Server.
![]()
Outlook Web Access (OWA) email client can be used as well. So, how to find out exchange server address with OWA. You just need to navigate to
Settings>Mail>Options>Mail>Accounts>POP and IMAP>note down values from POP Setting & IMAP Setting.
Or you can run the following command in the Exchange Management Shell run as administrator to get all attributes of the Exchange Server including the address.
Get-ExchangeServer
After accessing your Exchange Server address, you can utilize it to fix issues with the incoming/outgoing messages. But in some conditions, Outlook faces problems in connecting with Exchange Server, and you keep shuffling between different methods to remove the problem. All in all, Get-ExchangeServer cmdlet is one of the best ways to get all the answers on how to find Exchange Server name and other related attributes.
Let’s go through some secure troubleshooting methods which any user can perform without being dependent on Exchange Administrator.
1. Restart Outlook
It is the simplest method to resolve the connection issue. If restarting Outlook does not work, then restart the computer. Many times, when the Internet is down, the connection with the Outlook and Exchange Server also does not establish. So, restarting the Outlook should fix the connection issue due to minor connection related problems. When restarting Outlook does not work, then move to the next troubleshooting method.
2. Disable the offline mode
Generally, the users set the Outlook mode to the offline mode unknowingly, and it stops emails from incoming and outgoing. So, you should disable this option and connect Outlook with Exchange.
- Click the Send/Receive option on the menu.
- Go to the Work Offline button and click it.
- The status of the Outlook will change to ‘Trying to Connect’ from ‘Offline.’ Soon it will show the status as ‘CONNECTED TO: MICROSOFT EXCHANGE.’.’
3. Run a repair installation
You can run a repair installation from the Control Panel to remove the connection issues.
- Close the Outlook application and go to the Control panel.
- Click Programs and Features.
- Select Microsoft Office and click Change.
- Click Repair and then select Continue.
- Restart the computer after completion of the repair process.
- Run Outlook and check its status.
4. Recreate the OST file
Because the OST file is stored on the local computer, there are high chances that it may get corrupted due to any malware or hardware issues. A corrupt OST file can stop the Outlook application from connecting with Exchange Server. So, you can recreate the OST file again, and it may remove the connection issue of the Outlook.
- In the Control Panel, select the Mail option.
- Click the E-mail Accounts option.
- Select your account and click Open File Location. It will take you to the location of the respective OST file.
- Select the OST file, right-click it, and select the Delete option.
- Start the Outlook again. It will recreate the OST file and allow you to connect with Exchange Server.
5. Use the Scanpst tool to repair the corrupt PST file
Outlook offers a default scanning tool called scanpst.exe which repairs the PST file from minor corruption-related issues. You can run the tool and scan the PST file. It will check for errors and will prompt you to fix it if it finds any corruption.
You can find the Scanpst at the following location:
- Outlook 2019 – C:Program Files (x86)Microsoft OfficerootOffice16
- Outlook 2016 – C:Program Files (x86)Microsoft OfficerootOffice16
- Outlook 2013 – C:Program Files (x86)Microsoft OfficeOffice15
- Outlook 2010 – C:Program Files (x86)Microsoft OfficeOffice14
- Outlook 2007 – C:Program Files (x86)Microsoft OfficeOffice12
Conclusion
When Outlook is not connecting to Exchange due to corruption in the data file, then you should not remain dependent on the manual troubleshooting methods which only check for the error but do not provide any concrete solution. Kernel for OST to PST Converter is an outstanding solution which can recover data from corrupt, orphaned, or inaccessible OST files and make its content usable again. You can save the recovered data in a PST file and access it in Outlook.
FAQs
Q- What is the Exchange server address URL?
A- To access your Exchange server, you’ll need the server address URL. This URL is essentially the link to your server’s web portal where you can manage your email, calendar, & other features. By default, the Exchange server address URL contains the fully-qualified domain name (FQDN) of your server in the format https://<ServerFQDN>/ecp. This means that once you input this URL into your web browser, it will direct you to your Exchange server’s Electronic Control Panel (ECP).
Q- Where is the Exchange server default location?
A- If you’re using Exchange 2016 or Exchange 2013, the default location of the server should be C:Program FilesMicrosoftExchange ServerV15. But if you’re working with Exchange 2010, then the default location would be C:Program FilesMicrosoftExchange ServerV14.
More Information
- OST to PST conversion – The best way to repair and recover OST files data
- How to Relocate OST File Location Through Easy Steps
- Solve ‘Oversized’ OST File issues in Outlook using Manual Tricks
- Free Methods to Convert OST to PST File
Outlook. Определить активный сервер Exchange
Чтобы узнать к какому серверу Exchange в данный момент подключен Outlook используете команду для Powershell
Get-NetTCPConnection -OwningProcess $((Get-Process outlook).id)
Так же можно узнать используемый сервер для удаленного компьютера в вашей сети:
$ComputerName = "ComputerName"
Get-NetTCPConnection -CimSession $ComputerName -OwningProcess $((Get-Process -ComputerName $ComputerName outlook).id)
Записки администратора

Иногда, при составлении отчетов, требуется получить список серверов Exchange в организации или убедиться, что все они доступны(пингуются) с определенного сервера или вашего компьютера. Существует масса способов, но поскольку у вас наверняка уже открыт Exchange Management Shell, то сделать это можно одной строчкой PowerShell.
Нижеприведенный one-liner получает список Exchange серверов в организации, сортирует их по имени и пингует каждый сервер из списка. Команда format-table -autosize форматирует полный вывод столбцов.
[PS]C: (get-exchangeserver |sort -property name|
              foreach { Test-Connection -CN $_.fqdn -Count 1 -BufferSize 16 })|
format-table -AutoSize

Source   Destination            IPV4Address IPV6Address Bytes Time(ms)
------   -----------            ----------- ----------- ----- --------
Server11 Server11.exchangefaq.ru 100.100.18.4    {}          16    175
Server11 Server21.exchangefaq.ru 100.100.18.3    {}          16    183
Server11 Server22.exchangefaq.ru 100.100.18.5    {}          16    191
Server11 Server26.exchangefaq.ru 100.100.22.5    {}          16    190
Server11 Server27.exchangefaq.ru 100.100.21.6    {}          16    195
Server11 Server24.exchangefaq.ru 100.100.23.14   {}          16    20
Server11 Server25.exchangefaq.ru 100.100.180.11  {}          16    22
Server11 Server20.exchangefaq.ru 100.100.21.13   {}          16    7
Server11 Server12.exchangefaq.ru 100.100.1.1     {}          16    0
Server11 Server14.exchangefaq.ru 100.100.1.2     ::1         16    0
Server11 Server23.exchangefaq.ru 100.100.1.3     {}          16    0
Server11 Server29.exchangefaq.ru 100.100.1.18    {}          16    0
Можно воспользоваться командлетами для работы с AD и получить IP адреса, пропинговать любые компьютеры в сети.
В начале нужно подгрузить модуль работы с AD
Import-module ActiveDirectory
Затем запустить one-liner, который выбирает из AD компьютеры, содержащие «*DC*», так в моем лабе маркируются домен контроллеры.
[PS] C:>(get-adcomputer -filter 'name -like"*DC*"' |sort -property name|
 foreach{ Test-Connection -CN $_.DNSHOSTNAME -Count 1 -BufferSize 16 })|format-table -AutoSize
p.s. мне подобная информация потребовалась, когда нужно было получить IP адреса всех домен контроллеров в сети, а вспоминать их имена и узнавать IP путем пинга было просто лень. Оказалось, что в powershell это сделать проще пареной репы.
Связанные записи:
When connecting to an Office 365 mailbox, Forensic Email Collector automatically determines the EWS URL. However, if you are connecting to an on-premises Exchange server or an Exchange server hosted by another provider, you will need the EWS URL.
The EWS URL looks something along these lines:
https://mail.domain.com/EWS/Exchange.asmx
You can use several methods to find the EWS URL:
1. Using Exchange Autodiscover
Forensic Email Collector has built-in support for Exchange Autodiscover. You can use Autodiscover by entering the username and password, and then by clicking on the Autodiscover hyperlink. FEC will attempt to discover both the EWS URL and the target Exchange server version.

Please note that using the Autodiscover service requires the DNS records of the target domain to have been configured for Autodiscover.
Alternatively, you can also use Autodiscover by Ctrl+right clicking the Outlook system tray icon and choosing the Test Email AutoConfiguration… option:

In the Test Email AutoConfiguration tool, enter the target email address and password, and click the Test button.

The tool will perform Autodiscover and report the EWS endpoint URL if available.
2. Using Internal Resources
Typically, the IT representative that manages the Exchange server should be able to provide you with the EWS URL.
3. Using Exchange Management Shell
Another alternative is to open Exchange Management Shell on the Exchange server and to use the Get-WebServicesVirtualDirectory Cmdlet as follows:
Get-WebServicesVirtualDirectory | Select name, *url* | fl
4. Using A Previously-Configured Account
If available, you can also use an account already configured in an email client to find out what the EWS URL is. For example, opening the account settings in Outlook for Mac, an account set up using EWS looks as follows:

The Server textbox above contains the EWS URL for this account.
5. Using The Hosted Exchange Provider’s Website
Service providers often publish information on their support websites about the EWS URL to help end-users configure their email clients. For example, here is an article from Intermedia:
How Do I Configure Outlook 2011 For Mac To Connect To Exchange Mailbox?
6. Based on Outlook Web App (OWA) URL
You can often find the EWS URL of an organization based on its OWA URL. For instance, if visiting https://mail.example.com/ redirects to https://mail.example.com/owa/auth/logon.aspx, an educated guess for the EWS URL would be as follows:
https://mail.example.com/EWS/Exchange.asmx
Did this answer your question?
Thanks for the feedback
There was a problem submitting your feedback. Please try again later.
Still need help?
Contact Us
Contact Us
Last updated on August 19, 2021