![]() Руны
Руны
Руны
Руны (Runes) — дают новые способности для персонажа, которые в свою очередь позволяют попасть в недоступные места и локации.
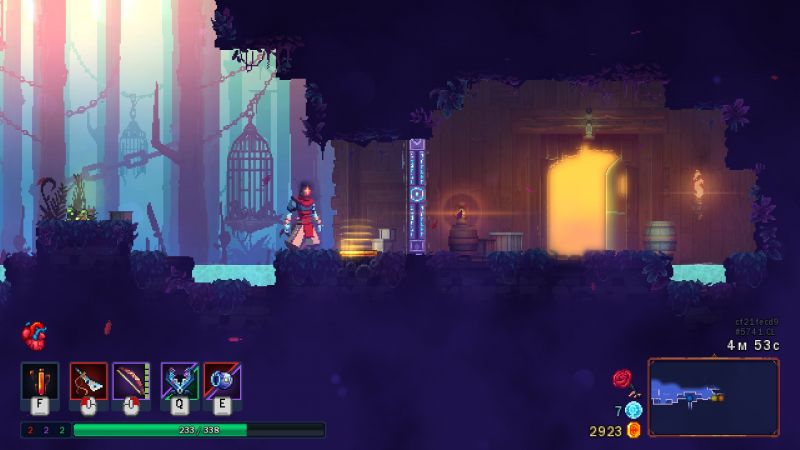
Единственный способ получить руны — это отправиться в определенные локации и победить элитных врагов, которые появляются у некоторых элитных обелисков. После приобретения, собранные руны игрок может просмотреть в правой части экрана в меню паузы в любое время.
| Иконка | Название | Местонахождение | Босс или элитный монстр | Способность | Разблокируемая локация |
|---|---|---|---|---|---|
| Руна лозы (Vine Rune) |
Тропа обречённых |
|
«С помощью этой вечной руны можно вырастить лозу и куда-нибудь забраться. »
Создаёт лозу, которая работает как лестница. |
||
| Руна телепортации (Teleportation Rune) |
|
«С помощью этой вечной руны можно использовать монолиты-телепорты.»
Телепортирует от одного идола к другому. |
Разрушенный дендрарий |
||
| Руна испытаний (Challenger Rune) |
Чёрный мост |
|
«Эта вечная руна открывает доступ к ежедневным испытаниям (В Тюремных камерах).»
Открывает дверь ежедневного забега. |
Ежедневный забег | |
| Таранная руна (Руна Белиера) (Belier’s Rune) |
|
«С помощью этой вечной руны можно проламывать пол в некоторых местах.»
Позволяет разрушать хрупкую землю ударом вниз.(отмечено символом) |
|||
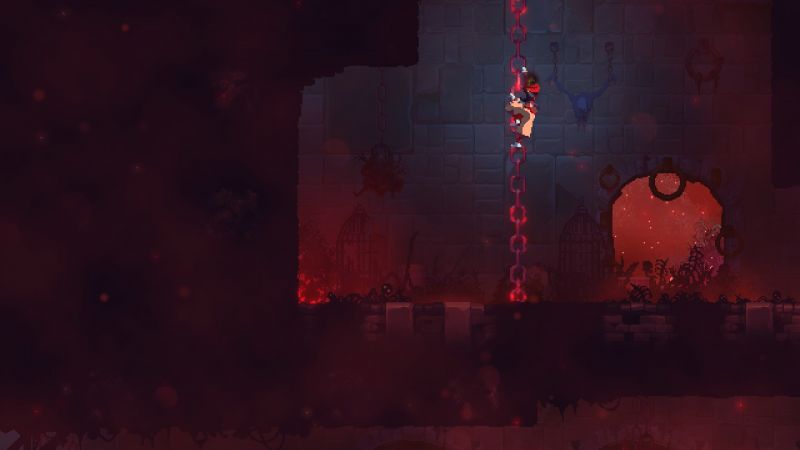
| Паучья руна (The Spider’s Rune) |
|
«С помощью этой вечной руны можно удерживаться на стенах.»
Позволяет ползать по стенам и прилипать к ним на несколько секунд. |
Недра тюрьмы
Оскверненная тюрьма |
||
| Руна гомункула (Rune Homunculus) |
Тронный зал |
|
«С помощью этой вечной руны можно покинуть собственное тело.»
Позволяет покидать тело в форме гомункула. |
— | |
| Особая руна (Customization Rune) |
|
«Эта вечная руна разблокирует особый режим.» | — | ||
| Руна исследователя (Explorer’s Rune) |
|
«»
Открывает всю карту, после того как вы исследовали уже 80% текущей локации. |
— |


Объекты рун
Объекты рун — изначально недоступные предметы окружения, ведущие в секретное место или другую локацию.
Лоза
- Изначально возможно только пощекотать
- Для активации: пощекотать с наличием
 Руны лозы
- Мгновенно вырастает лоза вверх до потолка, по которой возможно взобраться.
- Для активации: пощекотать с наличием
- Открывает: Ядовитые сточные канавы, выход из Тропы обречённых, секретные места.
Телепортирующий идол
- Изначально возможно только потереть.
- Для активации: потереть с наличием Руны телепортации.
- Телепортирует к противоположному идолу.
- Для активации: потереть с наличием
- Открывает: Крематорий, Забытая гробница, выходы из забытой гробницы, секретные места.
Стены

- Изначально за стены никак нельзя зацепиться.
- Для активации: прыгнуть на стены с наличием Руны паука.
- Зацепляется за стену.
- Для активации: прыгнуть на стены с наличием
- Открывает: Тюремные глубины,Дремлющий храм, Кладбище, секретные места.
Хрупкая земля
- Изначально будет при пикировнии гореть красным и не ломаться.
- Для активации: пикировать в место Таранной руны.
- Пол ломается, нанося смертельный урон обломками врагам.
- Для активации: пикировать в место
- Открывает: Ядовитые сточные канавы, секретные места.
Дверь ежедневного забега
- Изначально заперто и не открывается
- Для активации: открыть с наличием Руны испытаний.
- Для активации: открыть с наличием
- Открывает: Режим испытаний в Тюремных камерах.
Прочее
Выход из тела
Способность становится доступной после первой победы над десницей короля.
Для выхода из тела необходимо нажать (R)(стик на NS) и мы покинем обретённое тело в виде аморфной массы, которой постоянно возвращаемся в начале нового забега в сторону направления движения.
- Дальность применения равна от начала до середины комнаты с коллекцией предметов.
- При превышении дальности мы немедленно вернёмся в тело.
- НЕВОЗМОЖНО использовать во время проклятия.
- При применении перед врагом накидывается на голову врага и наносит небольшой периодический урон.
- Игнорирует щиты.
- Позволяет разблокировать рецепты: Мутации Передышка, Общее улучшение Запаса золота V.

В данном гайде расскажу, как найти все руны в Dead Cells. Руны — это важный геймплейный элемент, так как они открывают доступ в другие локации, а также находить чертежи в секретных местах. Но основная загвоздка заключается в том, что игра позволяет их открывать постепенно, за раз обнаружить не получится. По сути требуется специально знать, как их найти, чтобы избежать длительного топтания на одном месте. Всего же рун 8:
- Руна лозы — создает лозу из специального корня;
- Руна телепортации — телепортирует от одного надгробия к другому;
- Руна испытаний — открывает доступ к ежедневным испытаниям;
- Таранная руна — позволяет разрушать помеченный тонкий пол;
- Паучья руна — позволяет ползать, прыгать и держаться на стенах;
- Руна гомункула — открывается возможность выходить из тела, нападать гомункулом на врагов и перемещать турели;
- Особая руна — разблокирует режим тренировки;
- Руна исследователя — раскрывает всю карту, если исследовано 80% локации.

Быстрый переход:
- Руна лозы
- Руна телепортации
- Руна испытаний
- Таранная руна
- Паучья руна
- Руна гомункула
- Особая руна
- Руна исследователя
- Заключение
- Видео
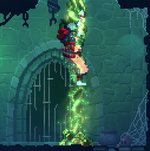
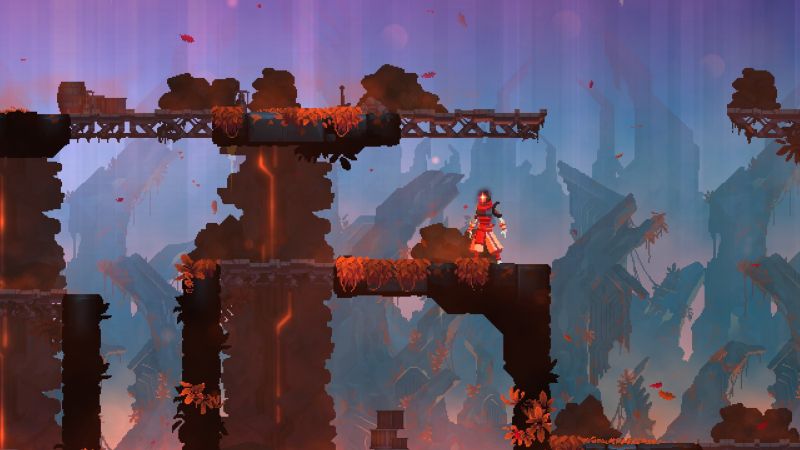
Руна лозы
Для получения руны лозы необходимо добраться до локации «Тропа обреченных». Далее пройдя далее по локации выйдете до места битвы с элитным ожившим лучником, после победы, над которым выпадет руна лозы.

Руна телепортации
Для ее получения требуется отправится в локацию «Ядовитые сточные канавы», тут уже требуется пройти всю локацию и отыскать место битвы с мини-боссом, оно будет обозначено красным флагом с черепом. После победы над элитным Рубакой выпадет руна телепортации.

Руна испытаний
Руна испытаний выпадает после победы над боссом «Привратник» на локации «Черный мост». Ее крайне трудно пропустить, но так как придется встретиться с первым реальным боссом в игре, то ее получение представляется не столько простым как предыдущие.

Таранная руна
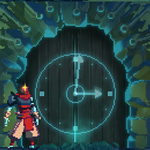
Добыть таранную руну можно только после получения руны телепортации. В локации «Тропа обреченных» нужно перейти в локации «Крематорий», для перехода в конце локации нужно подойти к надгробию и телепортироваться к выходу до крематория. Далее найти место битвы с элитным Рубакой, сама игра вас не проведет, потребуется именно исследовать.

Паучья руна
Необходимо пройти путь по канализационным локациям, важно, что без таранной руны это не получится. Далее уничтожить босса «Конъюктивиус», после чего перейти на локацию «Дремлющий храм». На ней вас сразу поведут к элитному Метателю, с которого, при победе над ним, должна выпасть паучья руна.

Руна гомункула
Данная руна выпадает только после прохождения игры в первый раз. После уничтожения Десницы Короля. Рисовать путь нет смысла, все дороги в игре ведут до финального босса.
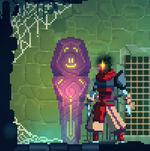
Особая руна
Для ее получения необходимо в локации «Тюремные башни» уничтожить элитного Зомби, который должен встретится в старте локации.

Руна исследователя
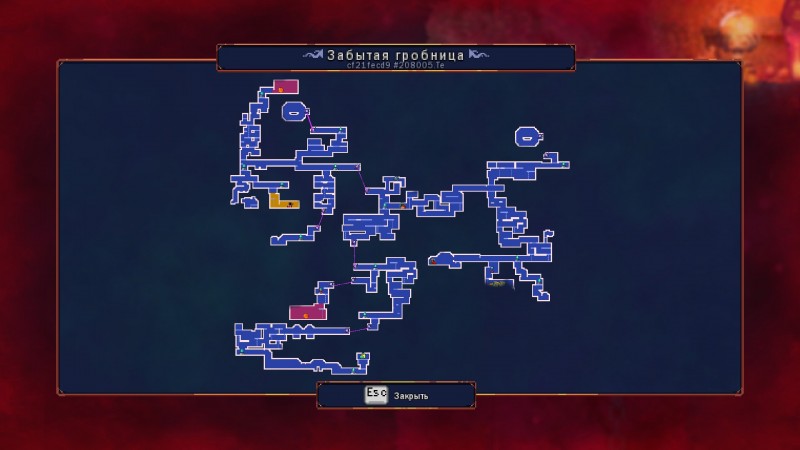
Необходимо добравшись до локации «Заброшенный склеп» найти место битвы с элитным Темным разведчиком. Основная проблема заключается, в том, что в локации постоянно нужно двигаться до источника света, из-за чего можно пропустить нужное место, оно будет помечено красным флагом на фоне.

Заключение
Поздравляю, теперь вы знаете, как найти все руны в Dead Cells. Но мало найти, требуется еще приложить большое количество сил и умений. В ответ попрошу вас поставить лайк и оформить подписку. Тут еще будет выходить много гайдов по Dead Cells. Желаю удачи!
Видео
Руны в Dead Cells являются одними из наиболее важных и полезных предметов в игре, так как они наделяют главного героя уникальными способностями, позволяющими ему попадать в ранее недоступные области и локации. Для полного прохождения игры следует собрать абсолютно все руны.
К сожалению, их нельзя просто найти и подобрать – получить руны можно только путем убийства специальных элитных противников (боссов), появляющихся рядом с некоторыми элитными обелисками. Получив новую руну, вы сможете изучить ее в окошке паузы, ищите в правом углу экрана.
Руна лозы
Даруемый навык: наделяет персонажа возможностью создавать прочные лозы из зеленых капелек, открывая тем самым доступ к новым участкам игрового мира.
Как получить:
- Направляйтесь в локацию под названием Тропа обреченных (Prominade of The Condemned).
- Дойти до Тропы довольно легко – выйдите из начальной зоны и вы тут же окажетесь в нужном уровне.
- В этой области вам предстоит победить элитного врага Нечестивого лучника.
- Уничтожив противника, заберите у него руну, которая откроет вам путь в Ядовитые сточные канавы (Toxic Sewers) и Тюремные башни (Ramparts).
Руна телепортации
Даруемый навык: наделяет персонажа возможностью перемещаться к особым тотемам, открывая тем самым новые локации.
Как получить:
- Первым делом направляйтесь в Ядовитые сточные канавы.
- Для попадания в нужную локацию пройдите в камеры заключенных, а затем воспользуйтесь руной лозы возле входа в канавы (выглядит как кучка слизи).
- Далее начните искать дверь, рядом с которой находится переключатель. Пройдите через нее и сразитесь с Рубакой.
- Уничтожив противника, заберите у него руну, которая откроет вам путь в Крематорий (Ossuary) и Заброшенный склеп (Forgotten Sepulcher).
Руна претендента
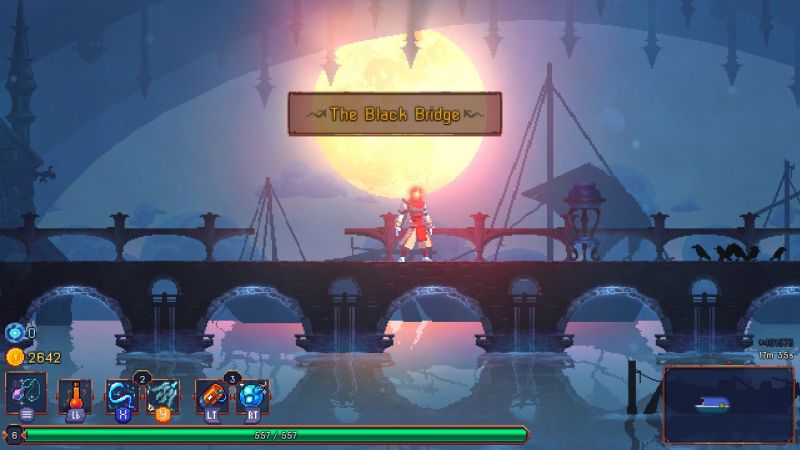
Даруемый навык: наделяет персонажа возможностью открывать дверь, расположенную в камерах заключенных и ведущую в зону с ежедневными испытаниями.
Как получить:
- Доберитесь до Черного моста (Black Bridge).
- Найдите и разберитесь с боссом по имени Привратник (Консьерж).
- Уничтожив противника, заберите у него руну, которая откроет вам путь к Ежедневным испытаниям.
Таранная руна
Даруемый навык: наделяет персонажа возможностью уничтожать хрупкие напольные участки, которые отмечаются специальной желтой иконкой.
Как получить:
- Для начала вам предстоит отправиться в Крематорий.
- Попасть в эту локацию можно из Тропы обреченных. Найдите на этом уровне особый гроб и взаимодействуйте с ним с помощью руны телепортации.
- Оказавшись в нужной зоне, отыщите дверцу, открываемую путем обрушения слабого пола.
- Там вы обнаружите элитного Рубаку. Убейте монстра и заполучите руну, которая откроет вам доступ в Древние сточные канавы (Ancient Sewers).
Руна паука
Даруемый навык: наделяет персонажа возможностью лазать по стенам как самый заправский Человек-паук. Жалко только паутиной пострелять не дадут.
Как получить:
- Вначале вам нужно будет попасть в Дремлющий храм (Slumbering Sanctuary), а для этого придется пройти через Невыносимую гробницу (Insufferable Crypt).
- Попасть в Невыносимую гробницу можно следующим образом: сначала идите в Ядовитые сточные канавы, потом спуститесь в Древние сточные канавы и отыщите там место, где можно разрушить пол, а затем просто идите вперед.
- В Невыносимой гробнице вам предстоит сразиться с Конъюктивусом (Наблюдателем) и победить его. Сделать это довольно непросто, поэтому мы опишем битву с ним чуть ниже.
- Расправившись с врагом, направляйтесь в Дремлющий храм и уничтожьте там элитного Метателя сфер. В результате вы получите руну, которая откроет доступ к Кладбищу (Graveyard) и Недрам тюрьмы (Prison Depths).
Как победить Конъюктивиуса
Этот босс представляет собой шарообразного монстра с огромным глазом посередине. Когда цвет его глаза меняется, он применяет разные способности, например, при зеленом – стреляет кислотой в разные стороны, а при фиолетовом – делает резкий рывок вперед и выпускает шипы.
Не стойте рядом с Наблюдателем слишком долго, так как он может создать небольшое электрическое поле вокруг себя. Когда опустятся все платформы, можете даже не пытаться поранить его, так как он становится неуязвимым – вместо этого начните уничтожать его щупальца.
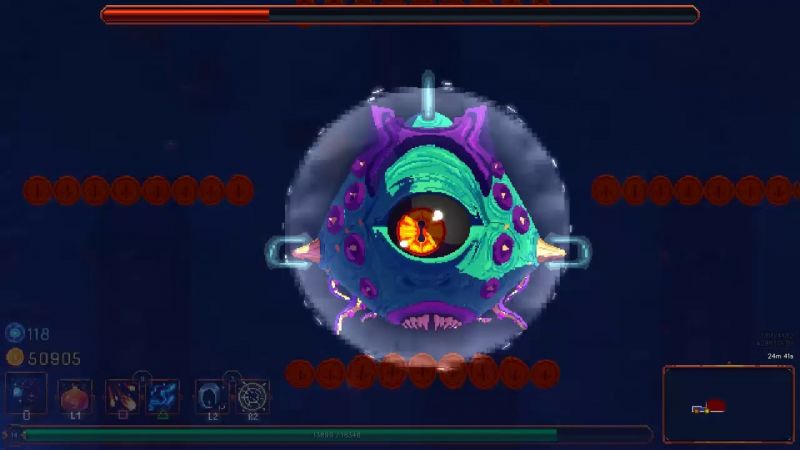
Вообще этого противника можно поймать на капкан или заморозить. К тому же против него хорошо срабатывают луки, электрический хлыст и факел. Щупальца тоже можно поймать капканами, плюс, их удары парируются.
Кстати, даже при нахождении под землей щупальца у Наблюдателя могут получить такие негативные статусы как кровотечение, горение и отравление, поэтому не забывайте постоянно накладывать их.
Руна гомункула
Даруемый навык: наделяет персонажа возможностью выйти из тела и закончить тем самым игру.
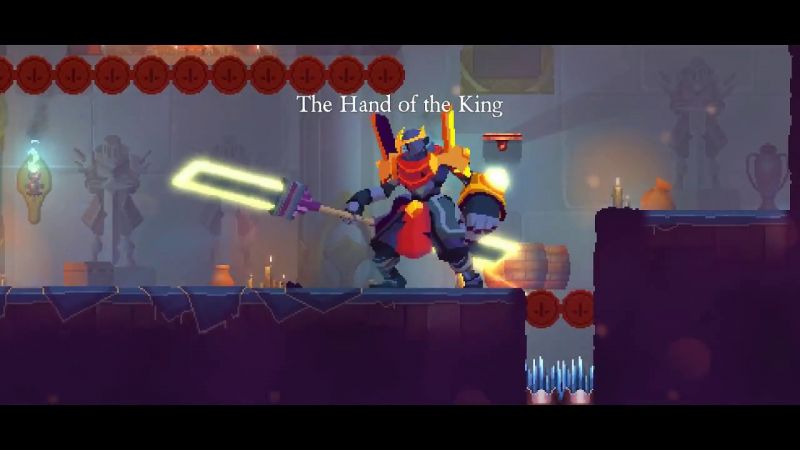
Как получить:
- Вам нужно будет добраться до финальной локации игры под названием Тронный зал (Throne Room).
- Перейти в этот уровень можно через Королевский замок (High Peak Castle).
- Оказавшись в нужной области, разберитесь с Десницей Короля и получите в свое распоряжение последнюю руну.
Особая руна
Даруемый навык: разблокирует особый режим игры, который аналогичен обычному, но имеет более глубокую настройку параметров.
Как получить
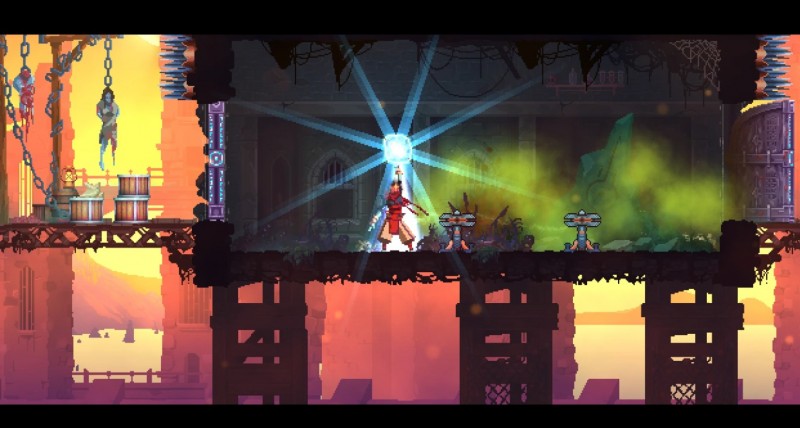
Для этого вам необходимо будет отправиться в локацию Тюремные башни (Ramparts) и разобраться там с элитным зомби (Элитником) в комнате, указанной на скриншоте выше. После этого подберите особую руну.
Руна исследователя
Даруемый навык: разблокирует всю карту, когда вы исследуете уже 80% текущей локации.
Как получить
Для этого необходимо разобраться с двумя Элитными темными разведчиками, которые стоят на мини-арене, расположенной неподалеку от выхода с уровня Заброшенный склеп (Forgotten Sepulcher). Убейте их и заполучите руну.
Runes are permanent upgrades which enable the player to travel to locations and Biomes which are not accessible otherwise. Once acquired, the player’s collected runes can be viewed in the saved game slot (in the main game menu, under «play»). The only way to acquire runes is to travel to specific zones and defeat a Boss or an Elite enemy, which spawn from certain Elite obelisks.
Upgrades are general improvements purchased from The Collector for cells, and function as improvements that introduce or improve various mechanics in some way that benefit the player. They are permanent and last between runs. Most are only available after completing a certain amount of unlocks and others must be acquired as Blueprints from specific locations before they are available.
List of runes[]
There are currently 8 runes in Dead Cells. All runes will drop after the guardian is defeated and can be picked up afterwards, save for the Homunculus rune, which is acquired automatically after the Hand of the King is defeated.
| Icon | Name | Biome | Description | Location | Elite Guardian or Boss | Grants access to |
|---|---|---|---|---|---|---|
|
|
Vine Rune | Promenade of the Condemned | This permanent rune lets you make climbing vines grow. | In a room accessed by entering a door found at the base of a large overhang | Undead Archer | Toxic Sewers, Ramparts |
|
|
Customization Rune | Ramparts | This permanent rune unlocks the Custom Mode. | In a room close to the entrance of the Ramparts | Undead Archer or Zombie | Custom Mode |
|
|
Challenger’s Rune | Black Bridge | This permanent rune provides access to the daily challenge (Prisoners’ Quarters). | Defeat the Concierge | The Concierge | Daily Run |
|
|
Teleportation Rune | Toxic Sewers | This permanent rune lets you use teleportation monoliths. | In a room found beneath a switch-operated door with the switch directly behind the door | Slasher | Ossuary, Forgotten Sepulcher, Dilapidated Arboretum,TBS Morass of the BanishedTBS |
|
|
Ram Rune[a] | Ossuary | This permanent rune lets you break through certain floors. | In a room with spikes that is in front of a switch-operated door | Slasher | Ancient Sewers |
|
|
Explorer’s Rune | Forgotten Sepulcher | This permanent rune reveals the whole map and its points of interest (scrolls, merchants, etc.) once you’ve explored most of the level. | In a room that is after two elite room, which is at the end of the biome | Two Dark Trackers | N/A |
|
|
Spider Rune | Slumbering Sanctuary | This permanent rune lets you cling to walls. | In a room with a dropdown and a banner | Caster | Slumbering Sanctuary (if entered from Black Bridge/NestTBS), Graveyard, Prison Depths, Corrupted Prison |
|
|
Homunculus Rune | Throne Room | This permanent rune lets you leave your body. | Defeat the Hand of the King | The Hand of the King | CavernRotG |
List of upgrades[]
Health Flask I must be unlocked before anything else.
| Icon | Name | Description | Cell cost |
Requirements | Notes |
|---|---|---|---|---|---|
|
|
Health Flask I | Unlocks a health potion that can be used at any time. | 5 | Must be unlocked first. | Heals 60% of your health over a few seconds. Each use removes 150 points (3 bars) of Malaise. |
|
|
Health Flask II | The health potion can be used 2 times. | 50 | Health Flask I | |
|
|
Health Flask III | The health potion can be used 3 times. | 150 | Health Flask II, unlock 10 items | |
|
|
Health Flask IV | The health potion can be used 4 times. | 300 | Health Flask III, unlock 25 items | |
|
|
Gold Reserves I | Preserves up to 500 GOLD when you die. | 5 | Health Flask I | |
|
|
Gold Reserves II | Preserves up to 1000 GOLD when you die. | 35 | Gold Reserves I | |
|
|
Gold Reserves III | Preserves up to 1500 GOLD when you die. | 100 | Gold Reserves II, unlock 8 items | |
|
|
Gold Reserves IV | Preserves up to 2000 GOLD when you die. | 200 | Gold Reserves III, unlock 15 items | |
|
|
Gold Reserves V | Preserves up to 2500 GOLD when you die. | 400 | Gold Reserves IV, unlock 30 items | Only available after finding its blueprint in the secret maze room in the Ancient Sewers. Requires the |
|
|
Recycling I | Transforms objects found on the ground or in chests into gold. | 25 | Health Flask I | 7% of the sale price |
|
|
Recycling II | Transforms objects found on the ground or in chests into gold. More than the previous version. | 120 | Recycling I | 15% of the sale price |
|
|
Random Melee Weapon | The starter melee weapon is drawn at random from your unlocked weapons. | 65 | Unlock 2 items | |
|
|
Random Starter Bow | The starter bow is drawn at random from your unlocked bows. | 65 | Unlock 2 items | |
|
|
Random Starter Shield | The starter shield is drawn at random from your unlocked shields. | 65 | Unlock 2 items | |
|
|
Restock | Refreshes a shop’s stocks at a very reasonable price. | 300 | Unlock 20 items | The player can interact with a pedestal at any shop to change the items on display. Can be used 5 times per shop, with the shopkeeper’s prices increasing by +40% every time it is used. |
|
|
Specialist’s Showroom | Unlocks a special shop in the Prisoner’s Cells. There you’ll find all sorts of rare and expensive oddities for only the most experienced and discerning shoppers. | 150 | Unlock 20 items | Makes the Specialist’s Showroom spawn in Prisoners’ Quarters each run, which contains a |
|
|
Hunter’s Mirror | Unlocks a mirror near the Scribe that may come in handy during your hunts. | 150 | Specialist’s Showroom | Shows a random enemy or boss that carries a blueprint you don’t have yet, Will not show any items that cannot be unlocked at that difficulty, but the mirror can show you inaccessible enemies. |
|
|
Merchandise Categories | The merchants will offer a wider range of categories. | 300 | Unlock 30 items | Found in the Graveyard. The You can now pick between 3 categories in item shops. This will force the shop to have only the items selected. (Does not affect the food shops.) Weapon and skill shop categories can be chosen between the 3 stats: Brutality, Tactics, Survival. This can be changed in Custom Mode to work as it did prior to v1.9 which allowed the choice of different weapons (Melee, Ranged, Shields) and skills (Deployable Traps, Grenades, Miscellaneous Skills) |
|
|
Advanced Forge I | You can increase the quality of an object at the forge twice instead of once. | 200 | Gold Reserves IV, unlock 40 items | Only accessible after defeating Conjunctivius for the sixth time. |
|
|
Recycling Tubes | Allows you to choose between a few sets of starting equipment, each containing a melee weapon, ranged weapon, shield and two skills. | 150 | – | Only available after you get its blueprint by defeating the Hand of the King on 1 BSC mode.
Replaces your starting equipment with a large room that holds 4 sets of starting equipment. (If you do not have a Random Starting X upgrade, you still get the basic weapon). |
|
|
Backpack | Allows you to carry a spare weapon. Hold the interact button to empty the backpack. | 100 | Unlock 15 items | Cannot hold skills, two-handed weapons or the |
|
|
Training Room Key | Unlocks the Training Room. | – | – | Looted off the corpse of the Tutorial Knight in Prisoners’ Quarters. |

Notes[]
- The Ram Rune will also buff the player’s dive attack damage and range (long fall dive attack only).
- The Homunculus Rune allows the player detach their head and control it separately from their body to access certain areas. It can latch on to a single enemy, dealing damage to them and leaving the player with full control of the player’s body. The damage is scaled on the player’s highest stat. The head can also climb walls indefinitely.
- The head will return to the body instantly, going through all obstacles, under any of the following conditions: Reaching the max distance away from the main body, the player taking damage while the head is latched onto an enemy, the head defeating an enemy, the head remaining attached to an enemy for ~7 seconds, or if the player presses the assigned button again.
- The base damage dealt is 12, and it hits 5 times per second.
- The cooldown for this rune will not start unless the head attaches to an enemy but returns before the enemy is defeated. The cooldown is instantly reset if the enemy is defeated, should the head be still on that enemy.
- The head can also take items and blueprints before bringing them back to the player. However, they will be dropped if they encounter any enemy. They will also be dropped if the head jumps.
- Using the rune breaks invisibility.
- This rune can’t be used if the player is affected by
 curse, except if the only source of curse on the player is the Cursed Sword.
- For the Explorer’s Rune, once the player has explored 80% of the biome’s map, the entire map of the biome and the map inside BSC doors are revealed, showing all points of interest, enemies, as well as items and scrolls of power (but not blueprints).
- Additionally if an enemy is carrying precious loot, like an item or scroll, it will be marked in the map with a star, but it doesn’t reveal any layouts or terrain.
- This effect is similar to the map-revealing effect of the Forgotten Map.
History[]
|
Footnotes[]
- ↑ Formerly known as Belier’s Rune.
| Navigation wiki |
|---|
- ↑ https://gfycat.com/HarshFrigidIsabellinewheatear
Runes are permanent upgrades for the player. Some runes unlock alternate paths throughout the island, enabling the player to travel to new Biomes and take different routes to reach the end. Other runes enable the use of objects found on the island, enhance the player with a new movement option or ability or unlock alternate gamemodes.
Collected runes can be viewed in the saved game slot (in the main game menu, under «play»). Runes are found in specific places on the island and require a Boss or an Elite enemy to be defeated, which spawn in unique rooms. These rooms will no longer generate when the rune has been collected. Collecting a rune unlocks it instantly, there is no requirement to bring it to The Collector or a need to unlock it with cells.
Upgrades are general improvements purchased from the Collector for cells, and function as improvements that introduce or improve various mechanics in some way that benefit the player. They are permanent and last between runs. Most are only available after completing a certain amount of unlocks and others must be acquired as Blueprints from specific locations before they are available.
List of runes
There are currently 8 runes in Dead Cells. All runes will drop after the guardian is defeated and can be picked up afterwards, save for the Homunculus rune, which is acquired automatically after the Hand of the King is defeated.
| Icon | Name | Biome | Description | Location | Elite Guardian or boss | Grants access to |
|---|---|---|---|---|---|---|
|
|
Vine Rune | Promenade of the Condemned | This permanent rune causes climbing vines to grow. | In a room accessed by entering a door found at the base of a large overhang | Undead Archer |
|
|
|
Customization Rune | Ramparts | This permanent rune unlocks the Custom Mode. | In a room close to the entrance of the Ramparts | Undead Archer or Zombie | Custom Mode |
|
|
Challenger’s Rune | Black Bridge | This permanent rune provides access to the daily challenge (Prisoners’ Quarters). | Defeat the Concierge | The Concierge | Daily Run |
|
|
Teleportation Rune | Toxic Sewers | This permanent rune lets you use teleportation monoliths. | In a room found beneath a switch-operated door with the switch directly behind the door | Slasher |
|
|
|
Ram Rune[a] | Ossuary | This permanent rune lets you break through certain floors. | In a room with spikes that is in front of a switch-operated door | Slasher | Ancient Sewers from Toxic Sewers. |
|
|
Explorer’s Rune | Forgotten Sepulcher | This permanent rune reveals the whole map and its points of interest (scrolls, merchants, etc.) once you’ve explored most of the level. | In a room that is after two elite room, which is at the end of the biome | Two Dark Trackers | N/A |
|
|
Spider Rune | Slumbering Sanctuary | This permanent rune lets you cling to walls. | In a room with a dropdown and a banner | Caster |
|
|
|
Homunculus Rune | Throne Room | This permanent rune lets you leave your body. | Defeat the Hand of the King | The Hand of the King |
|
List of upgrades
Health Flask I must be unlocked before anything else.
| Icon | Name | Description | Cell cost |
Requirements | Notes |
|---|---|---|---|---|---|
|
|
Health Flask I | Unlocks a health potion that can be used at any time. | 5 | Must be unlocked first. | Heals 60% of your health over a few seconds. Each use removes 150 points (3 bars) of Malaise. |
|
|
Health Flask II | The health potion can be used 2 times. | 50 | Health Flask I | |
|
|
Health Flask III | The health potion can be used 3 times. | 150 | Health Flask II, unlock 10 items | |
|
|
Health Flask IV | The health potion can be used 4 times. | 300 | Health Flask III, unlock 25 items | |
|
|
Gold Reserves I | Preserves up to 500 GOLD when you die. | 5 | Health Flask I | |
|
|
Gold Reserves II | Preserves up to 1000 GOLD when you die. | 35 | Gold Reserves I | |
|
|
Gold Reserves III | Preserves up to 1500 GOLD when you die. | 100 | Gold Reserves II, unlock 8 items | |
|
|
Gold Reserves IV | Preserves up to 2000 GOLD when you die. | 200 | Gold Reserves III, unlock 15 items | |
|
|
Gold Reserves V | Preserves up to 2500 GOLD when you die. | 400 | Gold Reserves IV, unlock 30 items | Only available after finding its blueprint in the secret maze room in the Ancient Sewers. Requires the |
|
|
Recycling I | Transforms objects found on the ground or in chests into gold. | 25 | Health Flask I | 7% of the sale price |
|
|
Recycling II | Transforms objects found on the ground or in chests into gold. More than the previous version. | 120 | Recycling I | 15% of the sale price |
|
|
Random Melee Weapon | The starter melee weapon is drawn at random from your unlocked weapons. | 65 | Unlock 2 items | |
|
|
Random Starter Bow | The starter bow is drawn at random from your unlocked bows. | 65 | Unlock 2 items | |
|
|
Random Starter Shield | The starter shield is drawn at random from your unlocked shields. | 65 | Unlock 2 items | |
|
|
Restock | Refreshes a shop’s stocks at a very reasonable price. | 300 | Unlock 20 items | The player can interact with a pedestal at any shop to change the items on display. Can be used 5 times per shop, with the shopkeeper’s prices increasing by +40% every time it is used. |
|
|
Specialist’s Showroom | Unlocks a special shop in the Prisoner’s Cells. There you’ll find all sorts of rare and expensive oddities for only the most experienced and discerning shoppers. | 150 | Unlock 20 items | Makes the Specialist’s Showroom spawn in Prisoners’ Quarters each run, which contains a |
|
|
Hunter’s Mirror | Unlocks a mirror near the Scribe that may come in handy during your hunts. | 150 | Specialist’s Showroom | Shows a random enemy or boss that carries a blueprint you don’t have yet, Will not show any items that cannot be unlocked at that difficulty, but the mirror can show you inaccessible enemies. |
|
|
Merchandise Categories | The merchants will offer a wider range of categories. | 300 | Unlock 30 items | Found in the Graveyard. The You can now pick between 3 categories in item shops. This will force the shop to have only the items selected. (Does not affect the food shops.) Weapon and skill shop categories can be chosen between the 3 stats: Brutality, Tactics, Survival. This can be changed in Custom Mode to work as it did prior to v1.9 which allowed the choice of different weapons (Melee, Ranged, Shields) and skills (Deployable Traps, Grenades, Miscellaneous Skills) |
|
|
Advanced Forge I | You can increase the quality of an object at the forge twice instead of once. | 200 | Gold Reserves IV, unlock 40 items | Only accessible after defeating Conjunctivius for the sixth time. |
|
|
Recycling Tubes | Allows you to choose between a few sets of starting equipment, each containing a melee weapon, ranged weapon, shield and two skills. | 150 | – | Only available after you get its blueprint by defeating the Hand of the King on 1 BSC mode.
Replaces your starting equipment with a large room that holds 4 sets of starting equipment. (If you do not have a Random Starting X upgrade, you still get the basic weapon). |
|
|
Backpack | Allows you to carry a spare weapon. Hold the interact button to empty the backpack. | 100 | Unlock 15 items | Cannot hold skills, two-handed weapons or the |
|
|
Training Room Key | Unlocks the Training Room. | – | – | Looted off the corpse of the Tutorial Knight in Prisoners’ Quarters. |
Notes
- The Ram Rune will also buff the player’s dive attack damage and range (long fall dive attack only).
- The Homunculus Rune allows the player detach their head and control it separately from their body to access certain areas. It can latch on to a single enemy, dealing damage to them and leaving the player with full control of the player’s body. The damage is scaled on the player’s highest stat. The head can also climb walls indefinitely.
- The head will return to the body instantly, going through all obstacles, under any of the following conditions: Reaching the max distance away from the main body, the player taking damage while the head is latched onto an enemy, the head defeating an enemy, the head remaining attached to an enemy for ~7 seconds, or if the player presses the assigned button again.
- The base damage dealt is 12, and it hits 5 times per second.
- The cooldown for this rune will not start unless the head attaches to an enemy but returns before the enemy is defeated. The cooldown is instantly reset if the enemy is defeated, should the head still be on that enemy.
- The head can also take items and blueprints before bringing them back to the player. However, they will be dropped if they encounter any enemy or if the head jumps. Besides, picked up items can be manually dropped by pressing the «roll» button.
- The head can climb up ropes and fall down faster if the player tries to down-slam while controlling the head.
- Using the rune breaks invisibility.
- This rune can’t be used if the player is affected by curse, except if the only source of curse on the player is the Cursed Sword.
- For the Explorer’s Rune, once the player has explored 80% of the biome’s map, the entire map of the biome and the map inside BSC doors are revealed, showing all points of interest, enemies, as well as items and scrolls of power (but not blueprints).
- Additionally if an enemy is carrying precious loot, like an item or scroll, it will be marked in the map with a star, but it doesn’t reveal any layouts or terrain.
- This effect is similar to the map-revealing effect of the Forgotten Map.
History
|
Footnotes
- ↑ Formerly known as Belier’s Rune.
| Navigation wiki |
|---|
- ↑ https://gfycat.com/HarshFrigidIsabellinewheatear