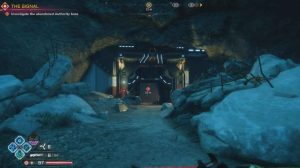
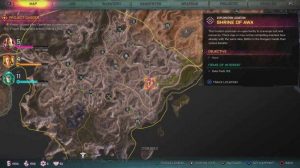
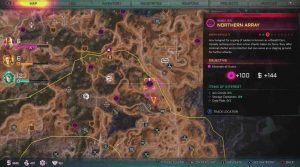
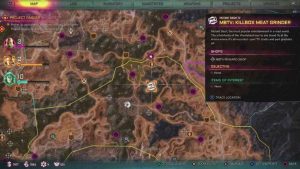
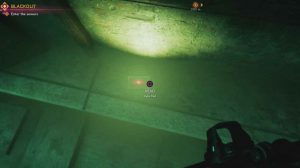
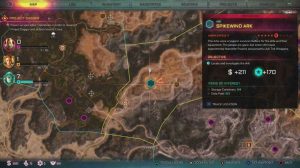
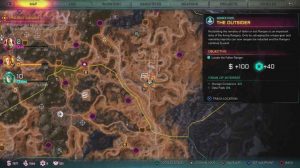
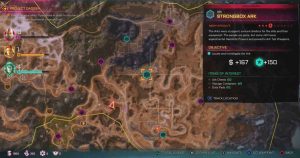
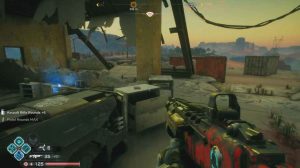
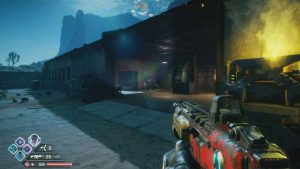
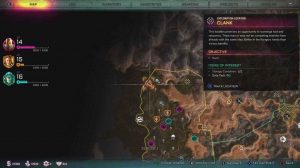
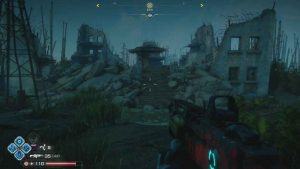
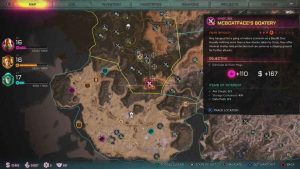
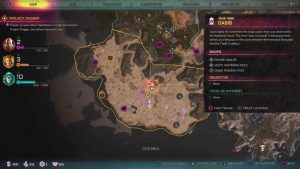
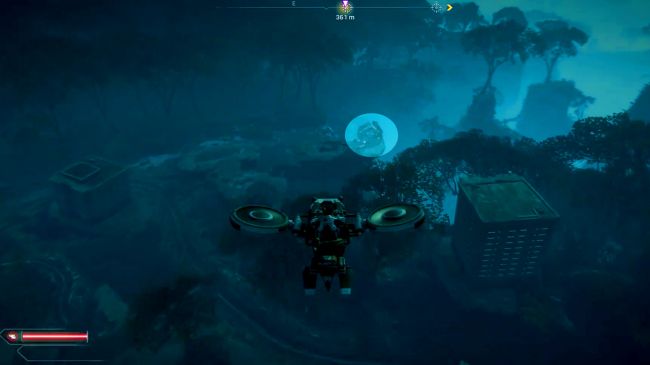
Ковчег суперсейфа находится в регионе Рваные равнины и даёт вам оружие Умный Ракетомёт. Помните, что вы можете установить маршрутную точку в любом месте, даже если маркер не на вашей карте.
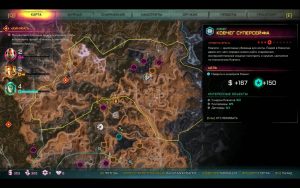
Ковчег суперсейфа (уровень врага 4/10)
Награды:
- Сундуки Ковчегов: 2
- Контейнеры: 5
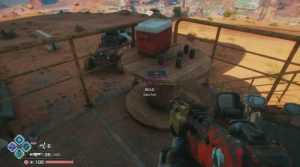
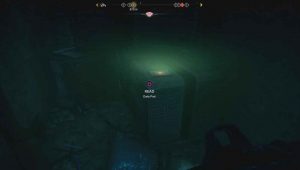
- Датапады: 1
- Умный ракетомёт
- $ 167
- +150 XP к Доктору Квасиру
Есть 2 сундука ковчега. Вот их месторасположение.
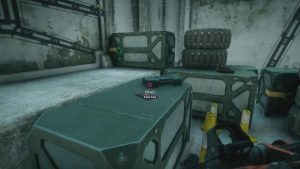
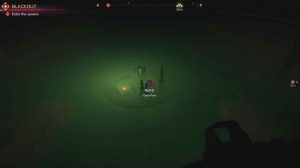
Сундук ковчега # 1
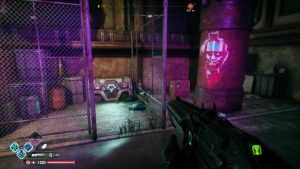
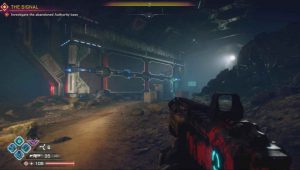
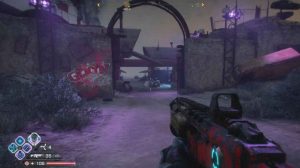
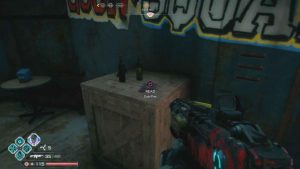
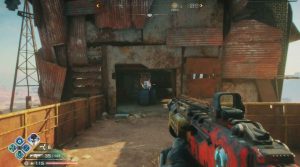
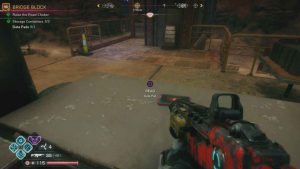
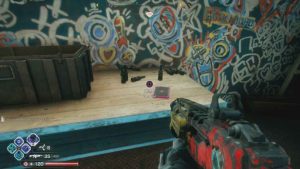
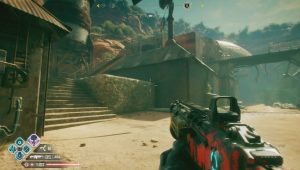
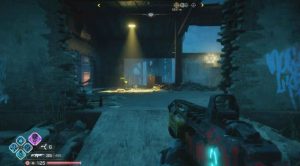
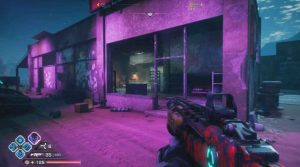
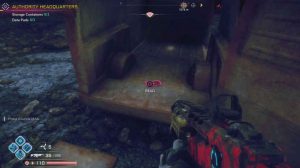
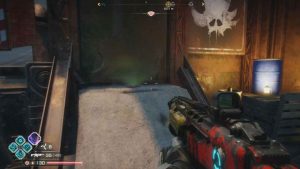
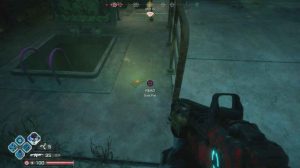
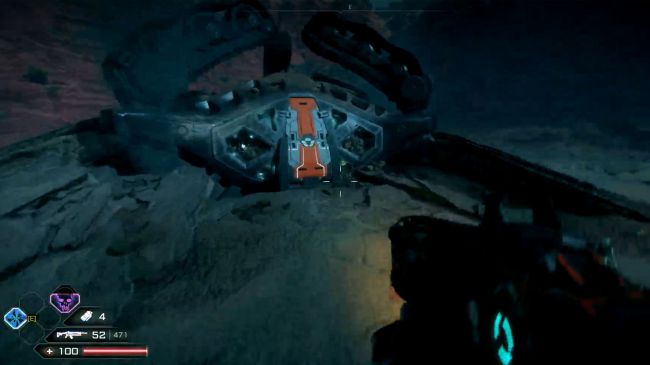
Войдите в Ковчег и держитесь левой стороны. Ищите клетку с левой стороны, возле граффити головы Хмыря (Goon).
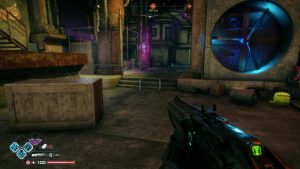
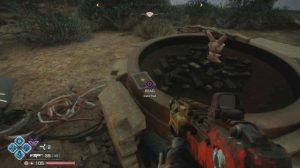
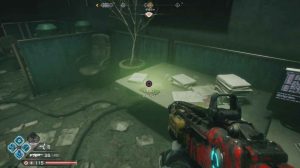
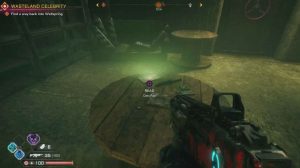
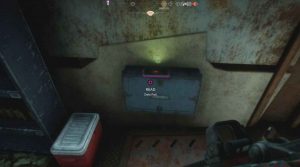
Это первый Ковчег. Внутри вы найдёте Сердечник из Ковчега. Его можно использовать, чтобы улучшить себя у Кибердоктора, в городе Источник.
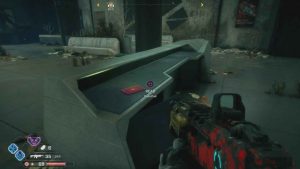
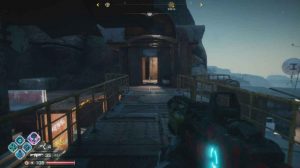
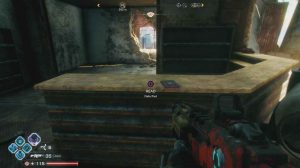
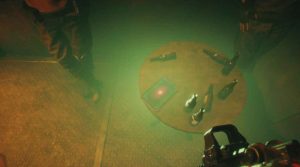
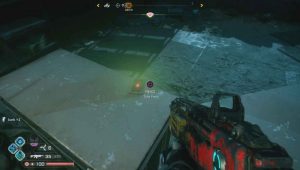
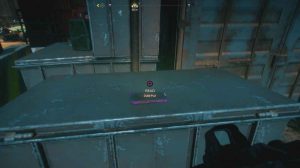
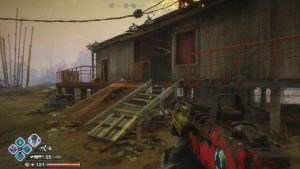
Сундук ковчега # 2
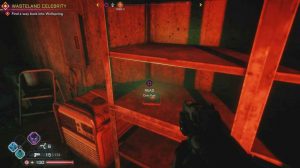
Встаньте перед лестницей, ведущей к Ковчегу. Поверните налево, и там найдёте последний сундук с ковчегом с 5 автозапчастями, которые можно использовать для улучшения вашего автомобиля.
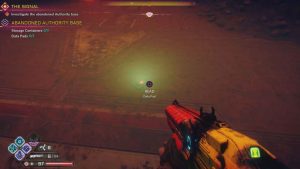
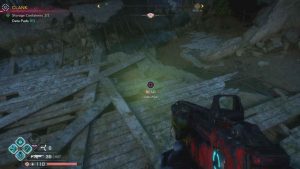
Контейнеры ковчега суперсейфа
Всего их в суперсейфе 5 штук. Ниже вы найдете их.
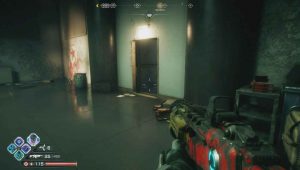
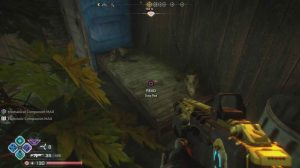
Контейнер # 1
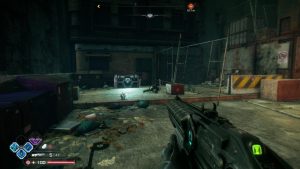
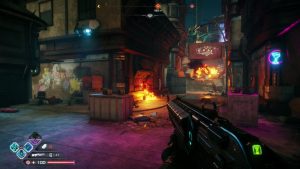
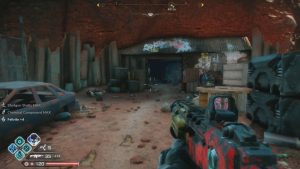
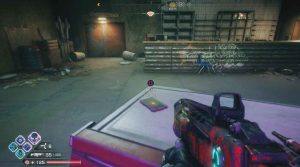
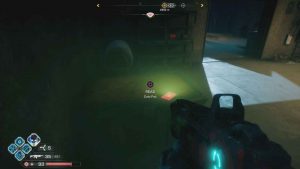
Продолжайте двигаться вперёд, но оставайтесь слева. Сделайте остановку, как только увидите небольшой неоновый коктейльный знак (на правой стене) и вывеску с GOON над горящей кучей.
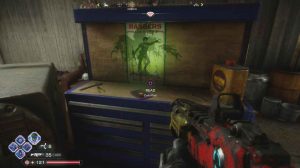
Идите к узкому коридору слева.
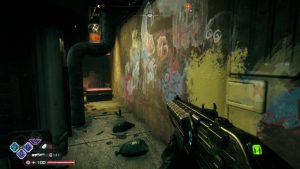
Вы увидите на стене изображение синего кролика с надписью и дальше контейнер. Внутри 130 фелтритов.
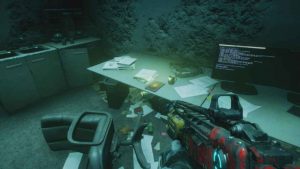
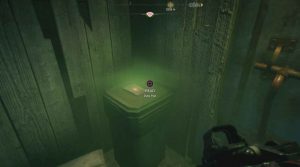
Контейнер # 2
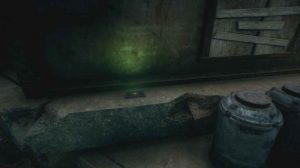
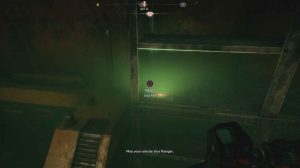
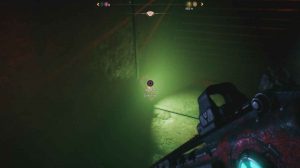
Вернитесь к пылающей куче обломков и поверните налево, вы увидите клапан на стене. Поверните его, и вы увидите скрытую лестницу, ведущую под землю.
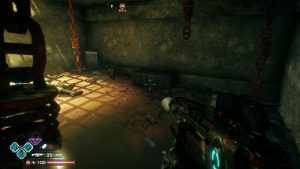
Спуститесь по ступенькам, они приведут вас к второму контейнеру. В контейнере лежит $ 260.
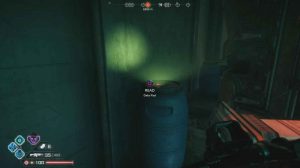
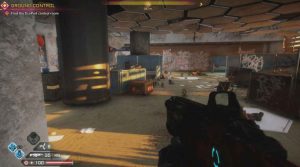
Контейнер # 3
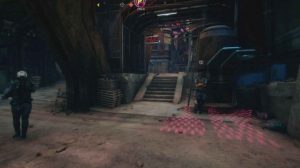
Вернитесь ещё раз к пылающими обломками. На правой стороне в коридоре есть граффити шута-черепа. Поверните в этот коридор.
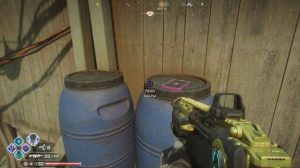
В конце этого коридора поверните налево и пройдите по лестнице в сторону мусорных баков.
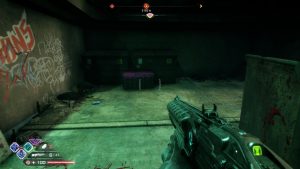
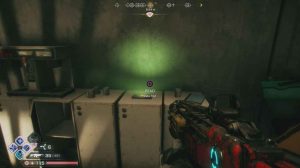
Оказавшись там, посмотрите направо на контейнер. Внутри 140 фелтритов.
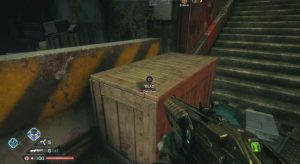
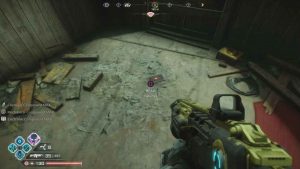
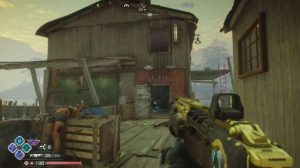
Контейнер # 4
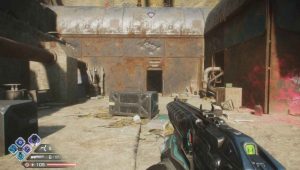
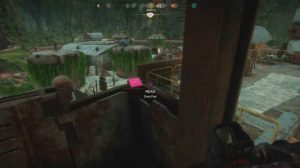
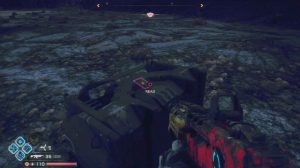
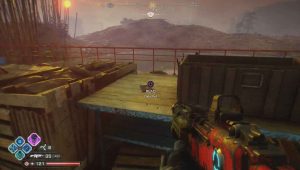
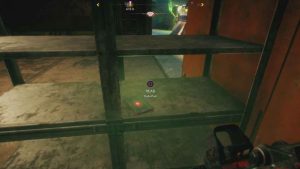
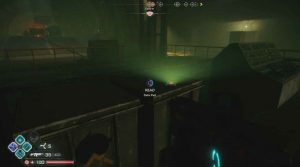
Повернитесь спиной к контейнеру. Отсюда идите вперёд к огню. Ваша цель — добраться до верха крыши к спрятанному там контейнеру.
В этом контейнере 135 фелтритов.
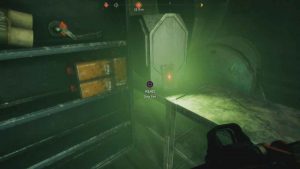
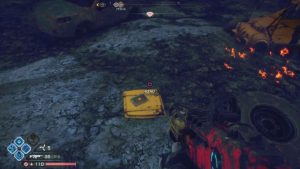
Контейнер # 5
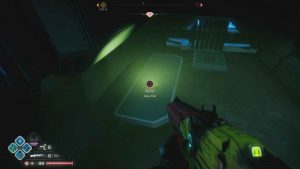
Последний контейнер находится прямо напротив 2-го сундука с ковчегом. Справа от двери Ковчега.
Датапады ковчега суперсейфа
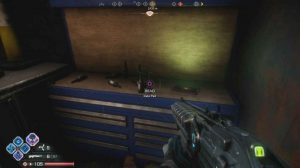
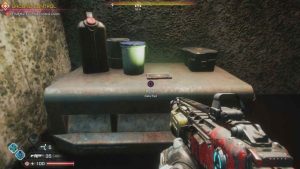
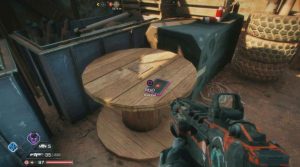
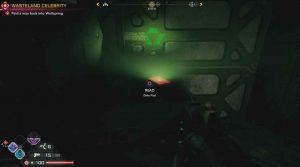
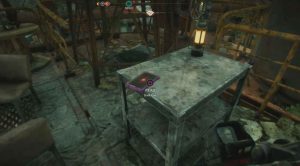
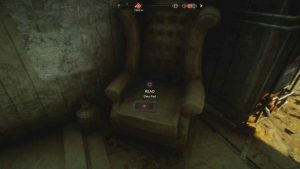
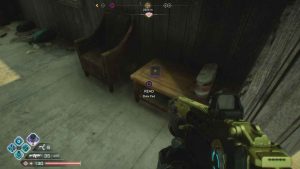
Датапад # 1
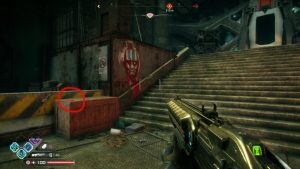
Встаньте перед лестницей, ведущей к Ковчегу. Датапад находится на деревянном ящике слева от граффити головы Хмыря, с синими и белыми полосами на лице.
В Rage 2 бандитские логова представляют собой вражеские аванпосты, в которых можно найти различные материалы, оборудование и деньги. Отыскать их можно практически в каждом крупном регионе. После обнаружения подобного объекта вам нужно будет полностью зачистить его от врагов, чтобы он перешел в категорию завершенных.
За нахождение и зачистку бандитских логов вы не только будете получать сундуки ковчега, датапады и деньги, но и сможете улучшать репутацию у Джона Маршала и тем самым открыть его ветку проектов. В этом руководстве мы укажем расположение всех бандитских лагерей в игре.
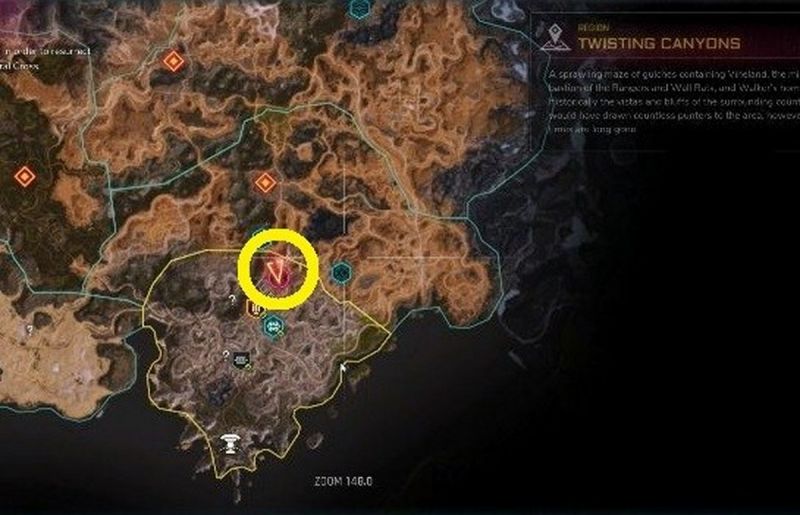
Кривые Каньоны
В этом регионе расположено несколько лагерей бандитов, в которых обитают сравнительно слабые головорезы, поэтому вы сможете разобраться с ними уже в первой половине игры.
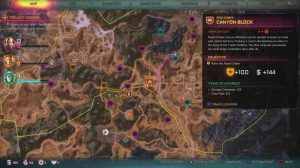
Газкатрас
- Сила противников: 2/10
- Награды: +100 очков репутации, 144 доллара, 2 сундука ковчега, 5 контейнеров, 1 датапад
Прочная крыша
- Сила противников: 2/10
- Награды: +100 очков репутации, 144 доллара, 1 сундук ковчега, 6 контейнеров
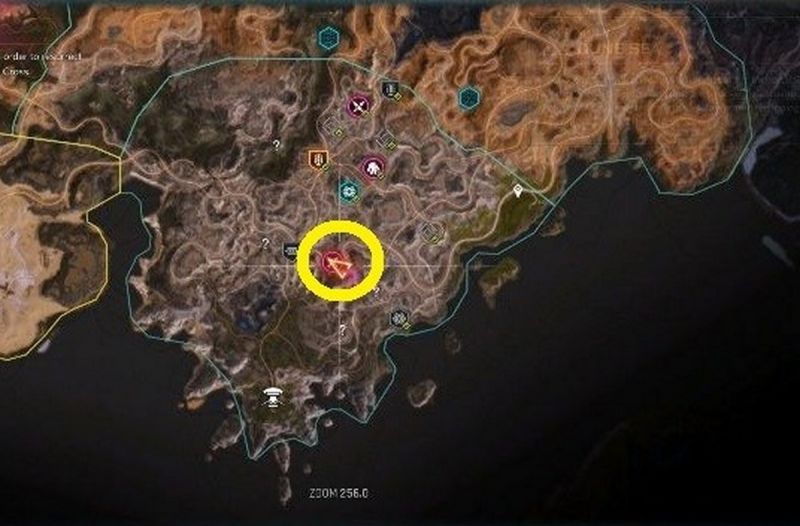
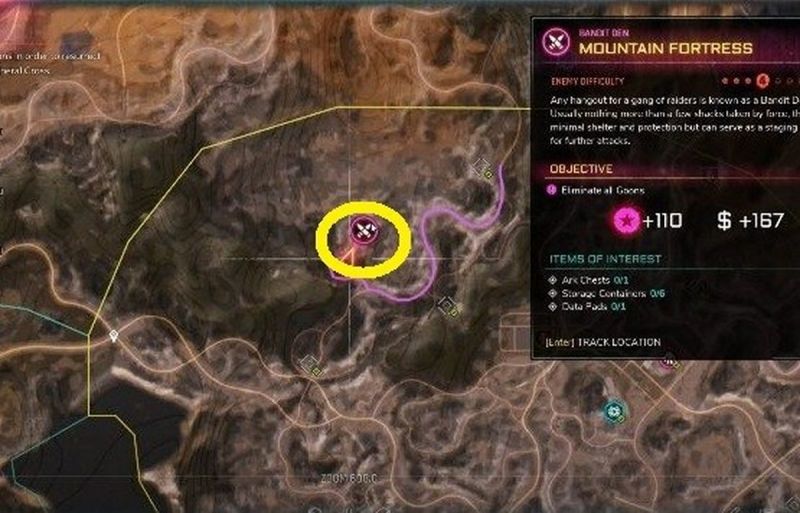
Горная крепость
- Сила противников: 4/10
- Награды: +110 очков репутации, 167 долларов, 1 сундук ковчега, 6 контейнеров, 1 датапад
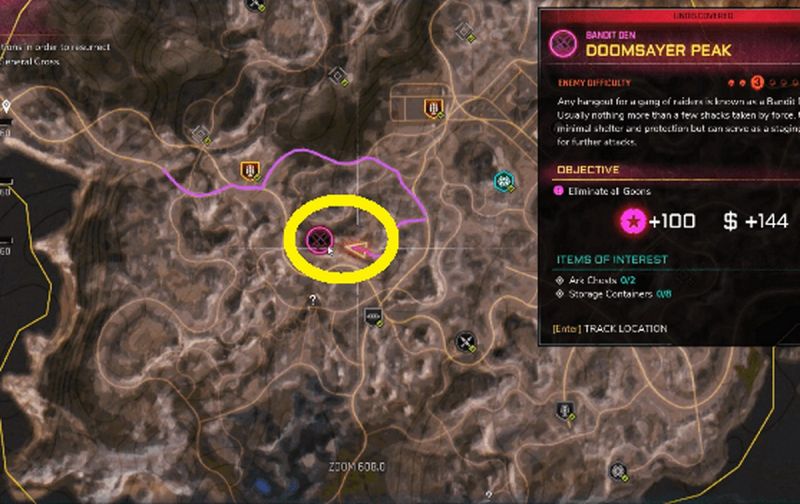
Пик Предсказателя Рока
- Сила противников: 3/10
- Награды: +100 очков репутации, 144 доллара, 2 сундука ковчега, 8 контейнеров
Разрушенная дорога
Большинство бандитских лагерей охраняются сравнительно слабыми врагами, но в некоторых все же обитают мощные головорезы, способные запросто разобраться с низкоуровневым героем. Поэтому не советуем вам нападать на все логова подряд без предварительной подготовки.
Тоннель
- Сила противников: 4/10
- Награды: +110 очков репутации, 167 долларов, 1 сундук ковчега, 3 контейнера
Ущелье Пилошеев
- Сила противников: 4/10
- Награды: +100 очков репутации, 144 доллара, 1 сундук ковчега, 2 контейнера, 1 датапад
Гнездо Пилошеев
- Сила противников: 5/10
- Награды: +120 очков репутации, 189 долларов, 1 сундук ковчега, 7 контейнеров
Северные антенны
- Сила противников: 3/10
- Награды: +100 очков репутации, 144 доллара, 1 сундук ковчега, 4 контейнера, 1 датапад
Ферма Йоменов
- Сила противников: 6/10
- Награды: +130 очков репутации, 211 долларов, 5 контейнеров
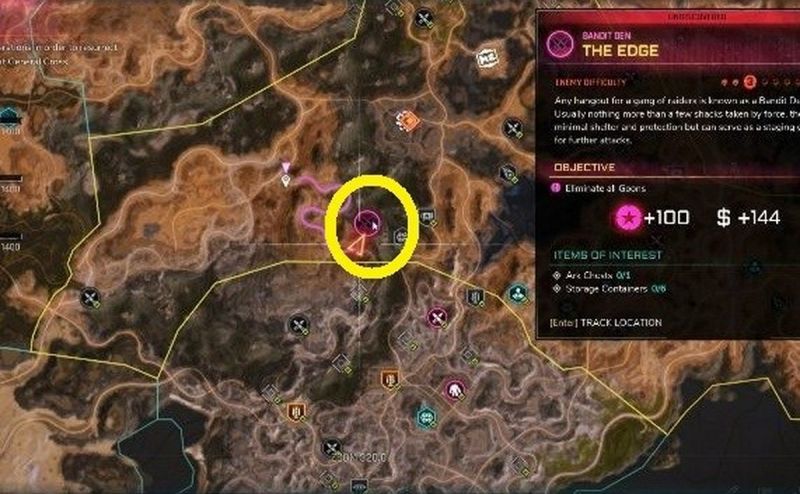
Ребро
- Сила противников: 3/10
- Награды: +100 очков репутации, 144 доллара, 1 сундук ковчега, 6 контейнеров
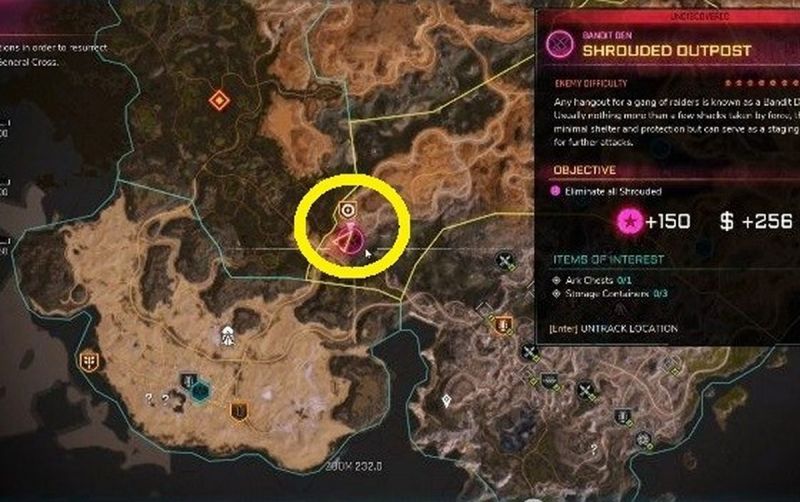
Аванпост Саванов
- Сила противников: 8/10
- Награды: +150 очков репутации, 256 долларов, 1 сундук ковчега, 3 контейнера
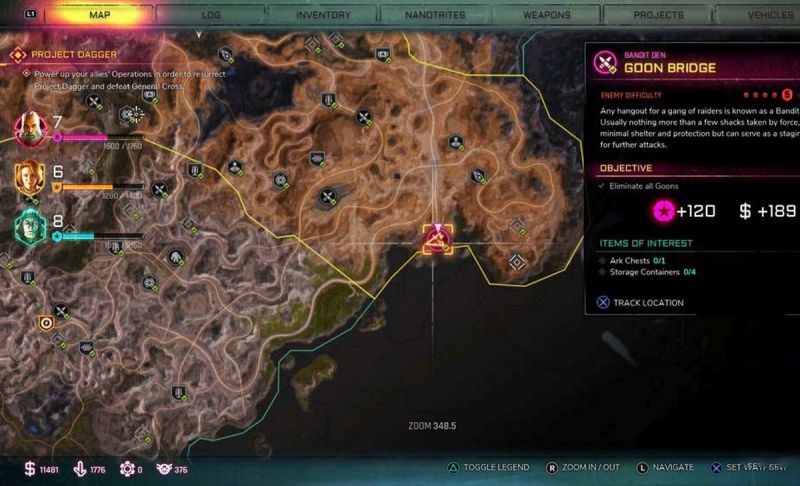
Мост Хмырей
- Сила противников: 5/10
- Награды: +120 очков репутации, 189 долларов, 2 сундука ковчега, 4 контейнера
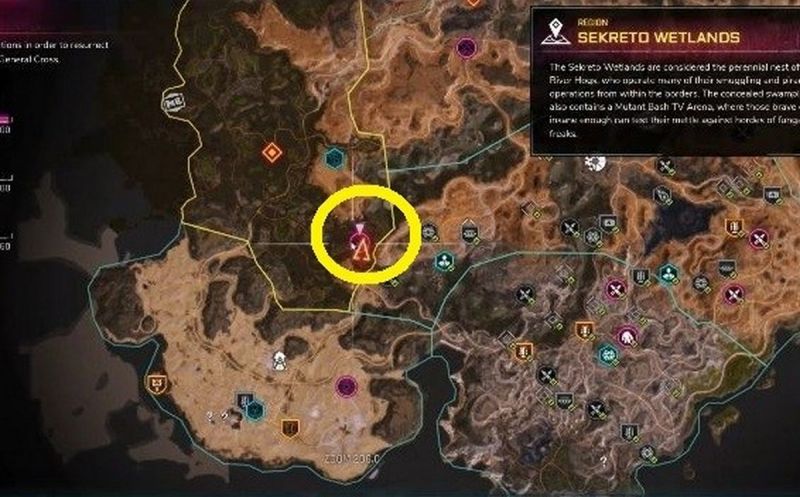
Топи Секрето
Тут вам предстоит иметь дело с довольно сильными бандитами, поэтому нападать на них следует уже после нахождения более-менее мощного оружия и получения атакующих способностей.
Грудная впадина
- Сила противников: 8/10
- Награды: +150 очков репутации, 256 долларов, 2 контейнера, 2 датапада
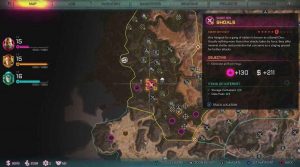
Отмели
- Сила противников: 6/10
- Награды: +130 очков репутации, 211 долларов, 1 контейнер, 1 датапад
Подавление
- Сила противников: 5/10
- Награды: +120 очков репутации, 189 долларов, 1 сундук ковчега, 5 контейнеров
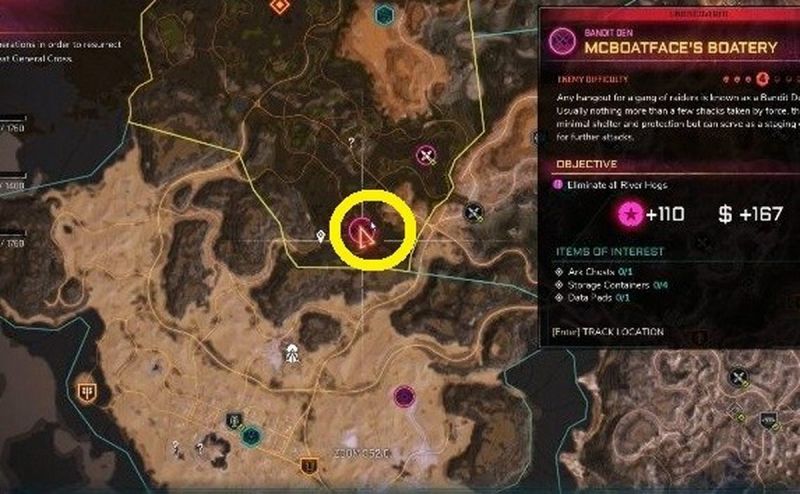
Лодки мистера Лодочника
- Сила противников: 4/10
- Награды: +110 очков репутации, 167 долларов, 1 сундук ковчега, 4 контейнера, 1 датапад
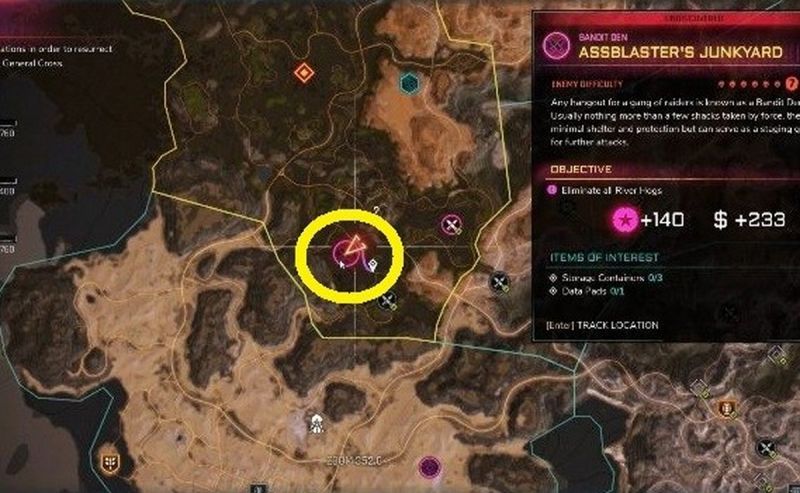
Свалка Нагибателя
- Сила противников: 7/10
- Награды: +140 очков репутации, 233 доллара, 3 контейнера, 1 датапад
Мост
- Сила противников: 5/10
- Награды: +120 очков репутации, 189 долларов, 1 сундук ковчега, 1 контейнер, 1 датапад
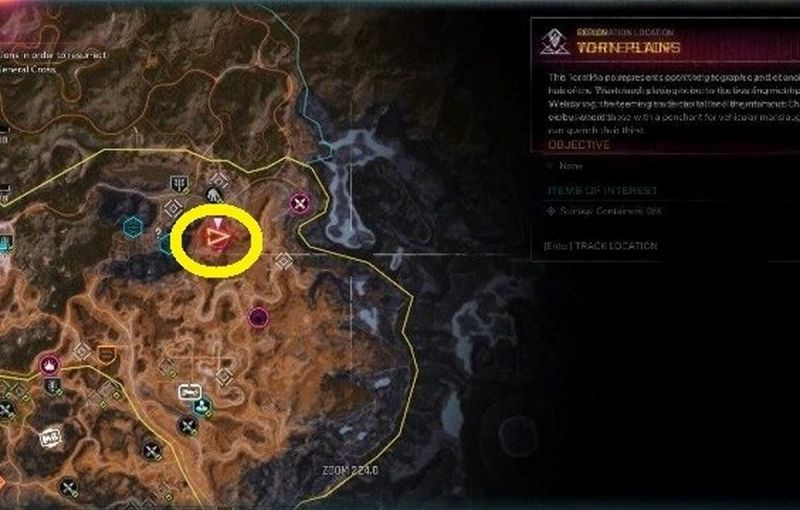
Рваные равнины
Тут встречаются как сильные, так и слабые бандитские логова, поэтому следует всегда быть настороже при атаке на данные аванпосты.
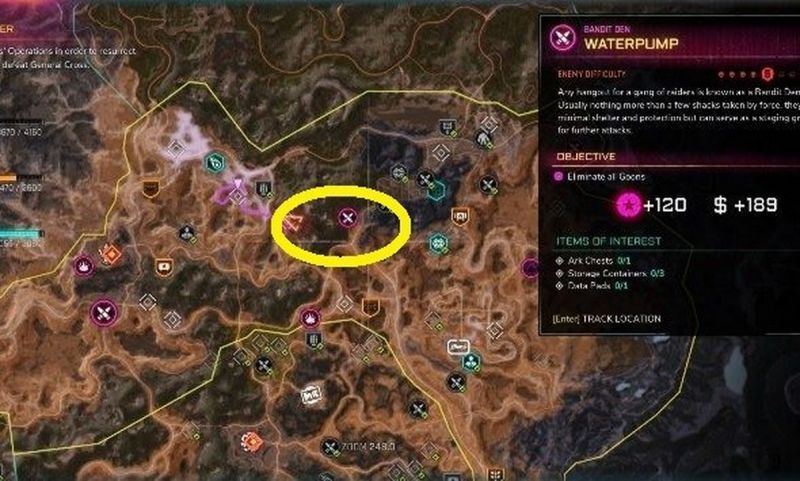
Водокачка
- Сила противников: 5/10
- Награды: +120 очков репутации, 189 долларов, 1 сундук ковчега, 3 контейнера, 1 датапад
Пост над восточной дорогой
- Сила противников: 3/10
- Награды: +100 очков репутации, 144 доллара, 4 контейнера
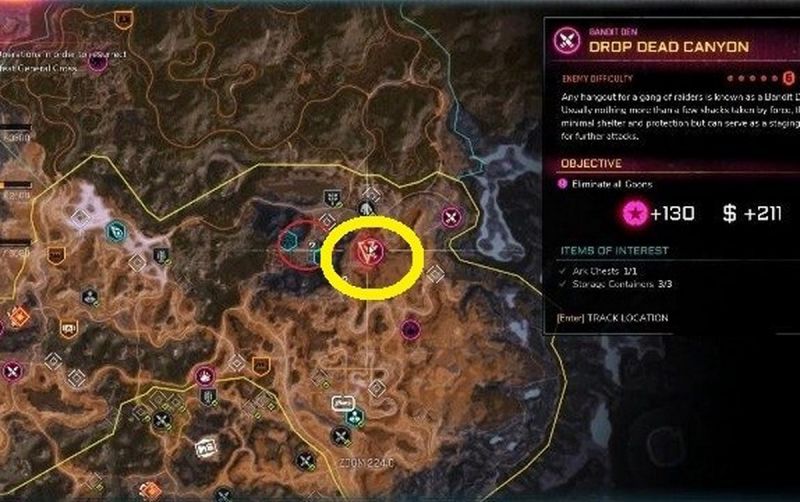
Каньон мертвеца
- Сила противников: 6/10
- Награды: +130 очков репутации, 211 долларов, 1 сундук ковчега, 3 контейнера
Передовой штаб
- Сила противников: 6/10
- Награды: +130 очков репутации, 211 долларов, 4 контейнера, 1 датапад
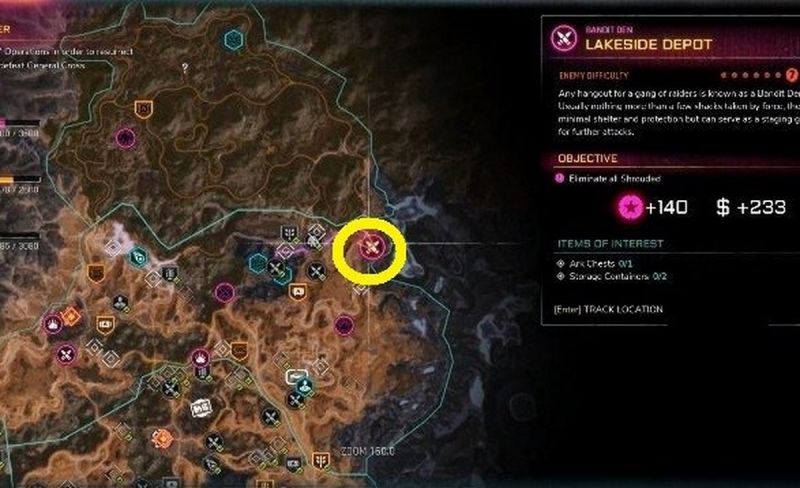
Автобаза у озера
- Сила противников: 7/10
- Награды: +140 очков репутации, 233 долларов, 1 сундук ковчега, 2 контейнера
Виллы вандалов
- Сила противников: 6/10
- Награды: +130 очков репутации, 211 долларов, 3 контейнера

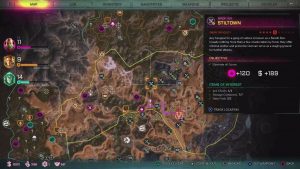
Стилтаун
- Сила противников: 5/10
- Награды: +120 очков репутации, 189 долларов, 1 сундук ковчега, 7 контейнеров, 2 датапада

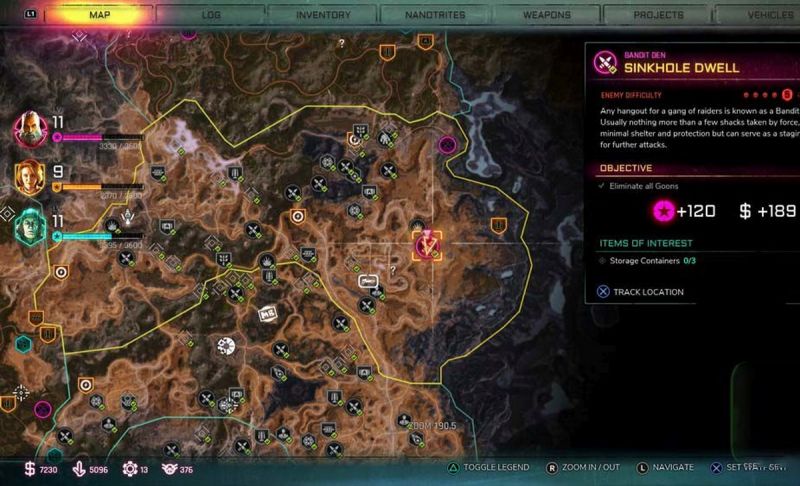
Глухая воронка
- Сила противников: 5/10
- Награды: +120 очков репутации, 189 долларов, 3 контейнера
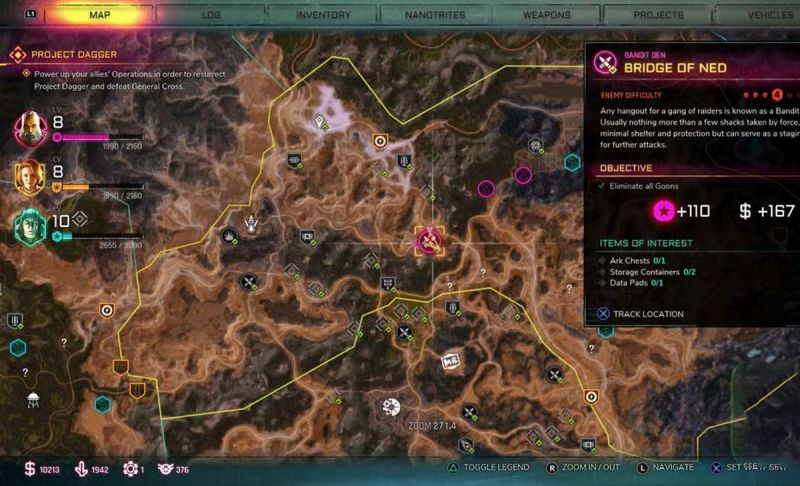
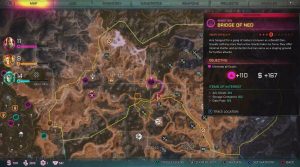
Мост Неда
- Сила противников: 4/10
- Награды: +110 очков репутации, 167 долларов, 1 сундук ковчега, 2 контейнера, 1 датапад
Море Дюн
В этом регионе вы столкнетесь с одними из самых опасных группировок в Пустошах. Советуем вам нападать на них только ближе к концу игры.
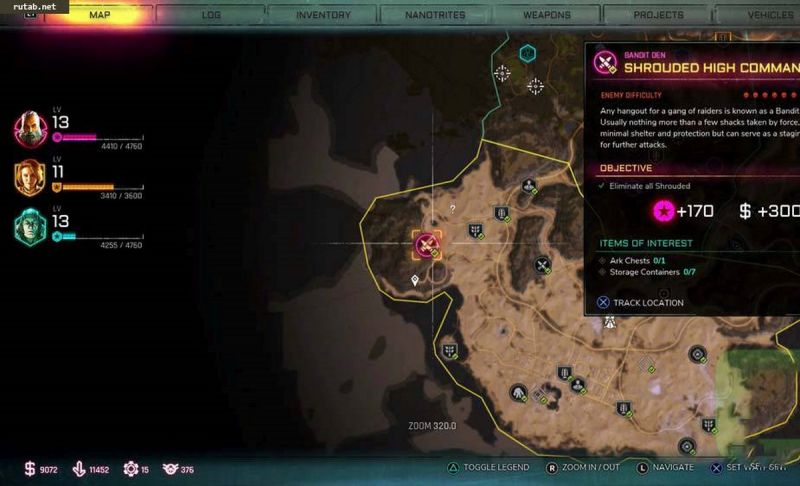
Штаб Саванов
- Сила противников: 10/10
- Награды: +170 очков репутации, 300 долларов, 1 сундук ковчега, 7 контейнеров
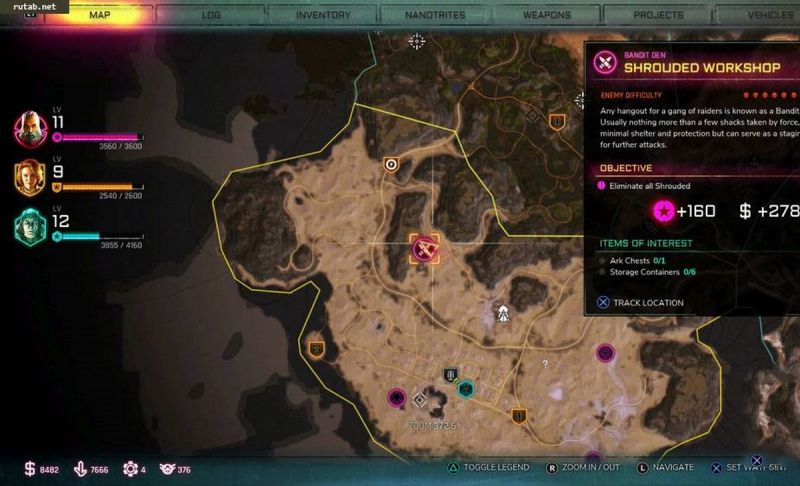
Мастерская Саванов
- Сила противников: 9/10
- Награды: +160 очков репутации, 278 долларов, 1 сундук ковчега, 6 контейнеров
Дикие Земли
Здесь обитают весьма сильные бандиты, связываться с которыми на ранних этапах игры не рекомендуется.
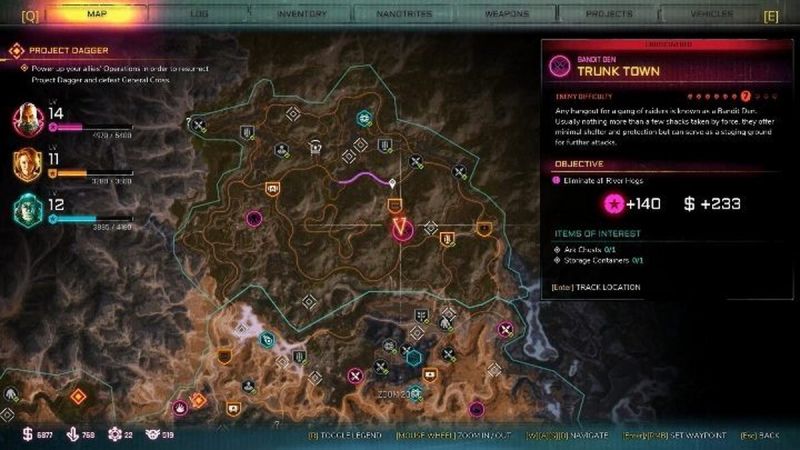
Транктаун
- Сила противников: 7/10
- Награды: +140 очков репутации, 233 доллара, 1 сундук ковчега, 1 контейнер
Бурная река
- Сила противников: 8/10
- Награды: +150 очков репутации, 256 долларов, 1 сундук ковчега, 2 контейнера
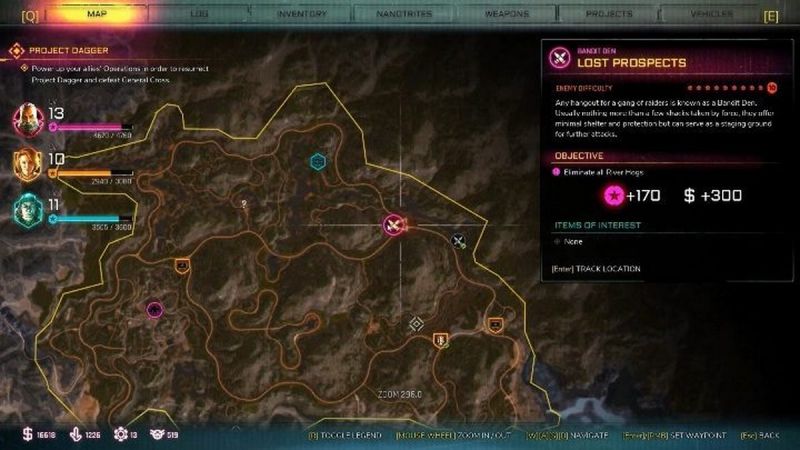
Утраченные возможности
- Сила противников: 10/10
- Награды: +170 очков репутации, 300 долларов
Остров фантазий
- Сила противников: 9/10
- Награды: +160 очков репутации, 278 долларов, 7 контейнеров
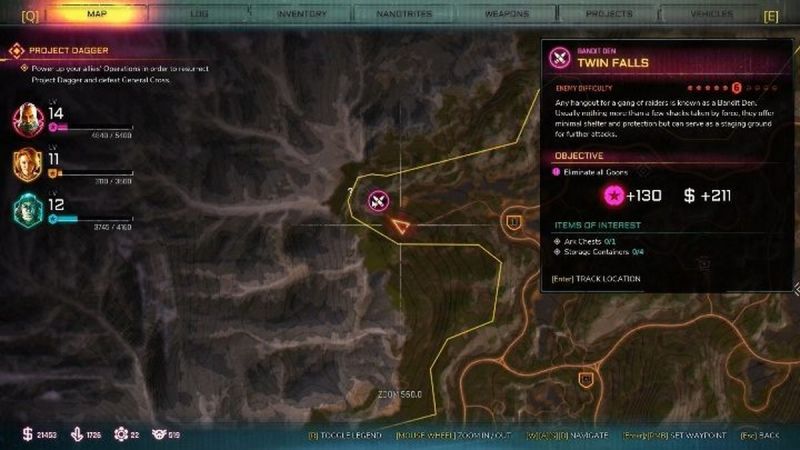
Твин-Фоллз
- Сила противников: 6/10
- Награды: +130 очков репутации, 211 долларов, 1 сундук ковчега, 4 контейнера

Таким образом, вы сможете найти все бандитские логова в Rage 2 и собрать достаточное количество датападов.

Data Pads are an optional collectible in Rage 2. Collecting them is incredibly useful as doing so will reveal new activities on your map, as well as unlock additional missions. There are a lot of Data Pads scattered throughout the wasteland and the guide below is split into the regions of the game showcasing all of their locations.
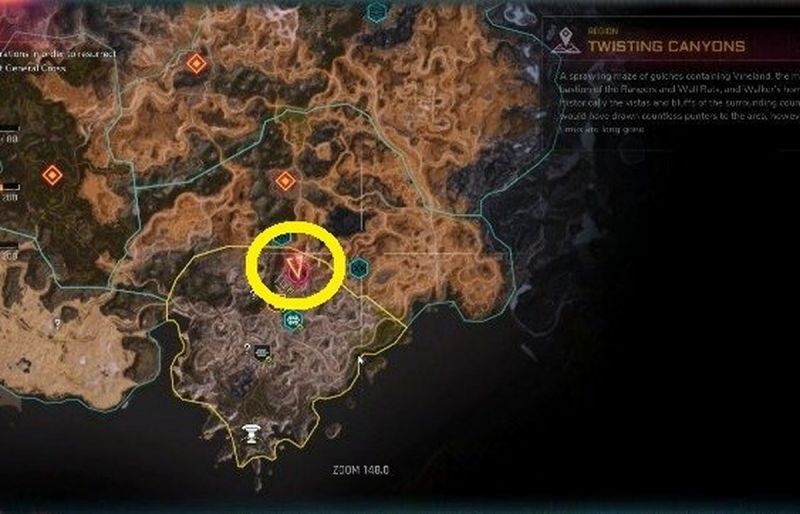
- Twisting Canyons
- Vineland
- Abandoned Authority Base Exploration Location
- Quake Hill Ark
- Shrine of Awa Exploration Location
- Mountain Fortress Bandit Den
- Gazcatraz Bandit Den
- Broken Tract
- Eden Space Centre
- Razorneck Ravine Bandit Den
- Puggy’s Lookout Exploration Location
- Hillside Roost Exploration Location
- Northern Array Bandit Den
- Snaker’s Crib Exploration Location
- Death Ravine Exploration Location
- Mutant Bash TV: Killbox Meat Grinder
- Recon Exploration Location
- Shrine Exploration Location
- Gunbarrel
- Lost Cause Exploration Location
- Green Side Lookout Exploration Location
- Bridge Block Road Choker
- Spikewind Ark
- Torn Plains
- Secret Bunker Exploration Location
- Pit Stop Bar Exploration Location
- The Outsider Ranger Echo
- Chazcar Derby: Torn Plains Track
- Dead Diner Exploration Location
- Strongbox Ark
- Recharge Station Delta Repowering Station
- Forward Command Post Bandit Den
- Stiltown Bandit Den
- Canyon Block Road Choker
- Prime Town Mutie Nest
- Bridge of Ned Bandit Den
- Mechanics of Wasteland Exploration Location
- On The Crack Exploration Location
- Quick Stop Exploration Location
- Gass Pass Pit Stop
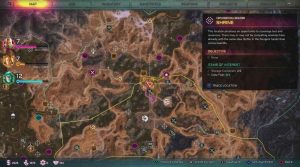
- Wellspring
- Wellspring (Only Obtainable During And After The Wasteland Celebrity Mission)
- Waterpump Bandit Den
- The Wilds
- Dreadwood
- Goliath Plant Exploration Location
- Authority Headquarters Exploration Location
- Sekreto Wetlands
-
- Clank Exploration Location
- Blood In The Mud Exploration Location
- Mutant Bash TV: Slippery Nipple Blasting Range
- The Bridge Bandit Den
- Lagooney
- Forest Block Road Choker
- Chest Hollow Bandit Den
- Shoals Bandit Den
- Big Willy’s Scrapyard Exploration Location
- Assblaster’s Junkyard Bandit Den
- McBoatface’s Boatery Bandit Den
-
- Dune Sea
- Lazarus Station Exploration Location
- Oasis
- Recharge Station Alpha Repowering Station
- Shrouded Vault Ark and Shrouded Sub Station Alpha & Bravo Electro Forges
Twisting Canyons Data Pads
Vineland
The first four Pads in the Twisting Canyons can be found in Vineland, which is the starting area of the game. After the battle with The Authority has concluded and you have talked to Lily, turn around and head to the left side of this large structure shown below. At the back corner, you can find the Prowley’s Project “Legacy” Log.
Head back to Lily and walk to the right side of the rubble she is standing next to. Resting on a box, against the rubble on the right, you can find the Ranger Report: Ravine Ambush Site Data Pad.
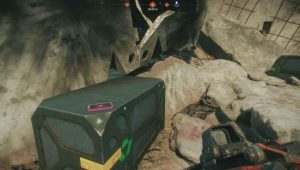
From that Data Pad, look on the opposite side of the large container next to you. By the Mutant Crusher’s hand, you can find the Data Pad, Vineland Refueling Base Is Lost.
Make your way to the Presidio, following the objective marker. Once you reach the gate that lifts, look at the gas canisters on the right. Resting on the box next to it is the Ranger Report: Checkpoint Bridge Overrun Data Pad.
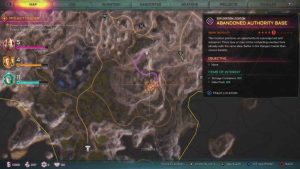
Abandoned Authority Base Exploration Location (Mission: The Signal)
This location can be found just north-east of Vineland.
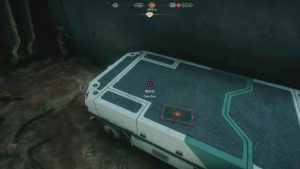
From the entrance, make your way inside the Base. As you reach the first corner, look on the floor to find the first Data Pad, Project Archon – Quality Must Come First.
Continue forward until you reach a large piece of machinery and a few Shrouded enemies. Just past them, on the left side, next to a corner, you can find the next Data Pad, Project Archon – Modular Constructs.

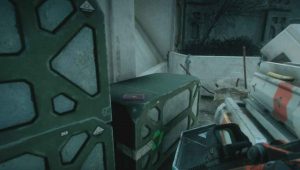
Walk straight ahead to the Authority walls and gates across the bridge. As you reach the corner, look to the left to find the final Data Pad, Project Archon – Underway, on a box by the door.

Quake Hill Ark
This Ark can be found to the north-east of Vineland.
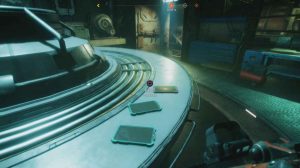
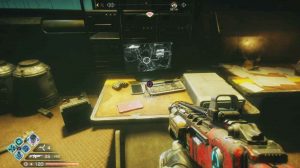
Enter the large building and head to the desk at the end of the reception to find another Data Pad, Eastern Dogs Report 264.10.
Make your way through the door and into the next room. On the desk to the right, against the window, you can find a Data Pad, Kvarsir’s Log – Entry 12:234.
The final Data Pad here requires you to pick-up the ability from the Ark. Once you have done so, head up the ramp that has fallen down and scale the ladder. Go through both doors at the top and look to your left for the Data Pad, Assistant Venn’s Last log.
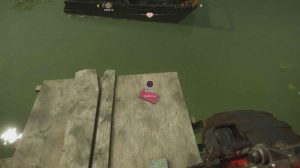
Shrine of Awa Exploration Location
The Shrine can be found in the centre of a raised part of the land on the eastern edge of the region.
It is located next to the pink bunny on the fire.
Mountain Fortress Bandit Den
The Mountain Fortress Bandit Den can be found in the north-east of the region.

Make your way through the den until you reach the room in the back. Take a right and enter the small room off to the side. On your right, you can find the Data Pad, Gregory’s Logbook.
Gazcatraz Bandit Den
The Bandit Den can be found in the north of the region, just east of the Mountain Fortress Bandit Den.
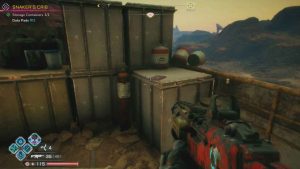
From the entrance to the Den, head to the left side of the path and look for a set of stairs. Go up the stairs and continue moving forward, Ahead you will see the entrance to a small room. Inside that room, on a box to your right, you can find the Data Pad, Message To Glisten Success.
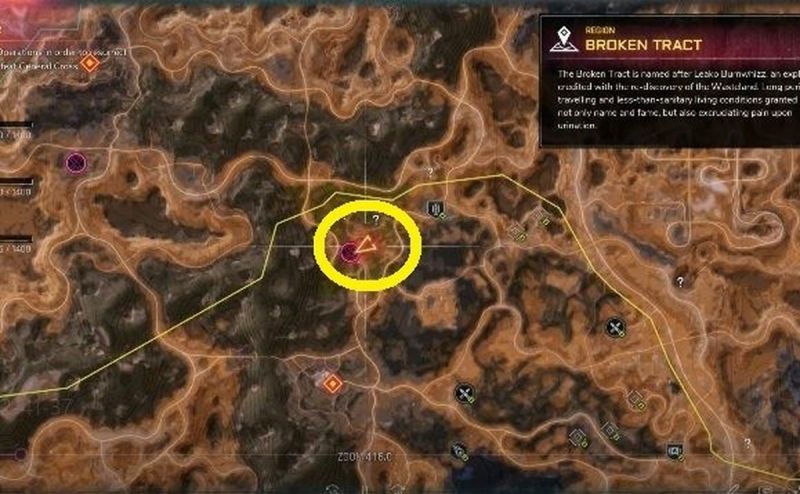
Broken Tract Data Pads
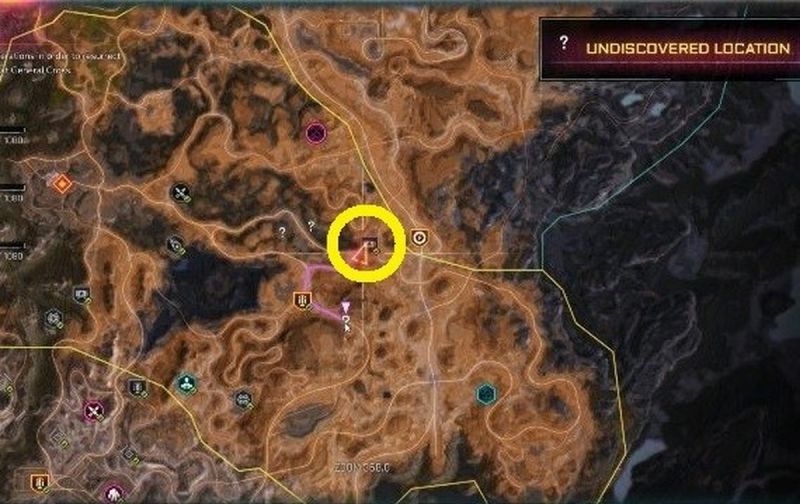
Eden Space Center
The Eden Space Center can be found in the far east of the Borken Tract region. This area is a part of the Ground Control main story mission.
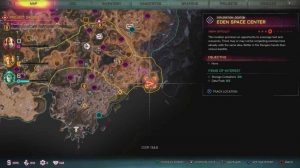
Progress forward until reaching an office with blue dividers. In the back left corner, there is a staircase. Head down them to find a Data Pad, Exciting Excavations #10, at the bottom.
Towards the end of the mission, you will enter the EcoPod control room. As you enter, you can find a Data Pad, RE/Urgent Message!, on a desk to the left.

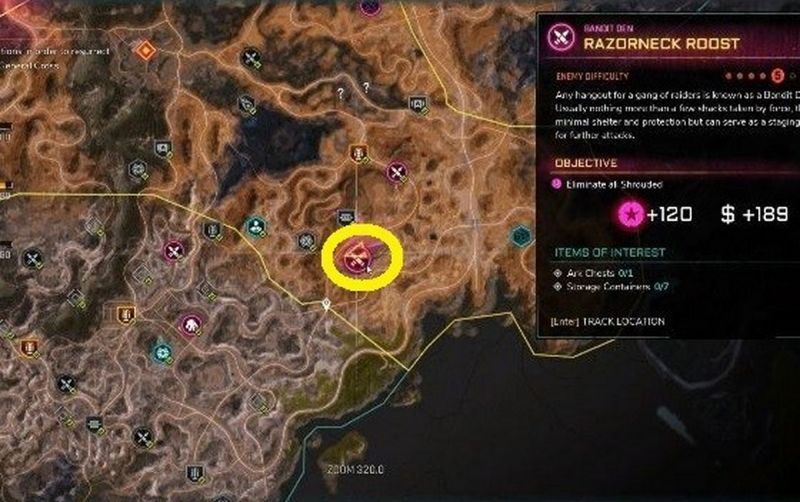
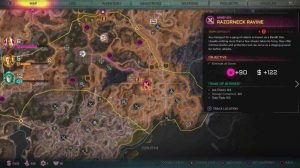
Razorneck Ravine Bandit Den
This Bandit Den can be found just north-west of the Eden Space Centre.
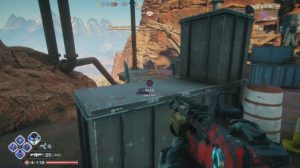
From the entrance, look to the left for some crates. On top of them, you can find the Data Pad, Exciting Excavations #4.
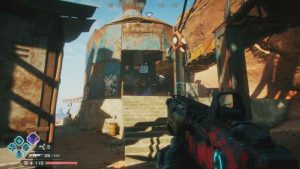
Make your way all the way through the Bandit camp to the circular building in the back. Inside, on the left, you can find the second Data Pad, Fightin’ Fair’s For Fools.
Puggy’s Lookout Exploration Location
This Exploration Location can be found in the northern part of the region.
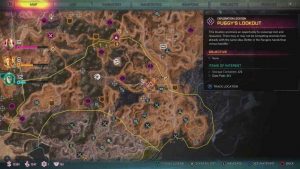
In the middle of the mannequins, on a box, you can find the Data Pad, War Pugs!
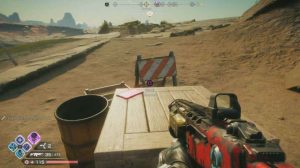
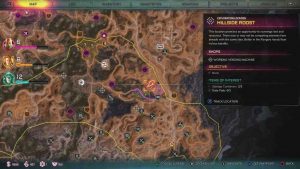
Hillside Resort Exploration Location
This Exploration Location can be found in the northern part of the region just above Puggy’s Lookout.
Head inside the central building. On the counter, you can find the Data Pad, Let ‘Em Rip!
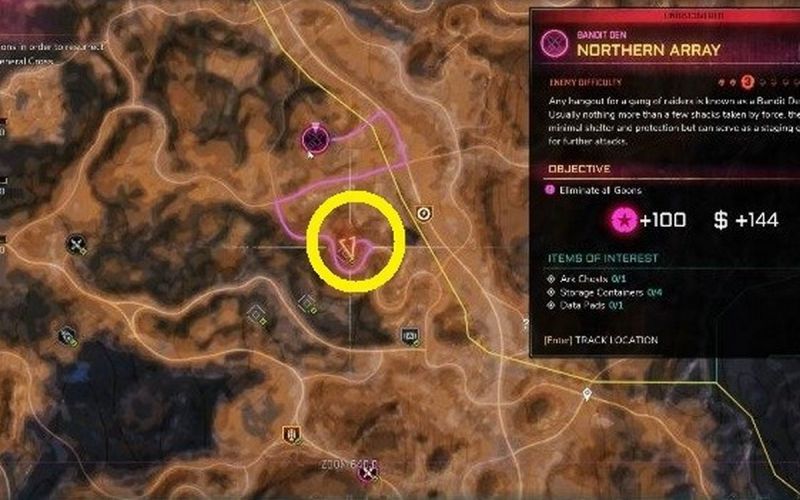
Northern Array Bandit Den
This Bandit Den can be found in the north of the region.
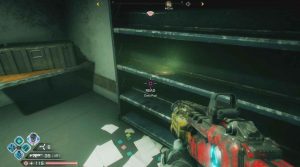
Enter the Bandit Camp and make your way all the way through to the central room. Head through the corridor on the right. On your left, at the end, you can find another door. Inside here, on a shelf, you can find the Data Pad, Hidden For Later.
Snaker’s Crib Exploration location
This Exploration Location can be found on the northern border of the region. It is north-east of the Mutant Bash TV location.
This Exploration Location can be found on the northern border of the region. It is north-east of the Mutant Bash TV location.
Head behind the building and onto the platform. Resting on a box in the corner is the Data Pad, Robo-Buddy.
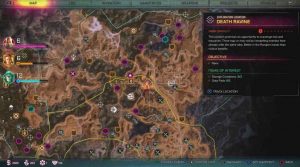
Death Ravine Exploration Location
This Exploration Location can be found on the northern border of the region. It is north-east of the Mutant Bash TV location.
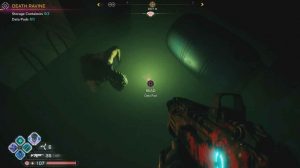
Head inside the cave carved into the side of the mountain. Next to the ladder, you can find the Data Pad, Rozz Journal Entry
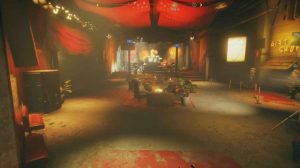
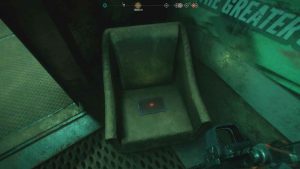
Mutant Bash TV: Killbox Meat Grinder
This Mutant Bash TV location can be found in the northern part of the Broken Tract. It is slightly north-east of Gunbarrel.
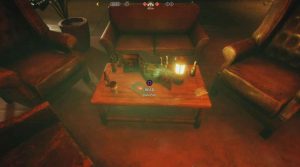
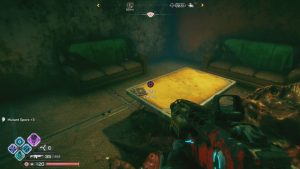
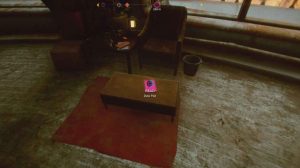
Inside the building, you can see a set of seats in front of you when standing next to the exit. Those seats are surrounding a table and on that table is a Data Pad, entitled Needs More Fire.
Recon Exploration Location
This Exploration Location can be found on the Northern border, in the centre of the region.

Head inside the building and up to the second floor. On the desk, you can find the Data Pad, Scout Observation #42.

Shrine Exploration Location
This Exploration Location can be found on the northern border, in the centre of the region. It is located in the hills of a mountain.
In the middle of the shrine, you can find the Data Pad, Tombstone.
Gunbarrel
The town of Gunbarrel houses a number of the Data Pads in the Broken Tract. The town can be found in the centre of the region. This town is part of the main Project Dagger storyline.
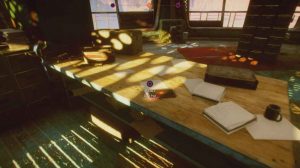
From the entrance of the town, turn around and enter the garage opposite. Inside, on the workbench, you can find the Bandit Flyer Data Pad.
Head inside the town and take a left as you enter. On the counter of the first shop, you can find the Data Pad, South Road Is Dangerous.
Continue following the path around. In the room after the General Store, the second Data Pad, Caravan Masters – Road Choker Report, can be found sat on the counter.
Go back outside and up the set of stairs ahead. Once you reach the top, take a left and you will see an alley. Resting on the metal bar, there is another Data Pad. The Warning: Pestilent Park Pad.

Head back along the main path until you reach the bar. Before heading inside, take the path on your right to find the Exciting Excavations #1 Data Pad sat on the wall.
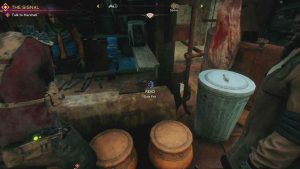
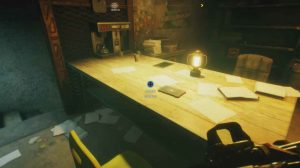
Next, head inside the Bar. On the table, right in front of you as you enter, you can find another Data Pad, The Cactus Jack.
Once on the bottom floor of the bar, take a left as you exit the stairs to find a Data Pad sat on the table. This one is The Legendary Snakers.
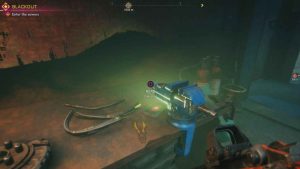
The next three Data Pads can only be obtained after completing the mission: Blackout. Talk to Marshall in the bar to get the mission. Follow the objective marker down the lift and into the sewers. Continue with the mission until you reach Marshall’s armory after using the lift.
The first Pad, Black Baron – Visions, can be found resting on the table, next to the shelves in the workshop.
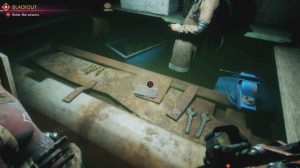
Head into the main room to find the Data Pad sitting on the central console. This Pad is a Message From E. Prowley.
Make your way up the ladder and the set of stairs. Sitting in the middle of the table in this room is the final Data Pad, Greenside Lookout MIA.
Lost Cause Exploration Location
This Exploration Location can be found in the western sector of the region. It is just north-west of the Great Crack Ark.
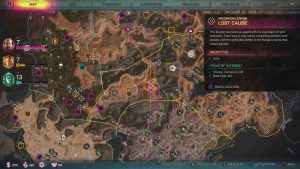
Make your way into the building at the back of the graveyard to find the Data Pad, Damper’s Journal, sat on a table.
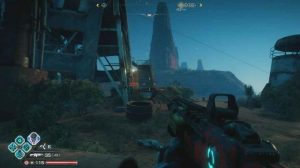
Green Side Lookout Exploration Location
This Exploration Location can be found in the western sector of the region. It is north-west of the Great Crack Ark.
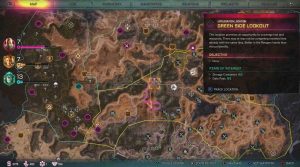
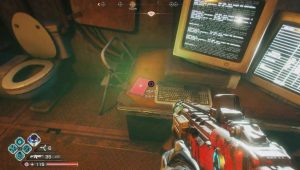
Head up the stairs of the lookout tower. Once you reach the first room, look on your right to find the Data Pad, Exciting Excavations #6, next to some computers.
Bridge Block Road Choker
This Road Choker can be found in the western sector of the region. It is along the southern border.
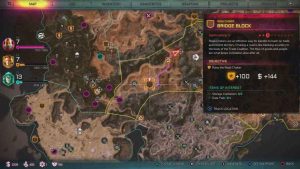
Position yourself on the eastern side of the Choker and look west. Head up the left set of stairs. On a box, at the top of them, you can find the Data Pad, More Cool Shit – BB.
Spikewind Ark
This Ark can be found in the western section of the Broken Tract region.
As you enter the area, you will see a destroyed building on the left. Inside, on a metal box, you can find the Data Pad, Hot On The Trail.
Torn Plains Data Pads
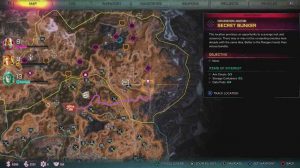
Secret Bunker Exploration Location
This location can be found in the east of the Torn Plains region.
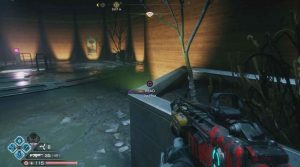
As you enter the bunker, on the right ledge before the elevator, you can find the Data Pad, Emergency Security Protocol.

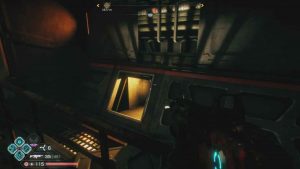
Head down the elevator and continue forward until the voice locks you out. To the right, you can find a small vent to climb through. When you come out of the other end, you can find the Data Pad, Memo To The Section Chiefs, on the desk.
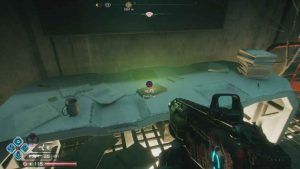
Continue forward into the next room. As you enter, look on the desk to your right to find the next Data Pad, Daily Herald Cover Story.
Progress forward through the corridor and into the next room. On the cabinets ahead, you can find the final Data Pad, Daily Herald Cover Story.
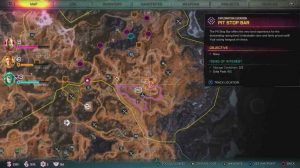
Pit Stop Bar Exploration Location
The Pit Stop Bar can be found just north-east of the Chazcar Derby.
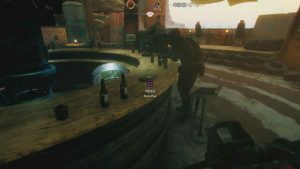
Head to the bar to find the Data Pad, Missing Bartender, on the back side of the counter.
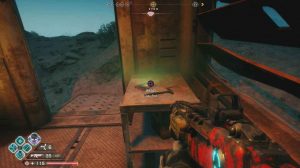
The Outsider Ranger Echo
This Ranger Echo can be found just south of the Chazcar Derby. Keep your eye out for a large building.
From the front of the building, head up the set of stairs to the porch. Resting on the table, you can find the Exciting Excavations #2 Data Pad.
Chazcar Derby: Torn Plains Track
The Chazcar Derby can be found in the south-eastern section of the Torn Plains region.

In order to enter the area, you will need to go through a doorway on the right. On a chair, just next to that doorway, you can find the first Data Pad, entitled Pappy Swift’s Patch.
Through the doorway, there is a waiting area, filled with race participants. On the left, two racing participants will be loitering outside of the garage. head around behind them, underneath the traffic lights. Resting on a metal box, you can find the Scare ‘Em Off Data Pad.
Dead Diner Exploration Location
This location can be found to the north-west of the Chazcar Derby.

Head inside the dine and into the back room. Resting on the desk in the corner, you can find the Data Pad, Smuggling Stash.

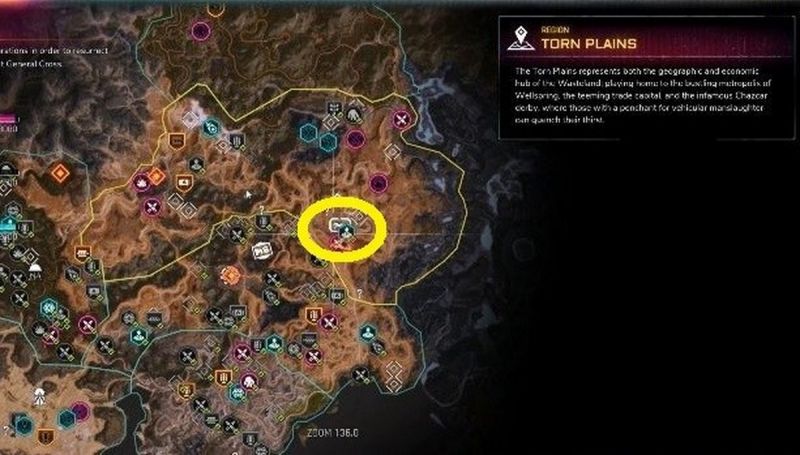
Strongbox Ark
The Strongbox Ark can be found in the Torn Plains region, north of the Chazcar Derby.
Continue through the area until reaching the Ark. Before scaling the stairs up to the Ark, look to the left for the Mutant Love Child Data Pad on top of a box.
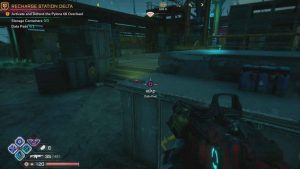
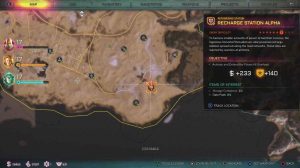
Recharge Station Delta Repowering Station
This station can be found in the north of the region.
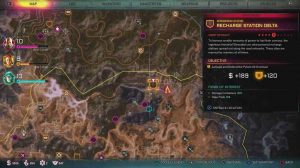
As you enter the area, head towards the tower. On a box, next to the stairs on the left side of the tower, you can find the Data Pad, The Tales of The Skin-Divers.
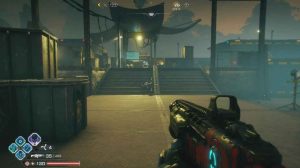
Forward Command Post Bandit Den
This Den can be found in the north of the region, slightly north of Strongbox Ark.
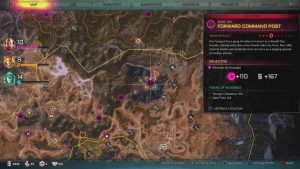
Make your way to the central platform. Sitting on the desk in the centre, you can find the Data Pad, Operation “Hightower” Report.
Stiltown Bandit Den
This Bandit Den can be found in the centre of the Torn Plains region.
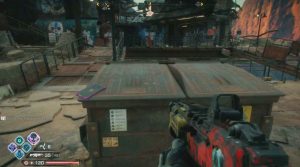
Make your way up the elevator and to the upper level of the camp. On the dumpster, just before the path connecting the bridge, you can find the Data Pad, ‘Send Booze!!!’.
Now, make your way to the top level of the Bandit Camp, inside the building with blue walls. Jump up to the second floor to find the Data Pad, Looking For Bombs, on a table.
Canyon Block Road Choker
This Road Choker can be found in the south of the Torn Plains region.
Look to the western edge of the Choker. On the ground level, against a corner, you can find the Cool Shit – BB Data Pad.
Prime Town Mutie Nest
This Mutie Nest can be found along the southern border of the region, in the centre.
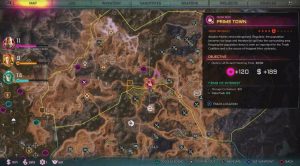
As you enter, look to your left for a set of stairs leading up to the second floor of a building. Take them up to that second floor to find the Data Pad, Getting Up and Running, on the table.
Bridge of Ned Bandit Den
This Bandit Den can be found in the centre of the region, east of Wellspring.
Make your way to the end of the bridge which the Bandit Den is situated on. In the final room, on the left, you can find the Data Pad, ‘Hey, Cousin!’.

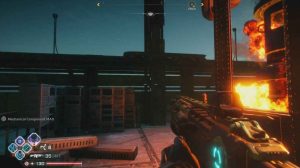
Mechanics of Wasteland Exploration Location
This location can be found in the north of the region.
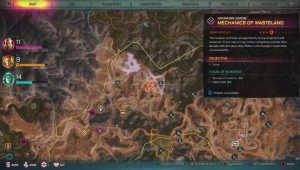
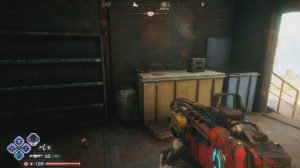
Head inside the building’s lower floor to find the Data Pad, They Are Coming For Me, on a box at the back.
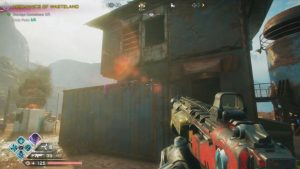
Head outside and climb up to the top floor, through the window. Inside, on the bed, you can find the second Data Pad, I’m Toast.

On The Crack Exploration Location
This Location can be found along the southern edge of the region’s border.
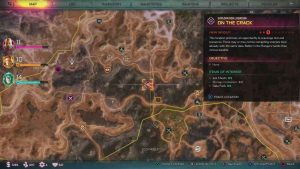
Head into the main building and up the small set of stairs. look to your left to find the Data Pad, The Mutie Fix, sitting on the side.
Quick Stop Exploration Location
The Quick Stop can be found in the western section of the Torn Plains.
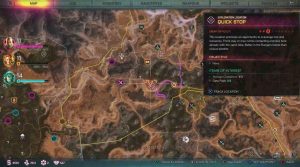
Head inside the building and look for a single crate in the middle of the room. Resting on top, you can find the Data Pad, Bullet Kaiser.

Gass Pass Pit Stop
This Pit Stop can be found in the western part of the region, slightly east of Wellspring.
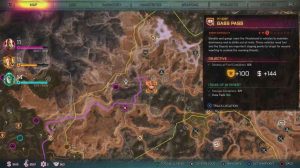
Head inside the central building and look for the toppled over vending machine. Resting on top is the Data Pad, Exciting Excavations #8.
Wellspring
Wellspring is found in the centre of the region. It is a part of the main Project Dagger storyline.
From the entrance of Wellspring, walk up the flight of stairs ahead and take a right. Then, take a left directly after and head to the booths in the back corner. Resting on the right table is the first Data Pad, Get the Gear or Git!

Head back to the staircase you walked up. Next to it is a ramp and at the top of that ramp, resting on a wall, you can find the next Data Pad. This one is entitled Pipe Down.
From that Data Pad, take a right and head out to the courtyard with the statue. Inbetween Jack and Bloody Mary’s shops you can find a small alley.
On the left, behind the first corner, you can find a Data Pad, Message From The Swill Baron.
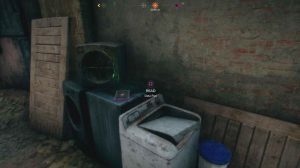
Continue forward and about halfway up, sitting on a rusted washing machine, you can find the I’m Not Paying Pad.
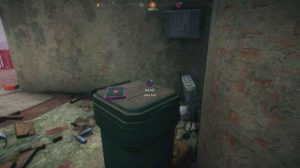
Continue up the alley, until you find a bin with the Use The Dumpster Data Pad on it.
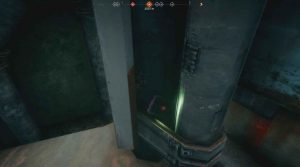
Make your way back to the courtyard with the statue. Behind the statue is the City Hall. To the left of the entrance, lodged in-between two pipes, you can find the Sinkhole Dwell Is Lost Data Pad.
Head inside City Hall and look on the table in the second office on the right. The Report From the Scraplands Data Pad is sitting on it.

Use the elevator that leads to Hagar’s office. As you exit, make a sharp right to find the Wellspring Public Library Data Pad sat on a bookshelf.

From that datapad, stick to the edge of the room and follow it around. Resting on a coffee table, just around the corner, you can find the Mako – Goons Spotted Data Pad.
Next, look on the table behind Hagar to find the Update – south-east Elevator Pad.
Turn around 180 degrees to find the Wyatt Ferris – New Office Data Pad sat on the side next to the sink and coffee machine.
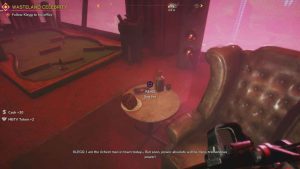
Wellspring (Only Obtainable During And After The Wasteland Celebrity Mission)
After Walker has won a race and completed Mutant Bash TV, Hagar will ask him/her to come back to Wellspring. Once back, head to the Winner’s Lounge and meet Klegg Clayton. He will take Walker up to his office, which has four Data Pads.
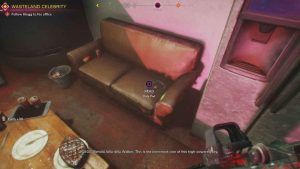
Upon exiting the elevator, turn to the right and look on the couch for the Unca Kleggy’s Swamp Swill Data Pad.
Next to the central pillar in the office, there is a small table next to a chair. Resting on this table is another Data Pad. This one is called Industrial Salvage For Ya.
Head up to the desk at the end of his office. Next to the mouse and keyboard, there is a Data Pad entitled Note From Chaz.
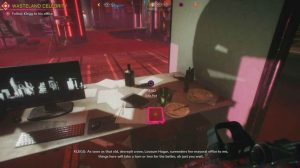
Turn around to find the Office Decorations Data Pad on top of a set of drawers.
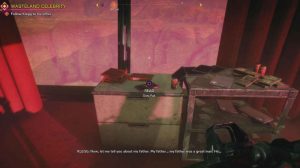
The next Data Pad can be found after killing Jumbo, the large Mutant Crusher. Head through the door in the corner of the room and up the stairs. The Data Pad, Jumbo Needs Lookin’ After, is sitting on the table.
Continue through the linear area until reaching the mannequin which is staring at the wall. Continue on a little further and turn the wheel on the door at the end of the area. Inside the room behind the door, on a shelf to the right, is another Data Pad, Feeding Jumbo.
Once reaching the room with the tank, jump up to the platform the tank is situated on. Behind the tank, on a desk is another Data Pad, Train My Tank Crew.

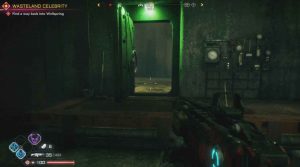
Upon reaching the room with the elevator, head along the hallway to the right. Around the corner is a staircase and in the back corner, beneath it, there is another Data Pad entitled Givin’ The Game Away.

Waterpump Bandit Den
This Bandit Den can be found in the western section of the region.
Head to the back of the area and into the building to the right of the large tower. On the table to the left of the entrance, you can find the Data Pad, Dolly The Detonator.
The Wilds Data Pads
Dreadwood
Dreadwood can be found in the north of The Wilds region.

Make your way to the back corner of the town, where the two vendors are. Head inside the small shack at the back labelled ‘Supplies’.
Turn to the right and look on a box attached to the wall for the first Data Pad, Send Reinforcements!.
In the corner of the shack, there is a ladder. Before climbing it, look to the right of it for a Data Pad, Exciting Excavations #3.

Climb the ladder and head into the room ahead. On the railing edge to the right, you can find the Warning From Management Data Pad.
Walk out onto the Rooftop seating area and look for a table on the right side with a lamp on it. The next Data Pad, Swill Still Kill, is resting here.
Go back downstairs and head behind the Pepper’s Palpable Promises store. Resting on a bin, next to the door, you can find the final Data Pad, Ark Bonanza.
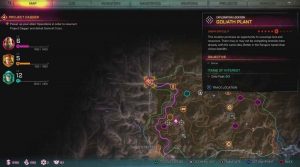
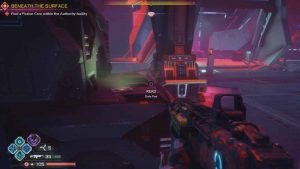
Goliath Plant Exploration Location (Mission: Beneath The Surface)
The Goliath Plant can be found in the top north-east of The Wilds region
All three Data Pads can be found in the first large arena you enter.
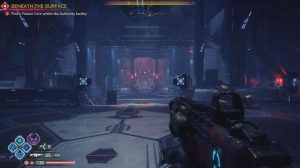
To collect them all, do a loop around the edge of the room clockwise. Along the path to the left, you can find the Data Pad, Project Archon – Combat Trials, against the railing.

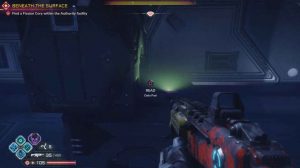
Continue looping around. Once you reach the elevator, look on the box to the left to find the second Data Pad, Project Archon – Combat Effective.
Walk past the elevator and continue the loop. Halfway along the walkway, on the opposite side of where the first Data Pad was, you can find the final one on a box by the wall. This one is entitled Project Archon – Neural Interface.
Authority Headquarters Data Pads
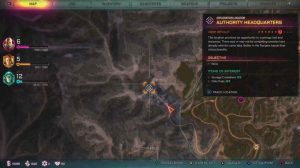
Authority Headquarters Exploration Location (Mission: Project Dagger)
All three of the Data PAds can actually be found outside of the Headquarters, which is located just outside of The Wilds region.
From the end of the road, opposite the entrance, walk to the destroyed van on the right side of the road. Inside the back, you can find the Data Pad, Project Archon – Ready For Development.
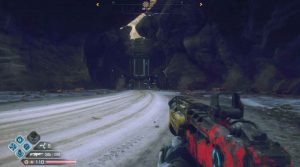
On the box to the left of that Pad, you can find the second one, Project Archon – A Happy Accident.
Head to the opposite side of the road to find the third Data Pad, Project Archon – A Worthy Steed, on a piece of rubble.
Sekreto Wetlands Data Pads
Clank Exploration Location
This Exploration Location can be found in the north of the region.
Across from the mainland, you can find this area in the swamp. Jump up to the pillar in the centre of the destroyed building to find the Data Pad, Muties With Brains?
Blood In The Mud Exploration Location
This Exploration Location can be found in the north of the region, along the western border.
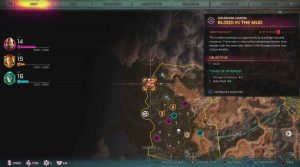
This location is on a small island off of the mainland. When standing in the middle of that island, look in a north-east direction to find a dock with a hover-boat. On top of a box on that dock, you can find the Data Pad, Shrouded Team Spotted.
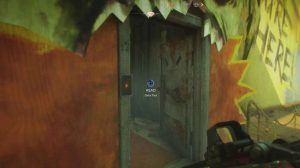
Mutant Bash TV: Slippery Nipple Blasting Range
This MBTV location can be found in the centre of the western edge of the Wetlands.
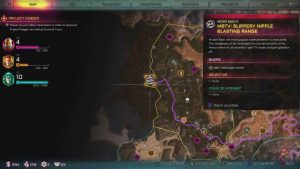
As you enter the door to the vendor, you will find the Data Pad, Arena Closed For Redecoration on the left edge of the doorframe.
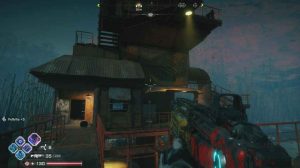
The Bridge Bandit Den
This Bandit Den can be found just north of Lagooney.
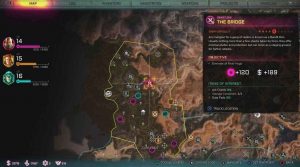
Make your way up to the top floor of the Den. Inside the room at the top, you can find the Data Pad, Locking Down The Wetlands.

Lagooney
Lagonney is found in the centre of the Sekreto Wetlands region. This town is a mandatory part of the main Ground Control quest.
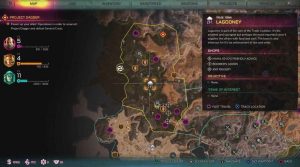
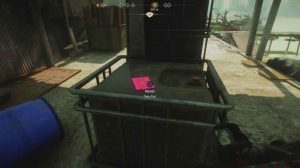
As you enter, go to the right of the bounty board and make your way up along the water. Look for the blue barrel on the floor. The Data Pad, Burrowing Muties?, can be found on the crate next to it.
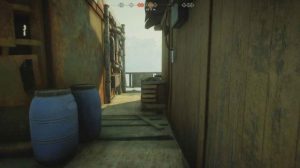
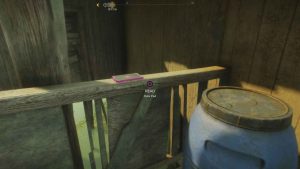
Return to the bounty board and head up to the Market. Look for a small side alley to your left. On the railing around the corner, you can find the Data Pad. This one is titled The Swill Must Flow.
Go back to the Market and this time take a right. Sitting on the chair, against the wall, you can find the ‘Prime Town has Mutant Trees?’ Data Pad
Jump down to the boardwalk, and make your way up along it. Halfway up you will find a bench next to a refrigerator. Sitting on the bench is another Data Pad. This one is called Hunters Story of Kvasirs Lab.

Turn around and walk across the planks in front of you. At the end, you can find the Exciting Excavations #4 Data Pad.
Make your way back to the market, this time heading to the far left corner. Here you can find a ladder leading down to a walkway. Take a left and continue along it until you reach a set of pipes on the wall. Look to your right to find the Goodbye Ma! Data Pad.

Forest Block Road Choker
This Road Choker can be found along the eastern border of the region.
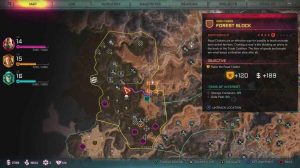
Stand on the south side of the Choker and look north. On the right, next to the River Hog symbol, you can find the Data Pad, Coolest Shit – BB.
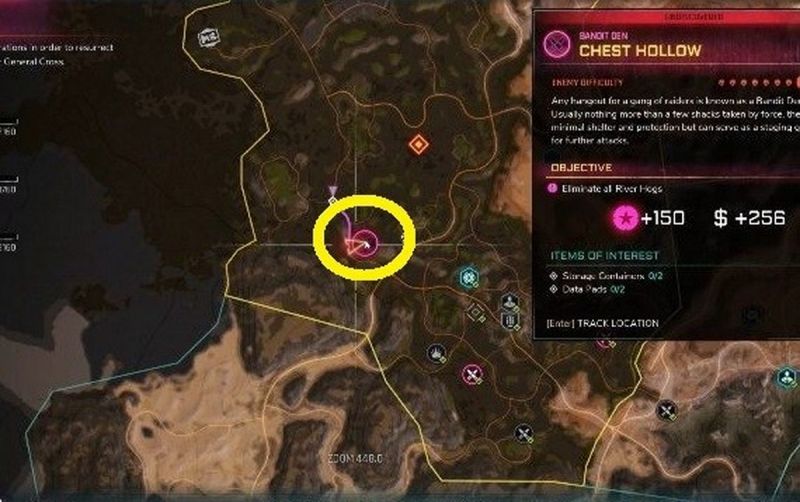
Chest Hollow Bandit Den
This Bandit Den can be found in the south-west corner of the region.

Make your way inside the central building. On the right, you can find the Data Pad, ‘Get Your Shit Together!’ on the blue tool shelves.
Head out the back of the building to find the Data Pad, More Fuckin’ Tips From Buggo, on the table outside.
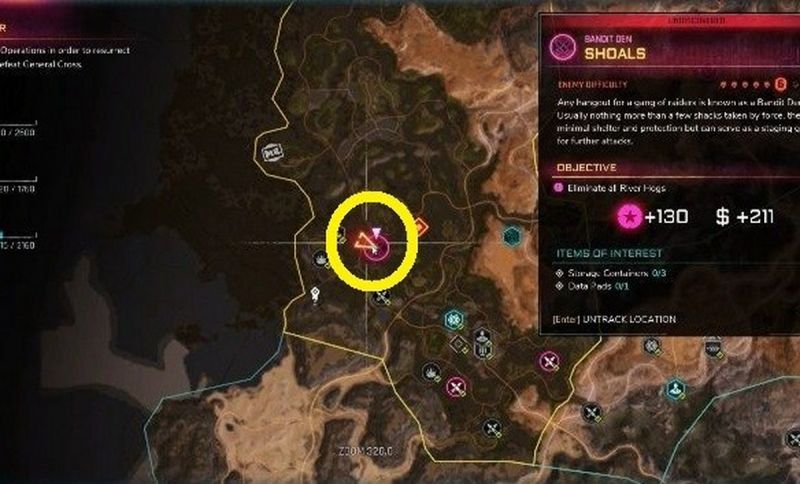
Shoals Bandit Den
This Bandit Den can be found in the south-west corner of the region.
Make your way into the central building. In the back right corner, you can find the Data Pad, Real Good Fuckin’ By Old’ Buggs.

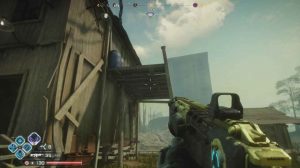
Big Willy’s Scrapyard Exploration Location
This Exploration Location can be found in the south of the region.
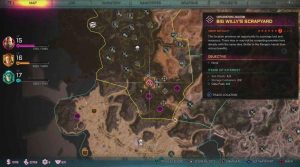
Look to the right of the central building. Jump up to this platform to find the Data Pad, The Ballad of Tugrid Stump.
Next, head inside the building and look on the floor, next to the back door. Here you can find the second Data Pad, Buggo’s Final Fuck.

Assblaster’s Junkyard Bandit Den
This Bandit Den can be found in the south of the region.
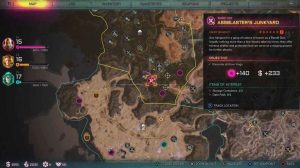
From the entrance to the den, head to the left side and look for a small hut with power lines running to it. Inside, you can find the Data Pad, Exciting Excavations #9.
McBoatface’s Boatery Bandit Den
This Bandit Den can be found at the very south of the region.
Head inside the central building at the back to find the Data Pad, Captin Crank’s Pirat Advensher, sitting on a bed.
Dune Sea Data Pads
Lazarus Station Exploration Location (Mission: Double Cross)
This Exploration Location can be found in the south section of the Dune Sea.

Right before the entrance of the location, you can see a small box on your right. The Data Pad, Project Archon – Stability Issues, is found resting on top.

Once you go down the elevator, continue forward and take the left path. Right in front of you, on another box, you can find the Data Pad, Project Archon – Combat Effective.

Head through the facility and complete the Double Cross mission. At the end of it, you will exit the facility. Head past the Rangers and down the stairs. To the right, inside a small cell, you can find the third and final Data Pad, Project Archon – A Strong Base.
Oasis
The town of Oasis can be found in the north of the Dune Sea.
As you enter the town, on your left there is an abandoned garage. Inside on the middle set of shelves, you can find a Data Pad, Dear Death Spitter.
Look at the shelves on the right side of the room to find another Data Pad, Supply Requisition Order From High Command.
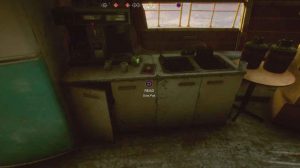
Make your way deeper into the town, until you come across the store: Jazz’s Watering Hole. Inside, on a box opposite the counter, you can find the Data Pad, Report: Weather In the Dune Sea.

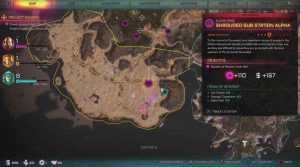
Recharge Station Alpha Repowering Station
This Repowering Station can be found in the east of the region.
Head behind the pylon and use the ladder on the platform to climb up to the lookout. Resting on the railing, you can find the Data Pad, Close To The Bleeding Edge.

Shrouded Vault Ark and Shrouded Sub Station Alpha & Bravo Electro Forges
The actual Ark doesn’t have any Data Pads. However, in order to complete the Ark, you need to visit two Sub Stations. All three of these locations can be found in the Dune Sea region. At Sub Station Bravo there is one Data Pad.
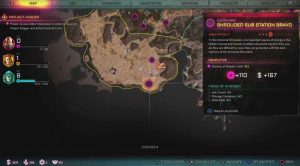
As you enter the building, look to your right to find the Data Pad, Atom Hammer Is The Future, on a metal box.

At Sub Station Alpa, just north of Bravo, look next to the ladder to enter the building for the Data Pad, The Unforgettable Tale of The Shrouded.
Drop down the ladder and into the vent system. About halfway along you will come across the second Data Pad, The Unconquerable Will of Iron.
Once you reach the room with the lever to pull, head to the opposite side from where the lever is. Resting on a box is the final Data Pad, The Resolute Shield of Sanctity.
Check out our selection of Rage 2 guides:
How To Upgrade Weapons, Where To Find Feltrite & Weapon Core Mods
How To Upgrade Nanotrite Abilities, Where To Find Feltrite & Nanotrite Boosters
How To Upgrade Vehicles, Where To Find Auto Parts
Projects Explained, How To Get Project Points, Projects To Buy First
All Ark Chest Locations Guide
Ark Guide: Weapons, Nanotrite Abilities Locations Walkthrough
23 мая 2019
23.05.19
1
76K
Rage 2 – шутер от первого лица с акцентом на использовании мощных пушек и удивительных суперспособностей. И в том, и в другом поначалу игры вы будете испытывать недостаток. К счастью, и то, и другое может быть найдено в одних и тех же местах – внутри Ковчегов.
Ниже я расскажу и покажу вам расположение каждого Ковчега в Rage 2. Некоторые предметы будут получены в начале игры, другие – должны быть найдены вами самостоятельно. Как правило, путешествуя по Пустоши, вы будет находить большую часть объектов, поскольку при сближении с ними на карте появляется маркер. Однако игровой мир очень большой, а чтобы активировать маркер, нужно подойти к Ковчегу на расстояние 100-200 метров. Часть Ковчегов спрятана внутри зданий или под землей, что усугубляет процесс их нахождения.
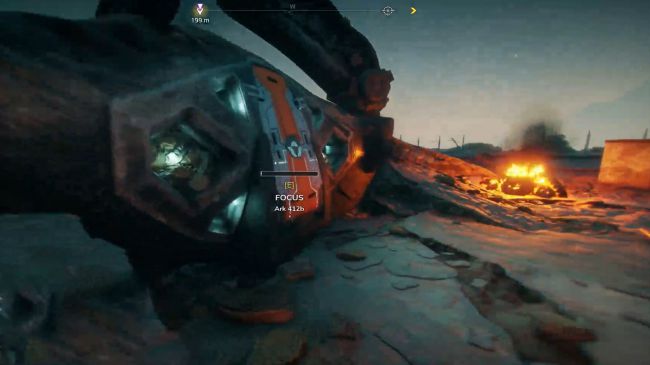
Важно. Также очень интересный момент связан с использованием концентрации. При ее активации, осмотрите окружающий мир, чтобы обнаружить мощные потоки света. Эти лучи указывают на расположение Ковчегов.
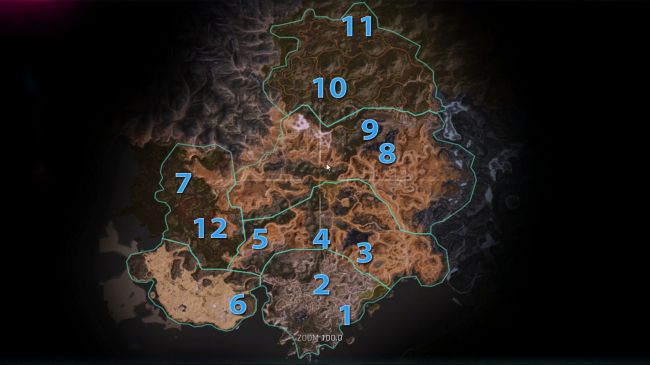
Расположение всех Ковчегов на карте.
1. Ковчег Дрожащего холма
Содержимое:
— Способность «Вихрь».
— Сундук Ковчега x1
— Контейнер x2.
— Датапад x3
Один из Ковчегов в Rage 2.
Ковчег Дрожащего холма, несмотря на название, спрятан под землей и замаскирован скучным серым зданием, стоящим на краю обрыва и окруженным транспортными контейнерами. Чтобы отыскать Ковчег, войдите в здание и пройдите через заднюю дверь. Продолжайте двигаться в том же направлении, пока не достигнете моста. Когда вы его пересечете, он рухнет, однако вы сможете открыть Ковчег и изучить новую способность. Это своего рода взрывающаяся (мини) черная дыра, засасывающая врагов и наносящая им урон.
2. Ковчег Драндулетного ущелья
Содержимое:
— Способность «Бросок».
— Сундук Ковчега x1
— Контейнер x6.

Один из Ковчегов в Rage 2.
Способность «Бросок» является полезным улучшением, поскольку действует как усиленная и быстрая атака ближнего боя. Очень удобный навык, если вы попали в окружение врагов ближнего боя (мутантов). Умение также разрушает броню противников, что невероятно полезно во время сражений с Бессмертными Саванами. Находится Ковчег в конце бандитского лагеря, поэтому прежде, чем попасть внутрь, его придется полностью зачистить.
3. Ковчег Каньонной бухты
Содержимое:
— Способность «Дефибрилляция».
Один из Ковчегов в Rage 2.
Ковчег Каньонной бухты хранит способность «Дефибрилляция», которая позволяет Уокер(у) возвращаться из мертвых в том случае, если вы успешно прошли мини-игру. Учитывая, что в Rage 2 на самом деле очень трудно погибнуть, вероятно, приоритетной целью умение назвать нельзя. Иначе разработчики сделали бы его активным по умолчанию, как в оригинале игры.
4. Ковчег Великой трещины
Содержимое:
— Способность «Гравитон».
— Сундук Ковчега x1
— Контейнер x4.
Один из Ковчегов в Rage 2.
Способность «Гравитон», которую вы найдете в Ковчеге Великой трещины, довольно важна при исследовании локаций, поиске ресурсов и сундуков, поэтому ее нужно получить как можно раньше. Ковчег спрятан в дальней части небольшого поселения, сквозь которое проходит дорога. Изучите его и войдите внутрь поселения. Дорога сама приведет вас к Ковчегу.
5. Ковчег Шипов бури
Содержимое:
— Способность «Барьер».
— Контейнер x4.
— Датапад x1
Один из Ковчегов в Rage 2.
Учитывая, что Rage 2 – искрометный шутер с большим количеством перестрелок, требующий постоянного передвижения по локации, развертываемый энергетический барьер (в виде данной способности) имеет ограниченное применение. Хотя он все же будет полезен. За пределами Ковчега находится Хламобот, поэтому вам придется его уничтожить прежде, чем попасть внутрь. Ковчег сложно не заметить, поскольку он находится под открытым небом за большой трубой, около одно- и двухэтажных зданий.
6. Ковчег Хранилища Саванов
Содержимое:
— Оружие «Заряженная энергопушка».
— Сундук Ковчега x2
— Контейнер x5.
Один из Ковчегов в Rage 2.
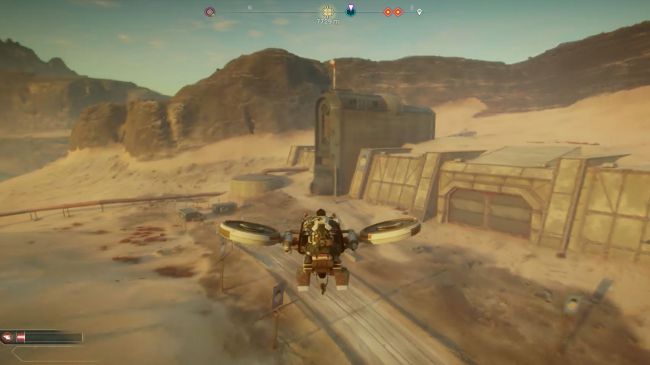
Данный Ковчег, в отличие от предыдущего, легко пропустить, поскольку он спрятан под скромным зданием, расположенным на окраине региона. Вы даже не получите маркер Ковчега до тех пор, пока не окажетесь у небольшой круглой двери высокой темной конструкции. Идите через здание, пока не доберетесь до Ковчега, чтобы получить заряженную пушку. Это интересное оружие, которое наносит тем больше урона, чем сильнее перегревается. Таким образом, вам придется одновременно управлять им и следить за своевременным охлаждением.
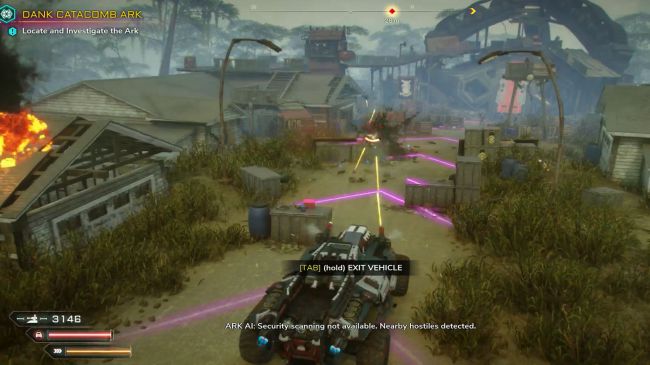
7. Ковчег Сырой катакомбы
Содержимое:
— Оружие «Огненный смерч» (револьвер).
Один из Ковчегов в Rage 2.
Трудно пропустить данный Ковчег, поскольку он возвышается над улицей с одноэтажными домами. Есть несколько врагов, которых придется убить прежде, чем можно будет войти внутрь. Но это того стоит! Огненный револьвер стреляет зажигательными пулями, которые вы можете активировать отдельно, нажав на ПКМ.
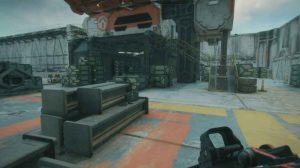
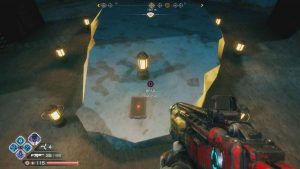
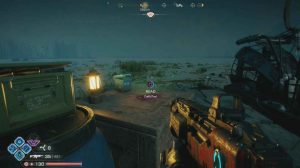
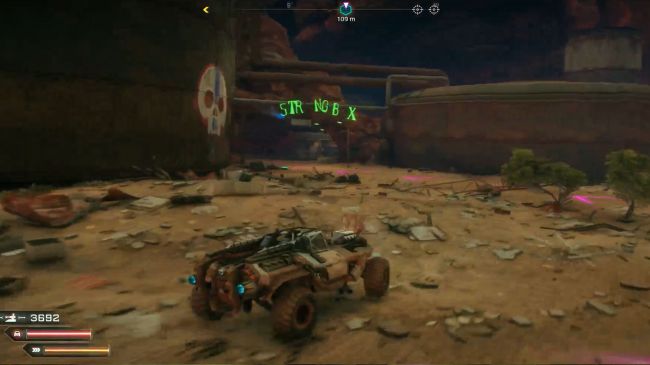
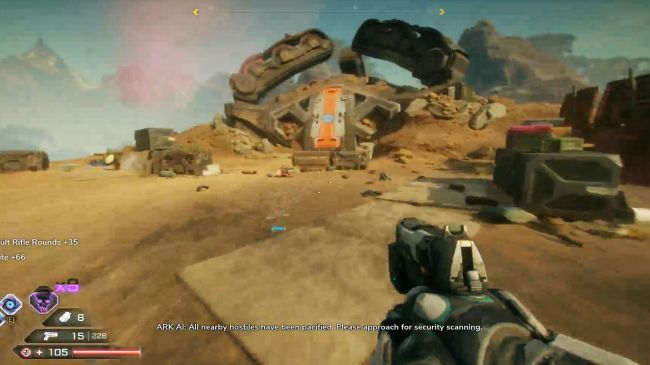
8. Ковчег Суперсейфа
Содержимое:
— Оружие «Умный ракетомет».
— Сундук Ковчега x2
— Контейнер x5.
— Датапад x1
Один из Ковчегов в Rage 2.
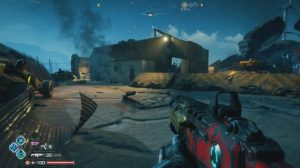
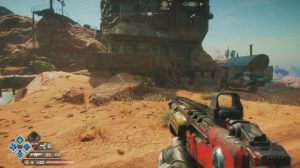
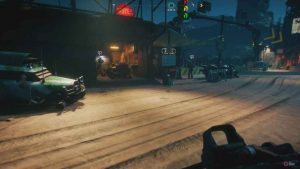
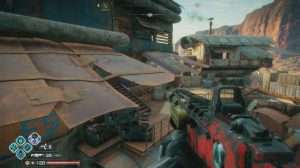
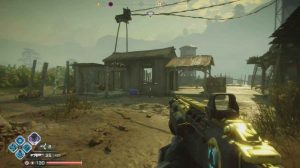
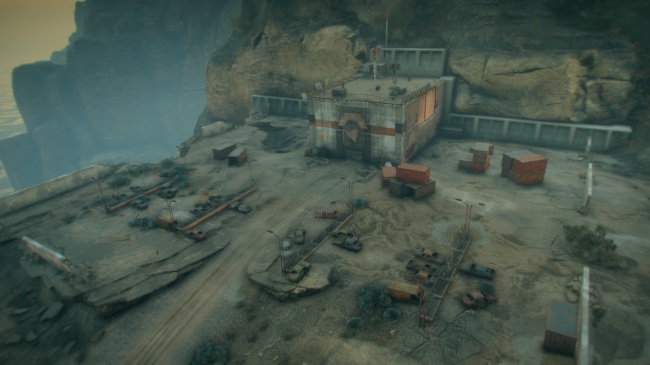
Поиску этого Ковчега следует уделить особое внимание, поскольку «Умный ракетомет» – одно из самых полезных оружий в игре. Оно стреляет пучком самонаводящихся ракет, которые способны быстро уничтожить практически любого босса или более сильных противников. Это еще один Ковчег, который можно пропустить, поскольку он находится в конце заброшенного поселения под названием Суперсейф. Вам придется бросить машину и идти пешком. Поселение похоже на обычные города с торговцами, но оно разрушено и заполнено бандитами. Убейте их и входите внутрь.
9. Ковчег Шрама земли
Содержимое:
— Способность «Удар сверху».
— Контейнер x2.
Один из Ковчегов в Rage 2.
Как и в случае с Ковчегом Сырой катакомбы, этот объект трудно пропустить, поскольку он расположен среди невысоких зданий. Проберитесь в гору, убейте бандитов и проникните внутрь, чтобы получить способность. С ее помощью вы сможете бить кулаком о землю, нанося урон за счет ударной волны (по области). Чем выше высота падения, тем больше разрушений несет удар о землю. Таким образом, хорошей идеей станет совмещение данного навыка с «Гравитоном».
10. Ковчег Нидл-Фоллз
Содержимое:
— Оружие «ГРаБС Спотыкушка».
— Контейнер x3.
Один из Ковчегов в Rage 2.
В этом Ковчеге вы найдете одно из самых забавных оружий в игре. ГРаБС «Спотыкушка» является гравитационным оружием, собирающим вместе любые предметы и пуляющим их во врагов. Если быть точнее, вы можете притягивать врага к машине или машину во врага. Чем тяжелее предмет, тем больше зарядов в него нужно выпустить прежде, чем притянуть к другому объекту.
11. Ковчег Гринхевена
Содержимое:
— Оружие «Гиперпушка».
Один из Ковчегов в Rage 2.
Этот Ковчег спрятан среди руин из белых высоких стен, и внутри может быть найдена «Гиперпушка». Прежде чем войти внутрь, убейте всех врагов. Перед каждым выстрелом «Гиперпушку» нужно зарядить, однако благодаря этому она пробивает практически все, на что вы целитесь, и может за один выстрел убить несколько противников.
12. Ковчег Полной трубы
Содержимое:
— Способность «Спринт».
— Контейнер x5.
Один из Ковчегов в Rage 2.
Как ни странно, данный Ковчег является одним из самых сложных в плане поиска. Он захоронен в болотистых землях Топи Секрето. Внутри него спрятана одна из наименее интересных способностей в игре – «Спринт». Лучше всего она описывается как навык, позволяющий бегать чуть быстрее обычного ускорения через Shift. Отправляйтесь в заболоченную область и ищите высокие, изогнутые здания. Ковчег расположен в укромном месте на уровне земли, поэтому его практически невозможно заметить (только с воздуха).
Поддержи Стопгейм!

Rage 2
Платформы
Жанры
Дата выхода
14 мая 2019
+562
Полное прохождение всех локаций в Rage 2 (также смотрите Карта мира Rage 2). Где найти Контейнеры, Сундуки Ковчегов, Датапады. Регионы: Дикие земли, Рваные равнины, Разрушенная дорога, Кривые Каньоны, Море Дюн, Топи Секрето. Сторожевая башня Правительства, Колонна, Пит стоп, Станция подзарядки, Дорожный барьер, Бандитские логова, Гнёзда крушителей, Электрокузница, Гнездо мутантов, Метеорит с фелтритом, Ковчег, Голос рейнджера, Шар шоу «Убей мутанта», Контракт, Импровизированная гонка, Шоу «Убей мутанта», Гоночная трасса, Место исследования.
Если эта страница отображается некорректно, то нажмите в браузере ctrl+f5. На смартфонах нужно очистить кэш (В браузере в верхнем правом углу Настройки -> Личные данные -> Очистить историю -> Отметить Файлы cookie и данные сайтов + Изображения и другие файлы, сохраненные в кэше -> Удалить данные)
Не забывайте, что в проектах Квасира есть способности, которые позволят вам отслеживать датапады и контейнеры. Топливные баки и гнезда мутантов можно подсвечивать концентрацией. Если есть вопросы по прохождению спрашивайте в комментариях!
Кривые Каньоны
Список локаций

Ковчег Дрожащего Холма
Тип локации: Ковчег
Сложность врагов: 2
Цель: Найти и исследовать Ковчег
$ +122
★ +130
Сундуки Ковчега x 1
Контейнеры x 2
Датапады x 3
Ковчег Драндулетного Ущелья
Тип локации: Ковчег
Сложность врагов: 2
Цель: Найти и исследовать Ковчег
$ +122
★ +130
Сундуки Ковчега x 1
Контейнеры x 6

Газкатрас
Тип локации: Бандитские логова
Сложность врагов: 2
Цель: Уничтожить всех Хмырей
$ +122
★ +90
Сундуки Ковчега x 2
Контейнеры x 5
Датапады x 1
Горная крепость
Тип локации: Бандитские логова
Сложность врагов: 4
Цель: Уничтожить всех Хмырей
$ +167
★ +110
Сундуки Ковчега x 1
Контейнеры x 6
Датапады x 1
Пик Предсказателя Рока
Тип локации: Бандитские логова
Сложность врагов: 3
Цель: Уничтожить всех Хмырей
$ +144
★ +100
Сундуки Ковчега x 2
Контейнеры x 8
Прочная крыша
Тип локации: Бандитские логова
Сложность врагов: 2
Цель: Уничтожить всех Хмырей
$ +122
★ +90
Сундуки Ковчега x 1
Контейнеры x 6

Дорожный блок у дороги
Тип локации: Дорожный барьер
Сложность врагов: 1
Raise the Road Chocker
$ +80
★ +100
Контейнеры x 2

Разрушенная шахта
Тип локации: Гнёзда крушителей
Сложность врагов: 3
$ +344
★ +200
Сундуки Ковчега x 1
Контейнеры x 6

Скрытый обзор
Тип локации: Место исследования
Сложность врагов: 2
Контейнеры x 3
Блокпост у моста
Тип локации: Место исследования
Сложность врагов: 2
Сундуки Ковчега x 1
Контейнеры x 4
Панорамища
Тип локации: Место исследования
Контейнеры x 3
Храм Авы
Тип локации: Место исследования
Датапады x 1

Сторожевая башня Правительства (к западу от Разрушенной шахты)
Тип локации: Сторожевая башня Правительства
Сложность врагов: 4
Цель: Уничтожить сторожевую башню Правительства
$ +367
★ +110
Контейнеры x 1
Сторожевая башня Правительства (к северо-западу от Пика Предсказателя Рока)
Тип локации: Сторожевая башня Правительства
Сложность врагов: 4
Цель: Уничтожить сторожевую башню Правительства
$ +367
★ +110
Контейнеры x 1
Сторожевая башня Правительства (к северо-востоку от Газкатраса)
Тип локации: Сторожевая башня Правительства
Сложность врагов: 3
Цель: Уничтожить сторожевую башню Правительства
$ +344
★ +100
Контейнеры x 2
Сторожевая башня Правительства (к западу от Ковчега Дрожащего Холма)
Тип локации: Сторожевая башня Правительства
Сложность врагов: 4
Цель: Уничтожить сторожевую башню Правительства
Разрушенная дорога
Список локаций
Ковчег Великой Трещины
Тип локации: Ковчег
Сложность врагов: 3
Цель: Найти и исследовать Ковчег
$ +144
★ +140
Сундуки Ковчега x 1
Контейнеры x 4
Ковчег Шипов Бури
Тип локации: Ковчег
Сложность врагов: 6
Цель: Найти и исследовать Ковчег
$ +211
★ +170
Контейнеры x 4
Датапады x 1
Мост Хмырей
Тип локации: Бандитские логова
Сложность врагов: 5
Цель: Уничтожить всех Хмырей
$ +189
★ +120
Сундуки Ковчега x 2
Контейнеры x 4
Северные антенны
Тип локации: Бандитские логова
Сложность врагов: 3
Цель: Уничтожить всех Хмырей
$ +144
★ +100
Сундуки Ковчега x 1
Контейнеры x 4
Датапады x 1
Ущелье Пилошеев
Тип локации: Бандитские логова
Сложность врагов: 2
Цель: Уничтожить всех Хмырей
$ +122
★ +90
Сундуки Ковчега x 1
Контейнеры x 2
Датапады x 2
Тоннель
Тип локации: Бандитские логова
Сложность врагов: 4
Цель: Уничтожить всех Хмырей
$ +167
★ +110
Сундуки Ковчега x 1
Контейнеры x 3
Гнездо Пилошеев
Тип локации: Бандитские логова
Сложность врагов: 5
Цель: Уничтожить всех Хмырей
$ +189
★ +120
Сундуки Ковчега x 1
Контейнеры x 7
Ферма Йоменов
Тип локации: Бандитские логова
Сложность врагов: 6
Цель: Уничтожить всех Хмырей
$ +211
★ +130
Контейнеры x 5
«Ребро»
Тип локации: Бандитские логова
Сложность врагов: 3
Цель: Уничтожить всех Хмырей
$ +144
★ +100
Сундуки Ковчега x 1
Контейнеры x 6
Аванпост Саванов
Тип локации: Бандитские логова
Сложность врагов: 8
Цель: Уничтожить всех Саванов
$ +256
★ +150
Сундуки Ковчега x 1
Контейнеры x 3

Остановка «Свежий сок»
Тип локации: Пит стоп
Сложность врагов: 4
Цель: Уничтожить все топливные контейнеры (11)
$ +167
★ +110
Сундуки Ковчега x 1
Контейнеры x 1
Станция дозаправки рейнджеров
Тип локации: Пит стоп
Сложность врагов: 1
Цель: Уничтожить все топливные контейнеры (6)
$ +100
★ +80
Сундуки Ковчега x 1
Контейнеры x 5

Печальная лачуга
Тип локации: Голос рейнджера
Цель: Найти павшего рейнджера
$ +100
★ +40
Контейнеры x 2
Торговый автомат
Слоновья скала
Тип локации: Голос рейнджера
Сложность врагов: 2
Цель: Найти павшего рейнджера
$ +122
★ +45
Контейнеры x 3
Конец дороги
Тип локации: Голос рейнджера
Цель: Найти павшего рейнджера
$ +100
★ +40
Контейнеры x 2

Метеорит с фелтритом
Тип локации: Метеорит с фелтритом
Сложность врагов: 3
Собрать весь фелтрит с метеорита
★ +40
Дорожный блок на холме
Тип локации: Дорожный барьер
Сложность врагов: 2
Цель: Поднять дорожный барьер
$ +122
★ +90
Контейнеры x 2
Дорожный блок на мосту
Тип локации: Дорожный барьер
Сложность врагов: 3
Цель: Поднять дорожный барьер
$ +144
★ +100
Контейнеры x 3
Датапады x 1
Космодром «Эдем»
Тип локации: Место исследования
Сложность врагов: 4
Контейнеры x 4
Датапады x 2
Хата на холме
Тип локации: Место исследования
Контейнеры x 2
Датапады x 1
Торговый автомат
Чумной парк
Тип локации: Место исследования
Сложность врагов: 4
Контейнеры x 4
Ущелье смерти
Тип локации: Место исследования
Сложность врагов: 1
Контейнеры x 2
Датапады x 1
Алтарь
Тип локации: Место исследования
Контейнеры x 2
Датапады x 1
Разведпост
Тип локации: Место исследования
Контейнеры x 2
Датапады x 1
Гиблое дело
Тип локации: Место исследования
Контейнеры x 1
Датапады x 1
Мастерская Алекса
Тип локации: Место исследования
Сундуки Ковчега x 1
Контейнеры x 4
Торговый автомат
Эко-15 (Сюжет)
Тип локации: Место исследования

«Убей мутанта»: «Мясорубка»
Тип локации: Шоу «Убей мутанта»
Награда шоу
Сторожевая башня Правительства
Тип локации: Сторожевая башня Правительства
Сложность врагов: 5
Цель: Уничтожить сторожевую башню Правительства
$ +389
★ +120
Контейнеры x 1
Сторожевая башня Правительства
Тип локации: Сторожевая башня Правительства
Сложность врагов: 5
Цель: Уничтожить сторожевую башню Правительства
$ +389
★ +120
Контейнеры x 3
Рваные равнины
Список локаций
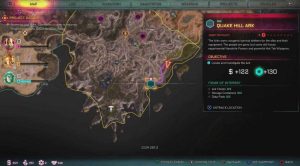
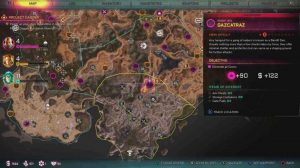
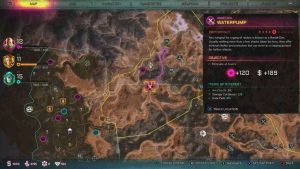
Ковчег Суперсейфа
Тип локации: Ковчег
Сложность врагов: 4
Цель: Найти и исследовать Ковчег
$ +167
★ +150
Сундуки Ковчега x 2
Контейнеры x 2
Датапады x 1
Ковчег Шрама Земли
Тип локации: Ковчег
Сложность врагов: 3
Цель: Найти и исследовать Ковчег
$ +144
★ +140
Контейнеры x 2
Глухая воронка
Тип локации: Бандитские логова
Сложность врагов: 5
Цель: Уничтожить всех Хмырей
$ +189
★ +120
Контейнеры x 3
Пост над восточной дорогой
Тип локации: Бандитские логова
Сложность врагов: 3
Цель: Уничтожить всех Хмырей
$ +144
★ +100
Контейнеры x 4
Каньон мертвеца
Тип локации: Бандитские логова
Сложность врагов: 6
Цель: Уничтожить всех Хмырей
$ +211
★ +130
Сундуки Ковчега x 1
Контейнеры x 3
Передовой штаб
Тип локации: Бандитские логова
Сложность врагов: 4
Цель: Уничтожить всех Саванов
$ +167
★ +110
Контейнеры x 4
Датапады x 1
Виллы вандалов
Тип локации: Бандитские логова
Сложность врагов: 6
Цель: Уничтожить всех Хмырей
$ +211
★ +130
Контейнеры x 3
Стилтаун
Тип локации: Бандитские логова
Сложность врагов: 5
Цель: Уничтожить всех Хмырей
$ +189
★ +120
Сундуки Ковчега x 1
Контейнеры x 7
Датапады x 2
Мост Неда
Тип локации: Бандитские логова
Сложность врагов: 4
Цель: Уничтожить всех Хмырей
$ +167
★ +110
Сундуки Ковчега x 1
Контейнеры x 2
Датапады x 1
Водокачка
Тип локации: Бандитские логова
Сложность врагов: 5
Цель: Уничтожить всех Хмырей
$ +189
★ +120
Сундуки Ковчега x 1
Контейнеры x 3
Датапады x 1
Автобаза у озера
Тип локации: Бандитские логова
Сложность врагов: 7
Цель: Уничтожить всех Саванов
$ +233
★ +140
Сундуки Ковчега x 1
Контейнеры x 2
Водоворот боли
Тип локации: Гнёзда крушителей
Сложность врагов: 5
Kill Sackhead
$ +389
★ +240
Сундуки Ковчега x 1
Контейнеры x 2

Сточная вода
Тип локации: Гнездо мутантов
Сложность врагов: 5
Цель: Уничтожить все капсулы зарождения мутантов (30)
$ +189
★ +120
Праймтаун
Тип локации: Гнездо мутантов
Сложность врагов: 5
Цель: Уничтожить все капсулы зарождения мутантов (30)
$ +189
★ +120
Контейнеры x 3
Датапады x 1
Подземный город
Тип локации: Гнездо мутантов
Сложность врагов: 5
Цель: Уничтожить все капсулы зарождения мутантов (30)
$ +189
★ +120

Станция подзарядки «Астра»
Тип локации: Станция подзарядки
Сложность врагов: 4
Цель: Активировать и защищать опоры до их перегрузки
$ +110
★ +167
Контейнеры x 4
Станция подзарядки «Дельта»
Тип локации: Станция подзарядки
Сложность врагов: 5
Цель: Активировать и защищать опоры до их перегрузки
$ +189
★ +120
Контейнеры x 3
Датапады x 1
Станция подзарядки «Эхо»
Тип локации: Станция подзарядки
Сложность врагов: 6
Цель: Активировать и защищать опоры до их перегрузки
$ +211
★ +130
Контейнеры x 4
Дорожный блок в каньоне
Тип локации: Дорожный барьер
Сложность врагов: 3
Цель: Поднять дорожный барьер
$ +144
★ +100
Контейнеры x 3
Датапады x 1
Дорожный блок Источника
Тип локации: Дорожный барьер
Сложность врагов: 3
Цель: Поднять дорожный барьер
$ +144
★ +100
Сундуки Ковчега x 1
Контейнеры x 3
Бумбокс
Тип локации: Пит стоп
Сложность врагов: 5
Цель: Уничтожить все топливные контейнеры (13)
$ +189
★ +120
Контейнеры x 4
Бензиновое ущелье
Тип локации: Пит стоп
Сложность врагов: 3
Цель: Уничтожить все топливные контейнеры (8)
$ +144
★ +100
Контейнеры x 5
Датапады x 1
Жилище изгоя
Тип локации: Голос рейнджера
Цель: Найти павшего рейнджера
$ +100
★ +40
Контейнеры x 3
Датапады x 1
Ничейный остров
Тип локации: Голос рейнджера
Цель: Найти павшего рейнджера
$ +100
★ +40
Контейнеры x 3

Дерби «Ралликрэш»: Рваные равнины
Тип локации: Гоночная трасса
Бар «Пит-стоп»
Тип локации: Место исследования
Контейнеры x 2
Датапады x 1
Тайный бункер
Тип локации: Место исследования
Сундуки Ковчега x 3
Контейнеры x 1
Датапады x 4
Мёртвое кафе
Тип локации: Место исследования
Контейнеры x 1
Датапады x 1
Торговый автомат
Забытый гараж
Тип локации: Место исследования
Сундуки Ковчега x 1
Контейнеры x 3
Торговый автомат
Авария
Тип локации: Место исследования
Сложность врагов: 4
Контейнеры x 3
Выступ на утёсе
Тип локации: Место исследования
Сложность врагов: 5
Сундуки Ковчега x 2
Контейнеры x 3
Механики Пустошей
Тип локации: Место исследования
Сложность врагов: 4
Контейнеры x 1
Датапады x 2
Белая точка
Тип локации: Место исследования
Контейнеры x 4
У Трещины
Тип локации: Место исследования
Сложность врагов: 3
Сундуки Ковчега x 1
Контейнеры x 2
Датапады x 1
Кладбище Бездны
Тип локации: Место исследования
Сложность врагов: 5
Контейнеры x 2
Короткая остановка
Тип локации: Место исследования
Сложность врагов: 3
Контейнеры x 3
Датапады x 1
Ядовитая свалка
Тип локации: Место исследования
Сложность врагов: 4
Контейнеры x 3
Сторожевая башня Правительства
Тип локации: Сторожевая башня Правительства
Сложность врагов: 10
Цель: Уничтожить сторожевую башню Правительства
$ +500
★ +170
Сторожевая башня Правительства
Тип локации: Сторожевая башня Правительства
Сложность врагов: 6
Цель: Уничтожить сторожевую башню Правительства
$ +411
★ +130
Топи Секрето
Список локаций
Ковчег Полной Трубы
Тип локации: Ковчег
Сложность врагов: 6
Цель: Найти и исследовать Ковчег
$ +211
★ +170
Контейнеры x 5
Ковчег Сырой Катакомбы
Тип локации: Ковчег
Сложность врагов: 7
Цель: Найти и исследовать Ковчег
$ +233
★ +180
Лодки мистера Лодочника
Тип локации: Бандитские логова
Сложность врагов: 4
Цель: Уничтожить всех Речных Кабанов
$ +167
★ +110
Сундуки Ковчега x 1
Контейнеры x 4
Датапады x 1
Свалка Нагибателя
Тип локации: Бандитские логова
Сложность врагов: 7
Цель: Уничтожить всех Речных Кабанов
$ +233
★ +140
Контейнеры x 3
Датапады x 1
Подавление
Тип локации: Бандитские логова
Сложность врагов: 5
Цель: Уничтожить всех Речных Кабанов
$ +189
★ +120
Сундуки Ковчега x 1
Контейнеры x 5
Мост
Тип локации: Бандитские логова
Сложность врагов: 5
Цель: Уничтожить всех Речных Кабанов
$ +189
★ +120
Сундуки Ковчега x 1
Контейнеры x 1
Датапады x 1
Отмели
Тип локации: Бандитские логова
Сложность врагов: 6
Цель: Уничтожить всех Речных Кабанов
$ +211
★ +130
Контейнеры x 3
Датапады x 1
Грудная впадина
Тип локации: Бандитские логова
Сложность врагов: 8
Цель: Уничтожить всех Речных Кабанов
$ +256
★ +150
Контейнеры x 2
Датапады x 2
Грязная балка
Тип локации: Гнёзда крушителей
Сложность врагов: 7
Цель: Убить Смегго Мерзкого
$ +433
★ +280
Сундуки Ковчега x 2
Контейнеры x 2
Полная труба
Тип локации: Гнездо мутантов
Сложность врагов: 5
Цель: Уничтожить все капсулы зарождения мутантов (22)
$ +189
★ +120
Контейнеры x 2
Сырой лес
Тип локации: Гнездо мутантов
Сложность врагов: 6
Цель: Уничтожить все капсулы зарождения мутантов (18)
$ +211
★ +130
Контейнеры x 1
Житухата
Тип локации: Гнездо мутантов
Сложность врагов: 6
Цель: Уничтожить все капсулы зарождения мутантов (31)
$ +211
★ +130
Контейнеры x 1
Узкий проход
Тип локации: Голос рейнджера
Сложность врагов: 5
Цель: Найти павшего рейнджера
$ +189
★ +60
В ловушке
Тип локации: Голос рейнджера
Сложность врагов: 3
Цель: Найти павшего рейнджера
$ +144
★ +50
Сундуки Ковчега x 1
Контейнеры x 2
Нефтехранилище
Тип локации: Голос рейнджера
Сложность врагов: 5
Цель: Найти павшего рейнджера
$ +189
★ +60
Сундуки Ковчега x 1
Контейнеры x 3
Дрова в пустыне
Тип локации: Пит стоп
Сложность врагов: 6
Цель: Уничтожить все топливные контейнеры (14)
$ +211
★ +130
Контейнеры x 5
Дорожный блок в лесу
Тип локации: Дорожный барьер
Сложность врагов: 5
Цель: Поднять дорожный барьер
$ +189
★ +120
Контейнеры x 5
Датапады x 1
Свалка Большого Уилли
Тип локации: Место исследования
Сложность врагов: 7
Сундуки Ковчега x 1
Контейнеры x 2
Датапады x 2
Лаборатория Квасира — Сюжет
Тип локации: Место исследования
Кланг
Тип локации: Место исследования
Контейнеры x 2
Датапады x 1
Кровь на земле
Тип локации: Место исследования
Сложность врагов: 6
Контейнеры x 1
Датапады x 1
Плохие соседи
Тип локации: Место исследования
Сложность врагов: 4
Контейнеры x 2
Преддверие
Тип локации: Место исследования
Контейнеры x 3
Обветшалый дом
Тип локации: Место исследования
Сложность врагов: 1
«Убей мутанта»: «Скользкий сосок»
Тип локации: Место исследования
Награда шоу
Сторожевая башня Правительства
Тип локации: Сторожевая башня Правительства
Сложность врагов: 7
Цель: Уничтожить сторожевую башню Правительства
$ +433
★ +140
Контейнеры x 1
Сторожевая башня Правительства
Тип локации: Сторожевая башня Правительства
Сложность врагов: 7
Цель: Уничтожить сторожевую башню Правительства
$ +433
★ +140
Контейнеры x 1
Сторожевая башня Правительства
Тип локации: Сторожевая башня Правительства
Сложность врагов: 8
Цель: Уничтожить сторожевую башню Правительства
$ +456
★ +150
Сторожевая башня Правительства
Тип локации: Сторожевая башня Правительства
Сложность врагов: 8
Цель: Уничтожить сторожевую башню Правительства
$ +456
★ +150
Море Дюн
Список локаций
Ковчег Хранилища Саванов
Тип локации: Ковчег
Сложность врагов: 6
Цель: Найти и исследовать Ковчег
$ +211
★ +170
Сундуки Ковчега x 2
Контейнеры x 5
Штаб Саванов
Тип локации: Бандитские логова
Сложность врагов: 10
Цель: Уничтожить всех Саванов
$ +300
★ +170
Сундуки Ковчега x 1
Контейнеры x 7
Мастерская Саванов
Тип локации: Бандитские логова
Сложность врагов: 9
Цель: Уничтожить всех Саванов
$ +278
★ +160
Сундуки Ковчега x 1
Контейнеры x 6
Мото-гробница
Тип локации: Гнёзда крушителей
Сложность врагов: 8
Цель: Убить Груля Разрушителя
$ +456
★ +300
Сундуки Ковчега x 1
Контейнеры x 11
Станция подзарядки «Альфа»
Тип локации: Станция подзарядки
Сложность врагов: 7
Цель: Активировать и защищать опоры до их перегрузки
$ +233
★ +140
Контейнеры x 1
Датапады x 1
Станция подзарядки «Бета»
Тип локации: Станция подзарядки
Сложность врагов: 9
Цель: Активировать и защищать опоры до их перегрузки
$ +278
★ +160
Станция подзарядки «Заря»
Тип локации: Станция подзарядки
Сложность врагов: 8
Цель: Активировать и защищать опоры до их перегрузки
$ +256
★ +150
Сундуки Ковчега x 1

Подстанция Саванов «Альфа»
Тип локации: Электрокузница
Сложность врагов: 4
Цель: Уничтожить все реакторы (1)
$ +167
★ +110
Сундуки Ковчега x 1
Контейнеры x 2
Датапады x 3
Подстанция Саванов «Браво»
Тип локации: Электрокузница
Сложность врагов: 4
Цель: Уничтожить все реакторы (1)
$ +167
★ +110
Сундуки Ковчега x 1
Контейнеры x 2
Датапады x 1
Тупик
Тип локации: Голос рейнджера
Цель: Найти павшего рейнджера
$ +100
★ +40
Контейнеры x 2
Перекрёстный огонь
Тип локации: Голос рейнджера
Цель: Найти павшего рейнджера
$ +100
★ +40
Контейнеры x 1
Станция «Лазарь»
Тип локации: Место исследования
Сложность врагов: 5
Датапады x 3
Сторожевая башня Правительства
Тип локации: Сторожевая башня Правительства
Сложность врагов: 9
Цель: Уничтожить сторожевую башню Правительства
$ +478
★ +160
Контейнеры x 4
Сторожевая башня Правительства
Тип локации: Сторожевая башня Правительства
Сложность врагов: 9
Цель: Уничтожить сторожевую башню Правительства
$ +478
★ +160
Контейнеры x 2
Сторожевая башня Правительства
Тип локации: Сторожевая башня Правительства
Сложность врагов: 8
Цель: Уничтожить сторожевую башню Правительства
$ +456
★ +150
Дикие земли
Список локаций
Ковчег Гринхевена
Тип локации: Ковчег
Сложность врагов: 10
Цель: Найти и исследовать Ковчег
$ +300
★ +210
Сундуки Ковчега x 2
Контейнеры x 4
Ковчег Нидл-Фоллз
Тип локации: Ковчег
Сложность врагов: 7
Цель: Найти и исследовать Ковчег
$ +233
★ +180
Контейнеры x 3
Транктаун
Тип локации: Бандитские логова
Сложность врагов: 7
Цель: Уничтожить всех Речных Кабанов
$ +233
★ +140
Сундуки Ковчега x 1
Контейнеры x 1
Бурная река
Тип локации: Бандитские логова
Сложность врагов: 8
Цель: Уничтожить всех Речных Кабанов
$ +256
★ +150
Сундуки Ковчега x 1
Контейнеры x 2
Утраченные возможности
Тип локации: Бандитские логова
Сложность врагов: 10
Цель: Уничтожить всех Речных Кабанов
$ +300
★ +170
Остров фантазий
Тип локации: Бандитские логова
Сложность врагов: 9
Цель: Уничтожить всех Речных Кабанов
$ +278
★ +160
Контейнеры x 7
Твин-Фоллз
Тип локации: Бандитские логова
Сложность врагов: 6
Цель: Уничтожить всех Речных Кабанов
$ +211
★ +130
Сундуки Ковчега x 1
Контейнеры x 4
Квартал двух «Д»
Тип локации: Гнёзда крушителей
Сложность врагов: 8
Цель: Убить Дигга и Дагга
$ +456
★ +300
Сундуки Ковчега x 1
Контейнеры x 3
Дикий лес
Тип локации: Гнездо мутантов
Сложность врагов: 5
Цель: Уничтожить все капсулы зарождения мутантов (16)
$ +189
★ +120
Контейнеры x 4
Дорожный взрыв
Тип локации: Пит стоп
Сложность врагов: 7
Цель: Уничтожить все топливные контейнеры (16)
$ +233
★ +140
Сундуки Ковчега x 1
Контейнеры x 4
Сырой запал
Тип локации: Пит стоп
Сложность врагов: 8
Цель: Уничтожить все топливные контейнеры (8)
$ +256
★ +150
Сундуки Ковчега x 1
Контейнеры x 5
Дорожный блок у деревьев
Тип локации: Дорожный барьер
Сложность врагов: 7
Цель: Поднять дорожный барьер
$ +233
★ +140
Контейнеры x 2
Дорожный блок в джунглях
Тип локации: Дорожный барьер
Сложность врагов: 5
Цель: Поднять дорожный барьер
$ +189
★ +120
Контейнеры x 5
Святилище Авадона
Тип локации: Голос рейнджера
Сложность врагов: 6
Цель: Найти павшего рейнджера
$ +211
★ +65
Сундуки Ковчега x 1
Контейнеры x 4
Останки
Тип локации: Голос рейнджера
Цель: Найти павшего рейнджера
$ +100
★ +40
Контейнеры x 3
Пост в Гринхевене
Тип локации: Голос рейнджера
Сложность врагов: 9
Цель: Найти павшего рейнджера
Сундуки Ковчега x 2
Контейнеры x 2
Охотник
Тип локации: Место исследования
Сложность врагов: 6
Контейнеры x 3
Дрифтвуд
Тип локации: Место исследования
Сложность врагов: 8
Сундуки Ковчега x 1
Контейнеры x 1
Башня на дереве
Тип локации: Место исследования
Сложность врагов: 7
Контейнеры x 3
Завод «Голиаф» — Сюжет
Тип локации: Место исследования
Сложность врагов: 6
Датапады x 3
Сторожевая башня Правительства
Тип локации: Сторожевая башня Правительства
Сложность врагов: 9
Цель: Уничтожить сторожевую башню Правительства
$ +478
★ +160
Контейнеры x 1
Сторожевая башня Правительства
Тип локации: Сторожевая башня Правительства
Сложность врагов: 10
Цель: Уничтожить сторожевую башню Правительства
$ +500
★ +170
Контейнеры x 1
Сторожевая башня Правительства
Тип локации: Сторожевая башня Правительства
Сложность врагов: 10
Цель: Уничтожить сторожевую башню Правительства
$ +500
★ +170
Контейнеры x 1