by Kazim Ali Alvi
Kazim has always been fond of technology, be it scrolling through the settings on his iPhone, Android device, or Windows. And at times, unscrewing the device to take… read more
Updated on March 9, 2023
- Several users have reported that voice typing, a useful feature in Windows 11, is not working. Read this article to find out the solution.
- To fix the problem, try updating the OS, running the built-in troubleshooter, and updating the relevant drivers, amongst other methods listed below.
- Also, check the speech-to-text software that you could use for transcription in Windows 11.
XINSTALL BY CLICKING THE DOWNLOAD FILE
This tool repairs common computer errors by replacing the problematic system files with the initial working versions. It also keeps you away from system errors, BSoDs, and repairs damages made by malware and viruses. Fix PC issues and remove viruses damage now in 3 easy steps:
- Download and Install Fortect on your PC
- Launch the tool and Start scanning to find broken files that are causing the problems
- Right-click on Start Repair to fix issues affecting your computer’s security and performance
- Fortect has been downloaded by 0 readers this month.
The voice typing feature is one of the most talked about in the latest iteration. Who wouldn’t want to use the voice input text rather than typing the same thing? But several users have reported that Windows 11 voice typing is not working.
The feature is not new, it was there in Windows 10 as well, though with a different name. But on Windows 11, it’s certainly a lot more advanced and offers high accuracy when translating from speech to text.
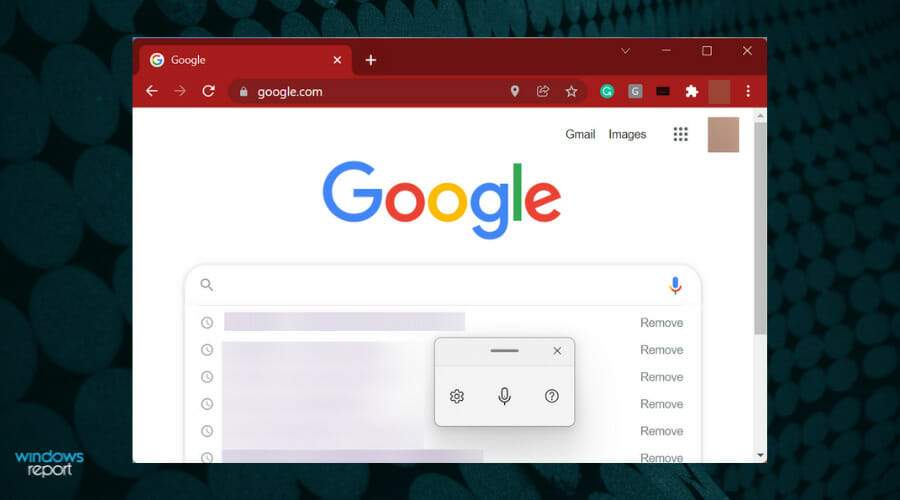
Apart from that, it will work anywhere on the system, whether you are performing a Google search, drafting a document, and we can use it even while writing this article.
So, read the following sections to find out all about the feature and the most relevant fixes in case Windows 11’s voice typing is not working.
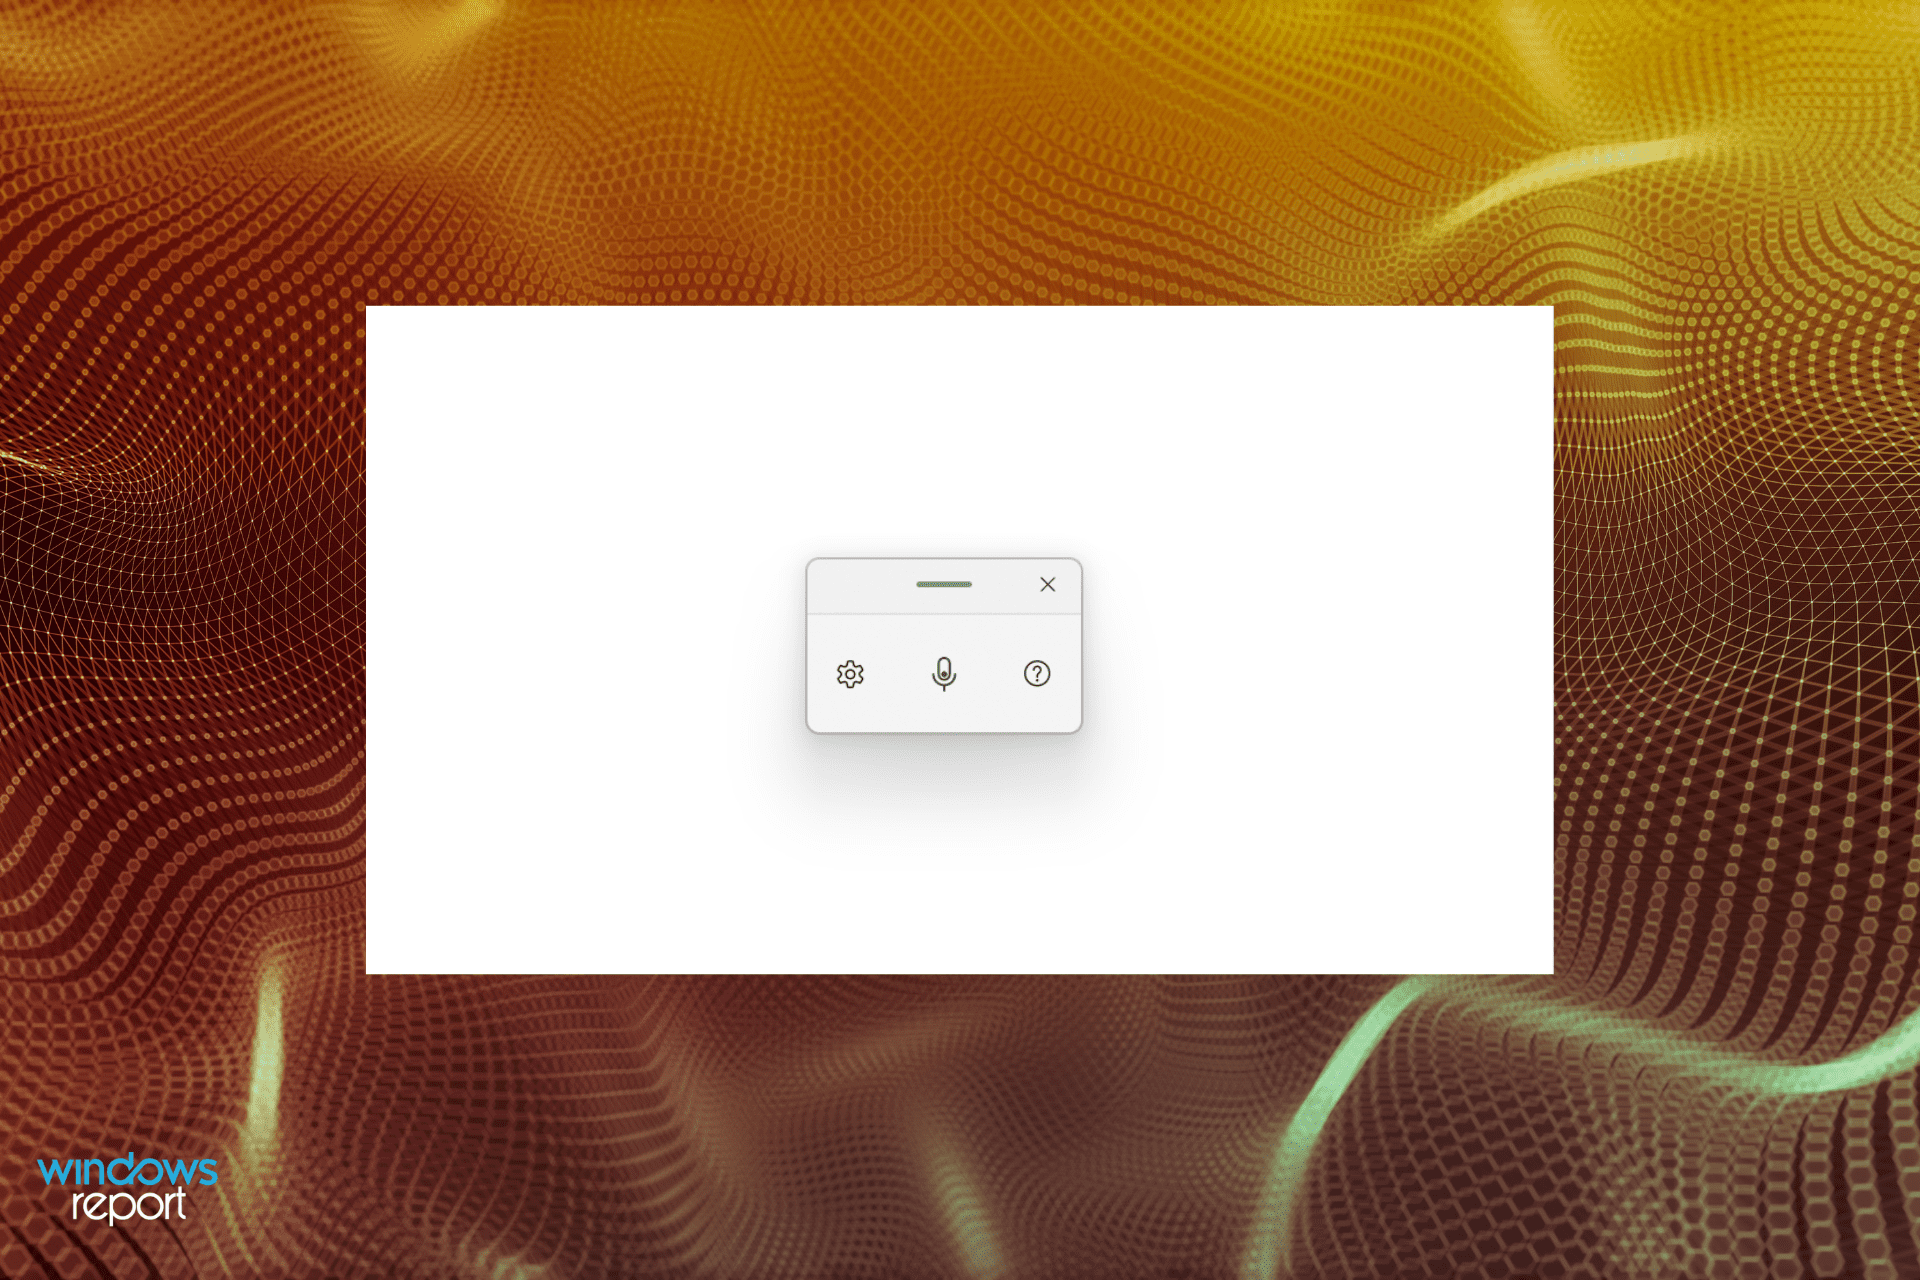
How do I enable and use voice typing in Windows 11?
The process to enable voice typing in Windows 11 is simple, you just have to place the cursor in a text field, and hit Windows + H to launch the tool. But, that isn’t certainly all!
There are a lot of other things about the voice typing tool that a user must know in order to make the most of it. Also, you may need to reconfigure the default settings for the best experience, or set the tool to launch automatically whenever required.
To find it all out, check our dedicated guide that will talk you through using the voice typing tool in Windows 11.
What do I do if voice typing is not working in Windows 11?
1. Check the connections (for external microphones)
If you are using an external microphone, it’s likely that the connections are not in order. To fix that, remove the jack or USB, whichever your microphone uses, clean it and the port, and then reconnect it.
Once that’s done, check if the Windows 11 voice typing not working problem is eliminated.
In case it isn’t, connect the same microphone to another system, and verify if it works there. If it does, the problem lies with your computer, and executing the fixes below should fix it.
While if it doesn’t, you may have to replace the microphone. Check our curated guide that lists the best microphones for Windows 11.
2. Verify that the microphone is enabled
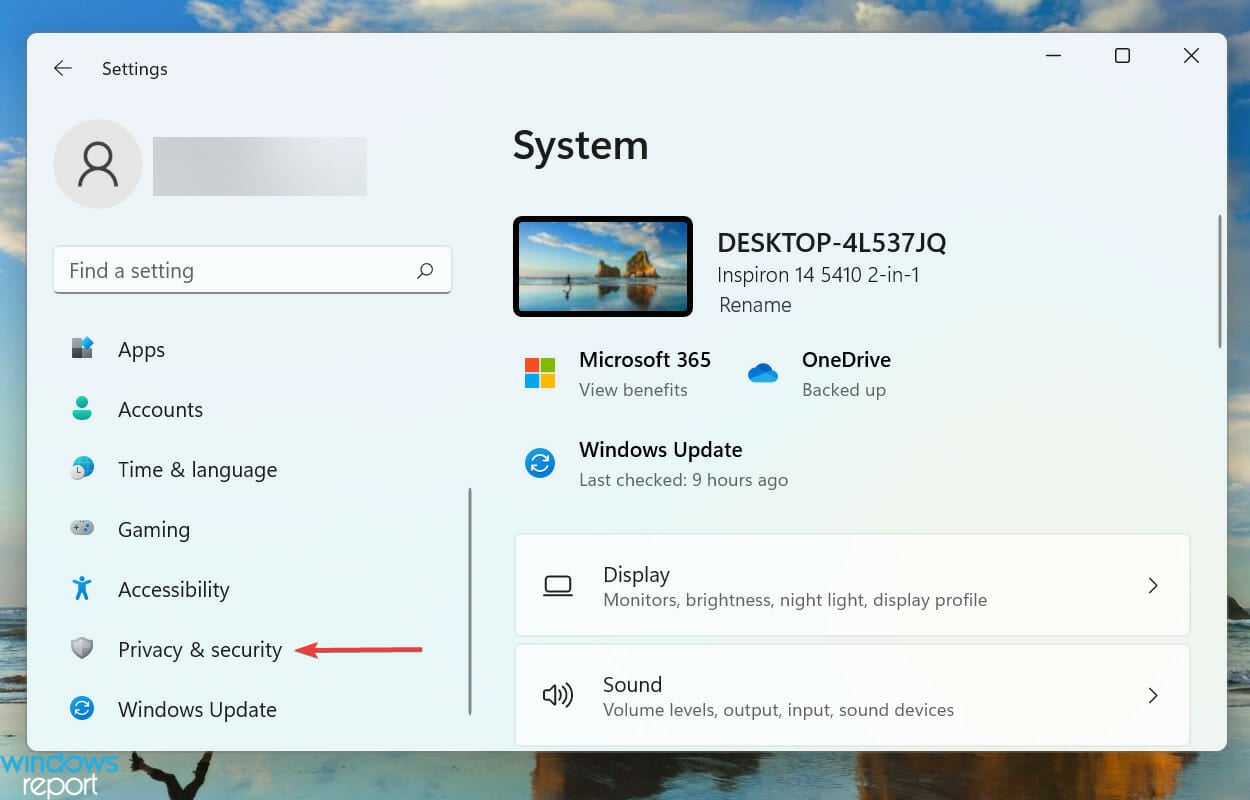
- Press Windows + I to launch the Settings app, and select Privacy & security from the tabs listed in the navigation pane on the left.

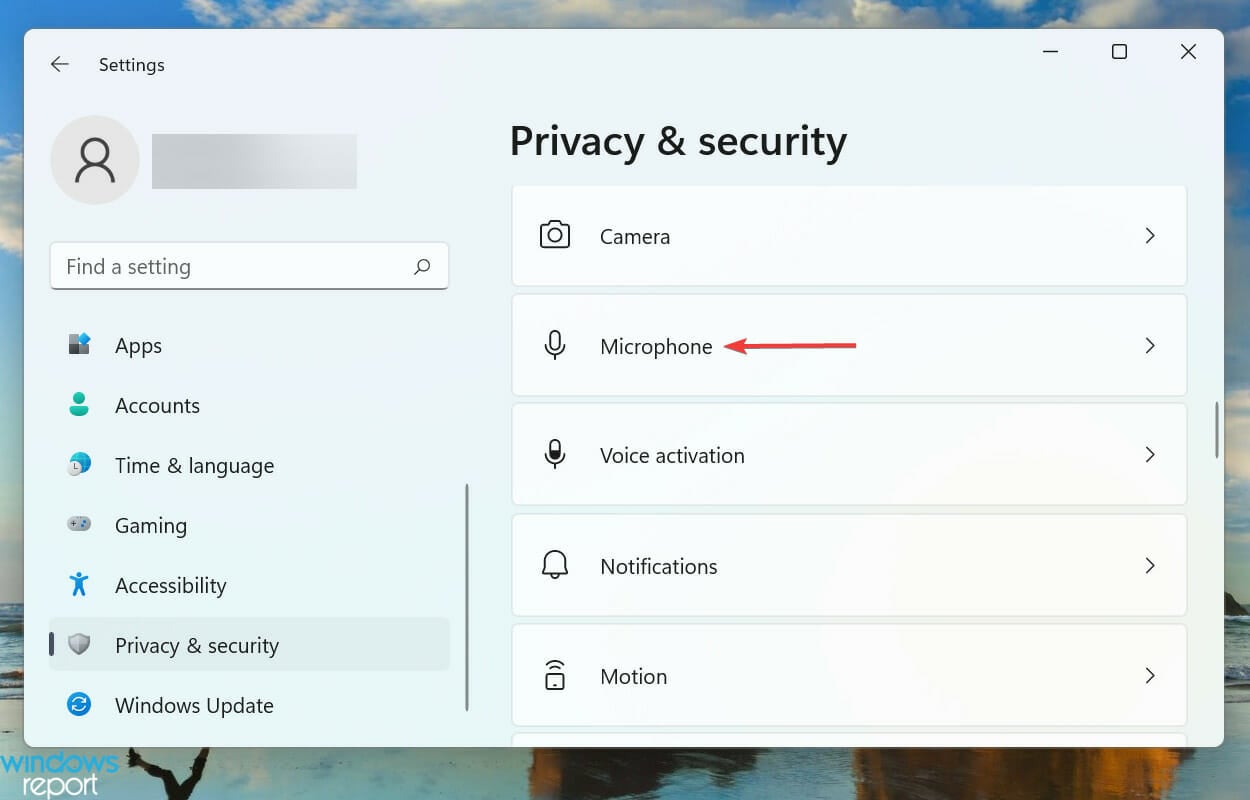
- Scroll down and select Microphone under App permissions.
- Make sure the Microphone access toggle is enabled.

If the microphone doesn’t have the required permissions, you will encounter problems with voice typing. Simply making the required changes can get things working.
After providing the permission, check if the voice typing not working problem in Windows 11 is fixed
3. Choose the correct language for speech
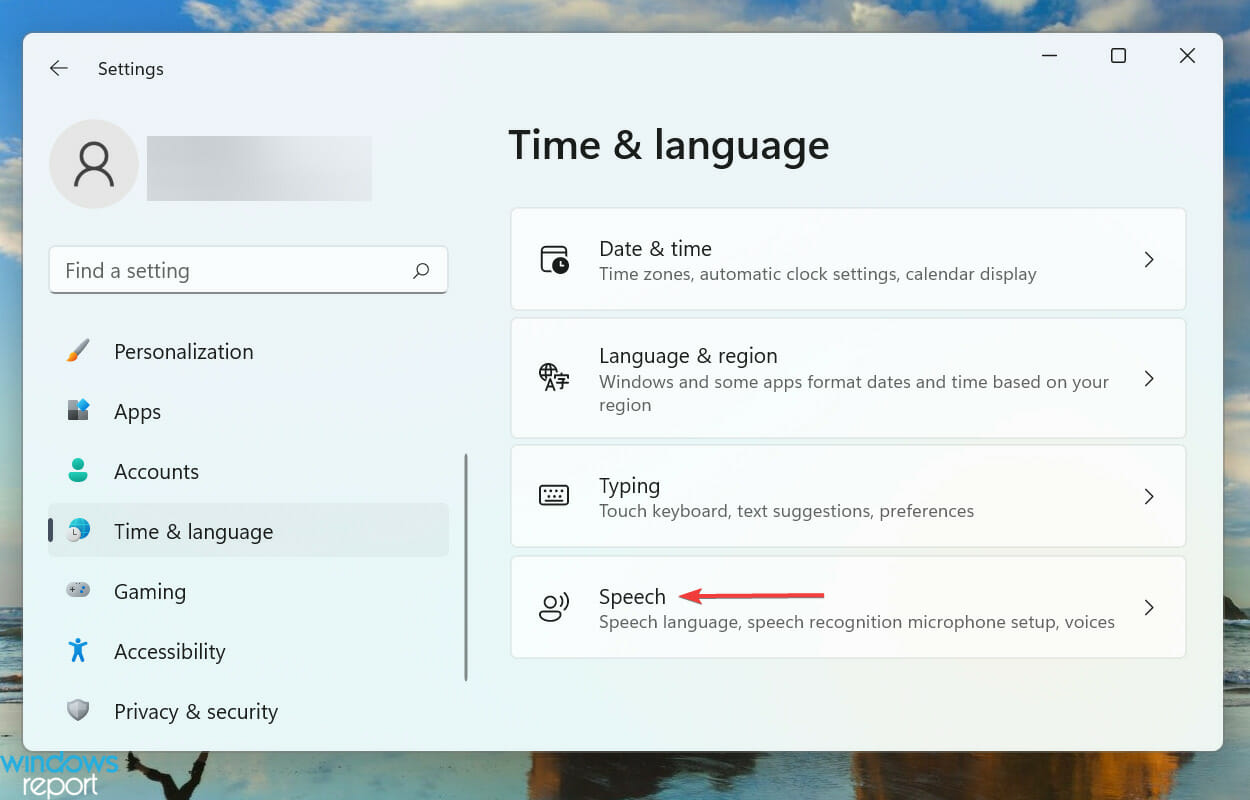
- Press Windows + I to launch the Settings app, and select Time & language tab from the ones listed in the navigation pane on the left.
- Next, click on Speech on the right.
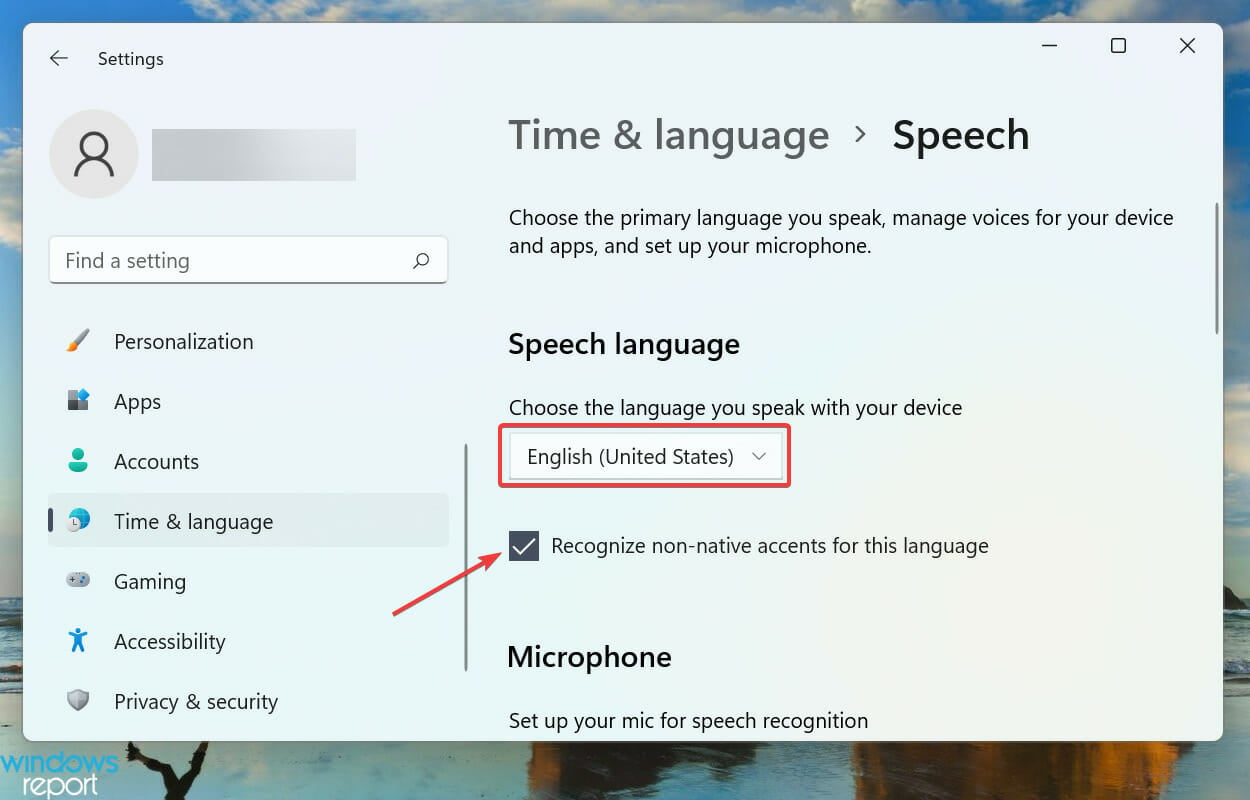
- Now, select the desired option from the Choose the language you speak with your device dropdown menu, and tick the checkbox for Recognize non-native accents for this language option.
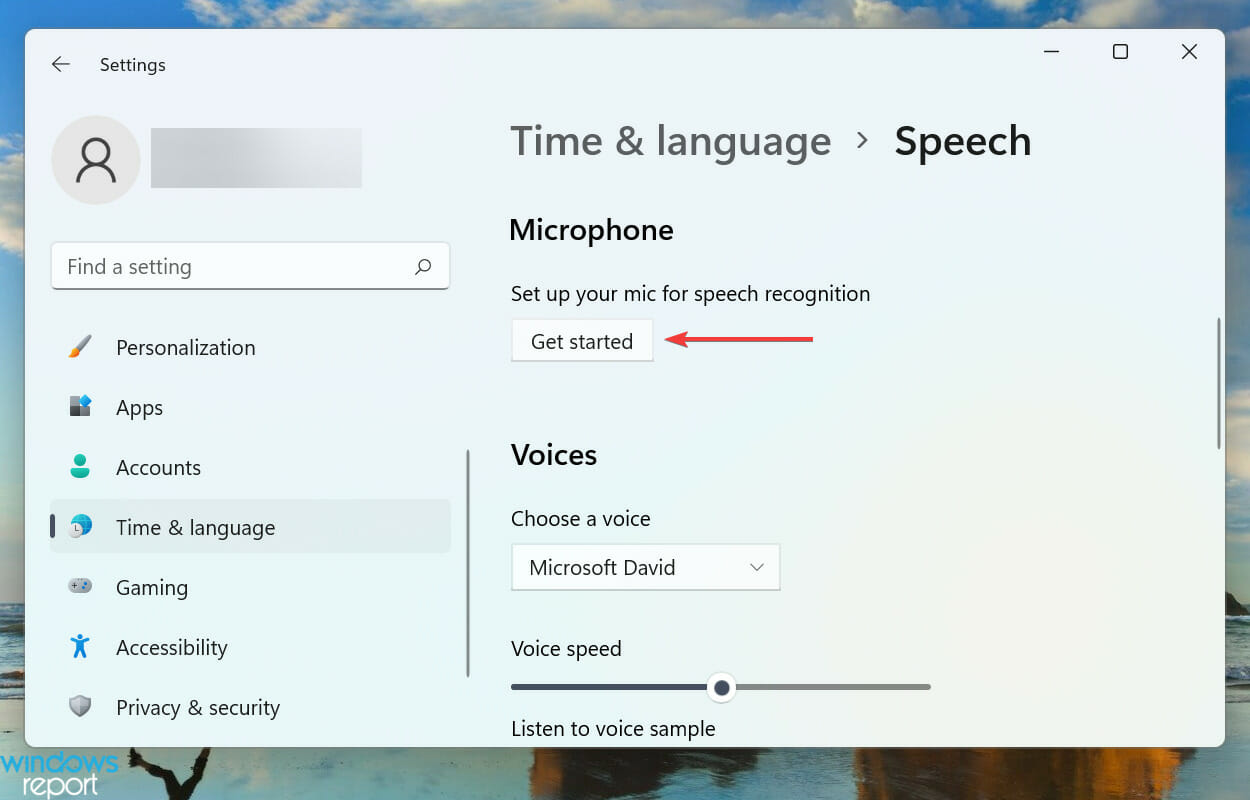
- Click on the Get started button under Microphone, and follow the on-screen instructions to fix things.

4. Update Windows 11
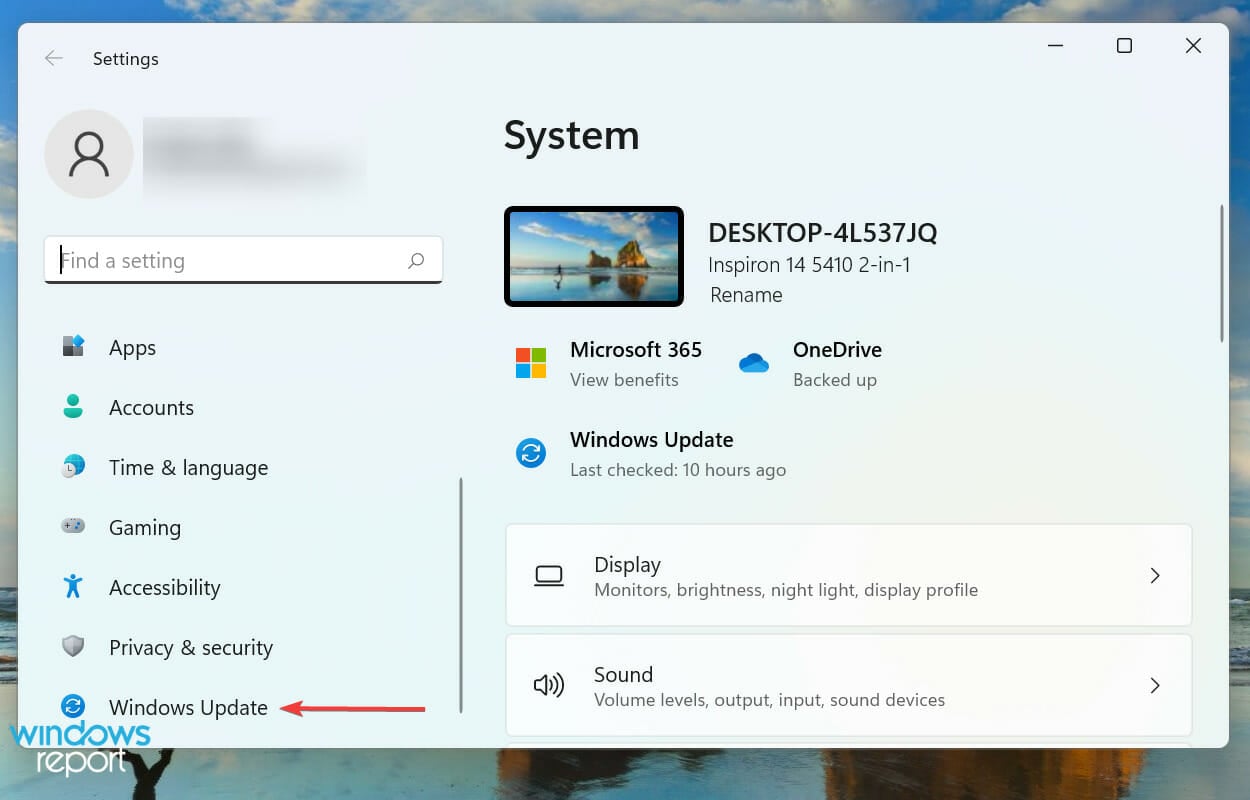
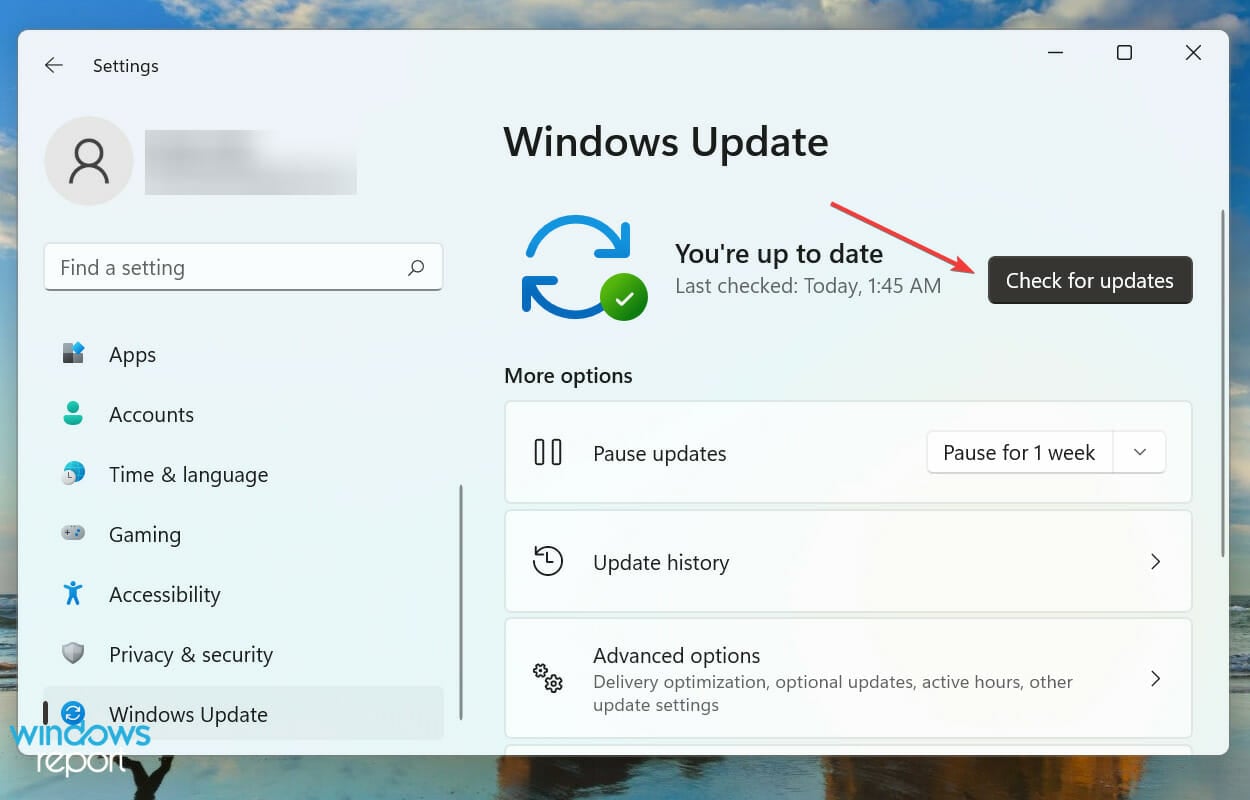
- Press Windows + I to launch the Settings app, and select the Windows Update tab from the navigation pane.
- Click on the Check for updates button on the right to scan for a newer version of the OS.
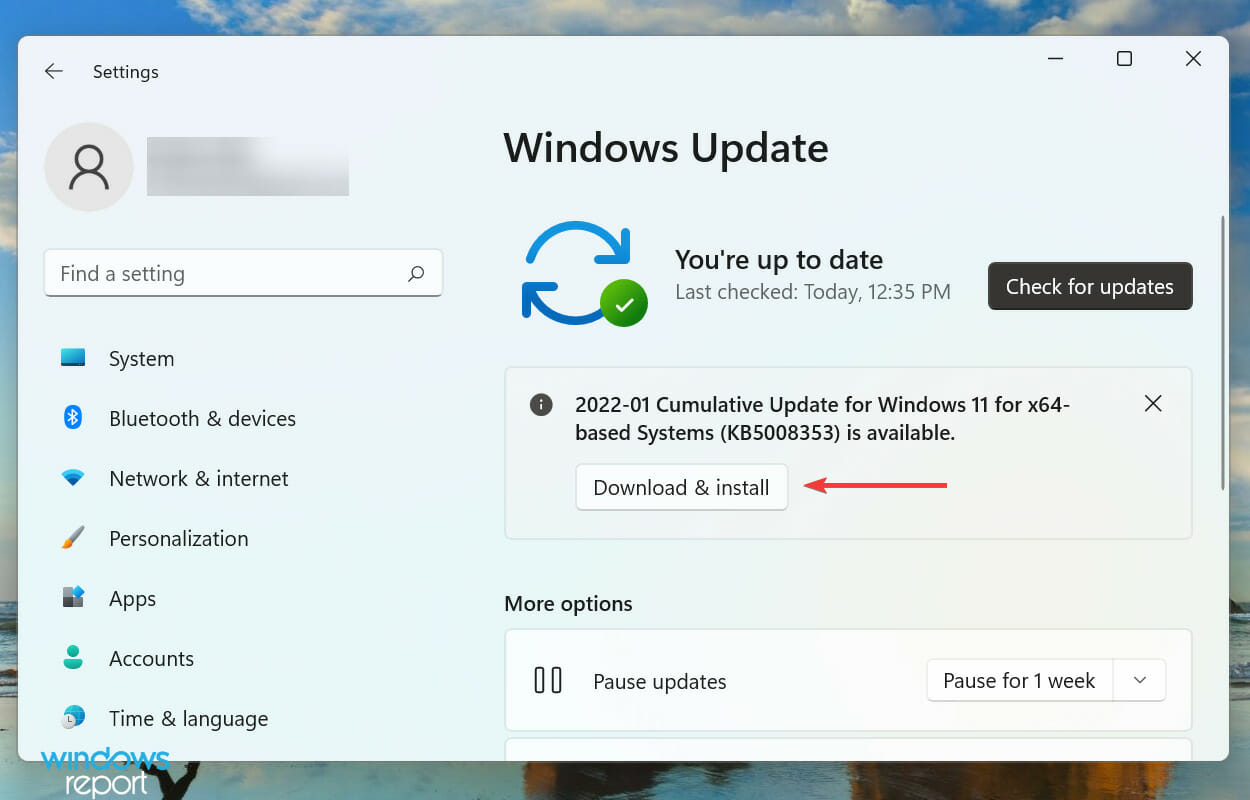
- If an update is listed after the scan, click on Download & install.
Some PC issues are hard to tackle, especially when it comes to missing or corrupted system files and repositories of your Windows.
Be sure to use a dedicated tool, such as Fortect, which will scan and replace your broken files with their fresh versions from its repository.
If you are facing the Windows 11 voice typing not working error due to a bug in the current version of the OS, installing an update would be the best fix. Whenever Microsoft identifies a bug in Windows, a patch for it is released in the subsequent versions.
5. Run the troubleshooter
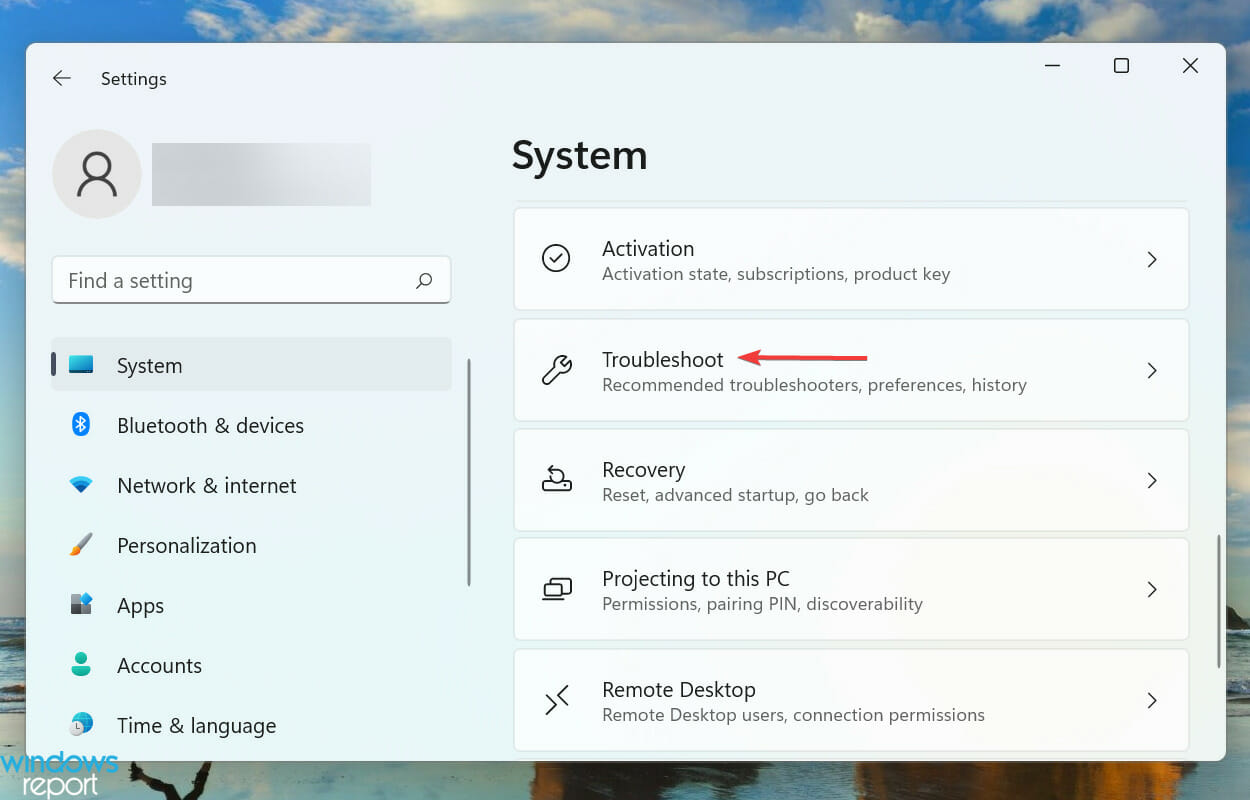
- Press Windows + I to launch the Settings app, and click on Troubleshoot on the right in the System tab.
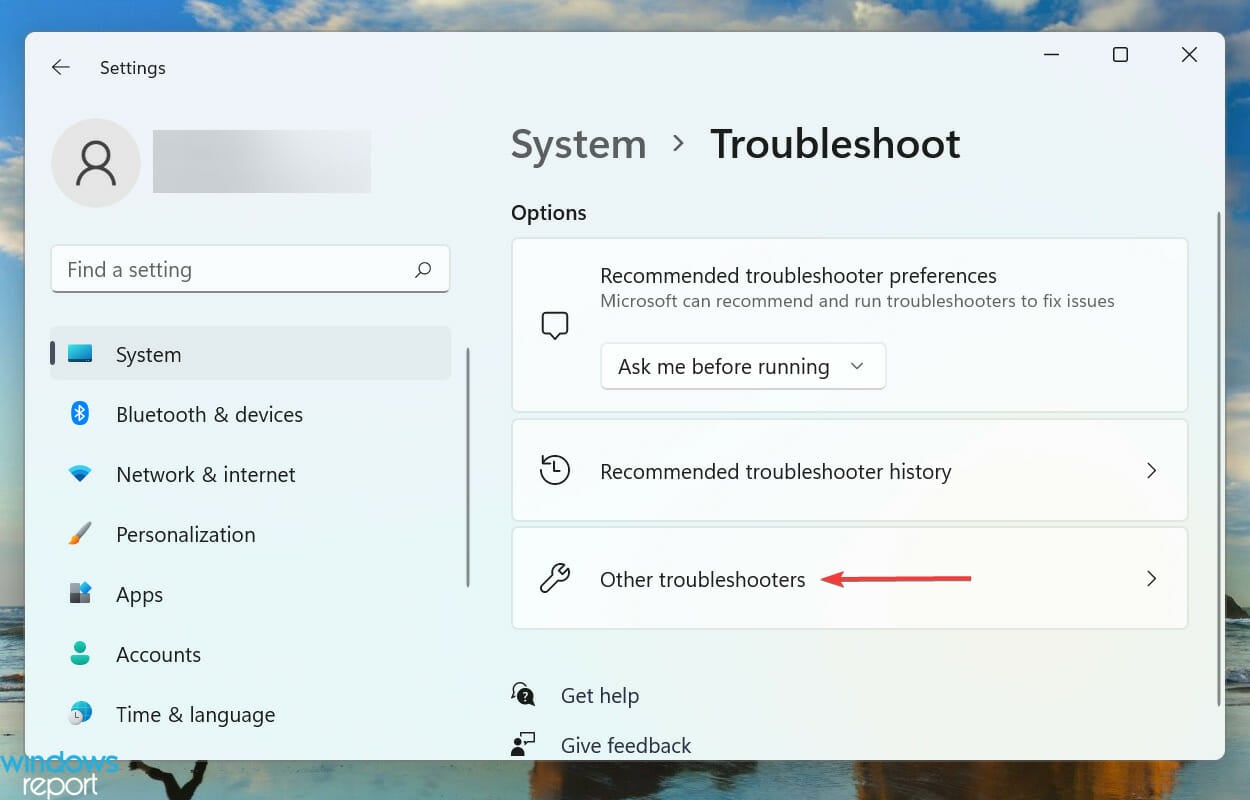
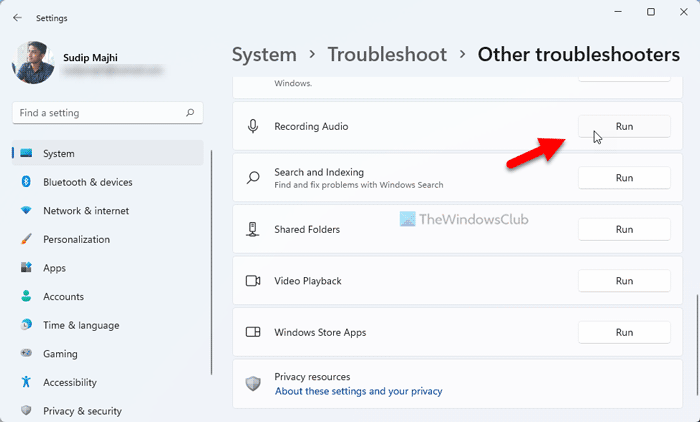
- Next, click on Other troubleshooters.
- Locate the Recording Audio troubleshooter, and click on the Run button next to it.
- Follow the on-screen instructions and choose the relevant option when prompted.
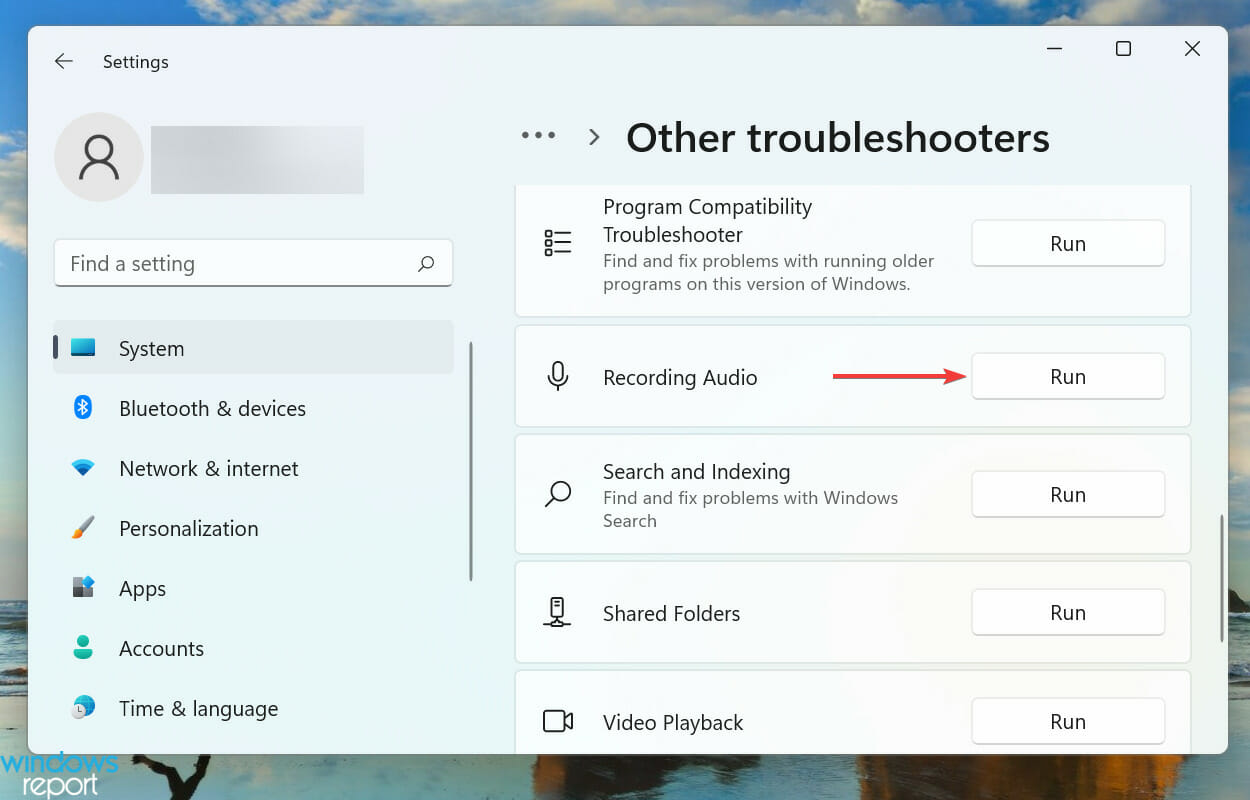
It’s always recommended to run a dedicated troubleshooter whenever you encounter an issue in Windows. Microsoft offers several of these to automatically diagnose and eliminate problems causing the system or connected devices to malfunction.
Once the troubleshooter is done running, check if the Windows 11 voice typing not working problem is eliminated. In case it persists, head to the next method.
6. Update the microphone driver
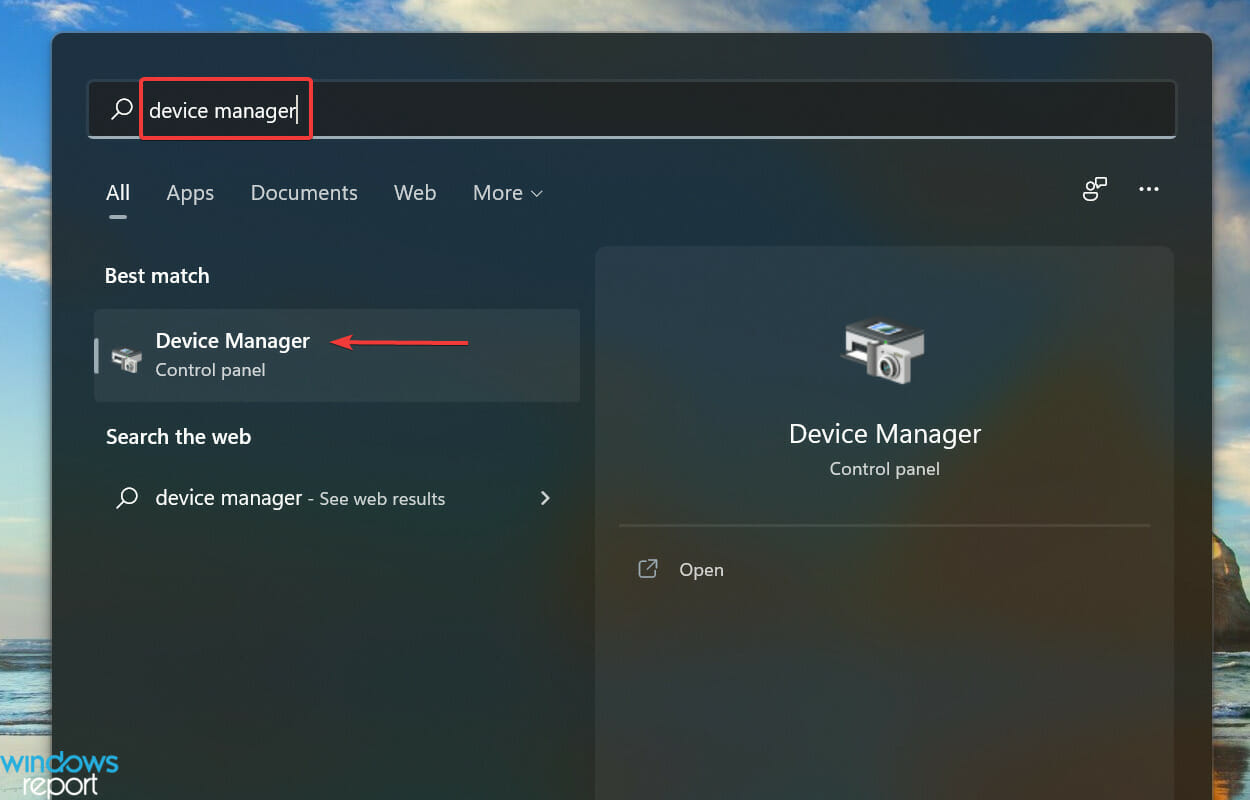
- Press Windows + S to launch the Search menu, enter Device Manager in the text field at the top, and click on the relevant search result that appears.
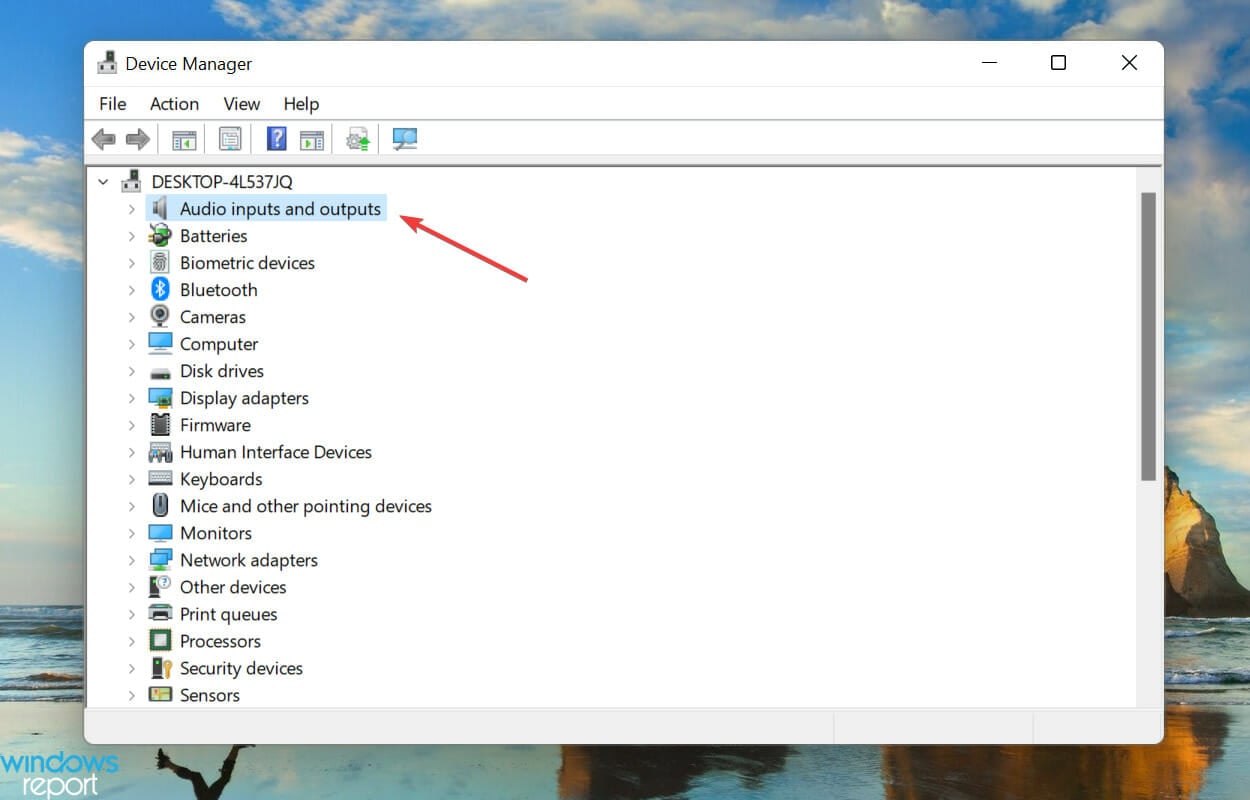
- Now, double-click on the Audio inputs and outputs entry to view the various devices under it.
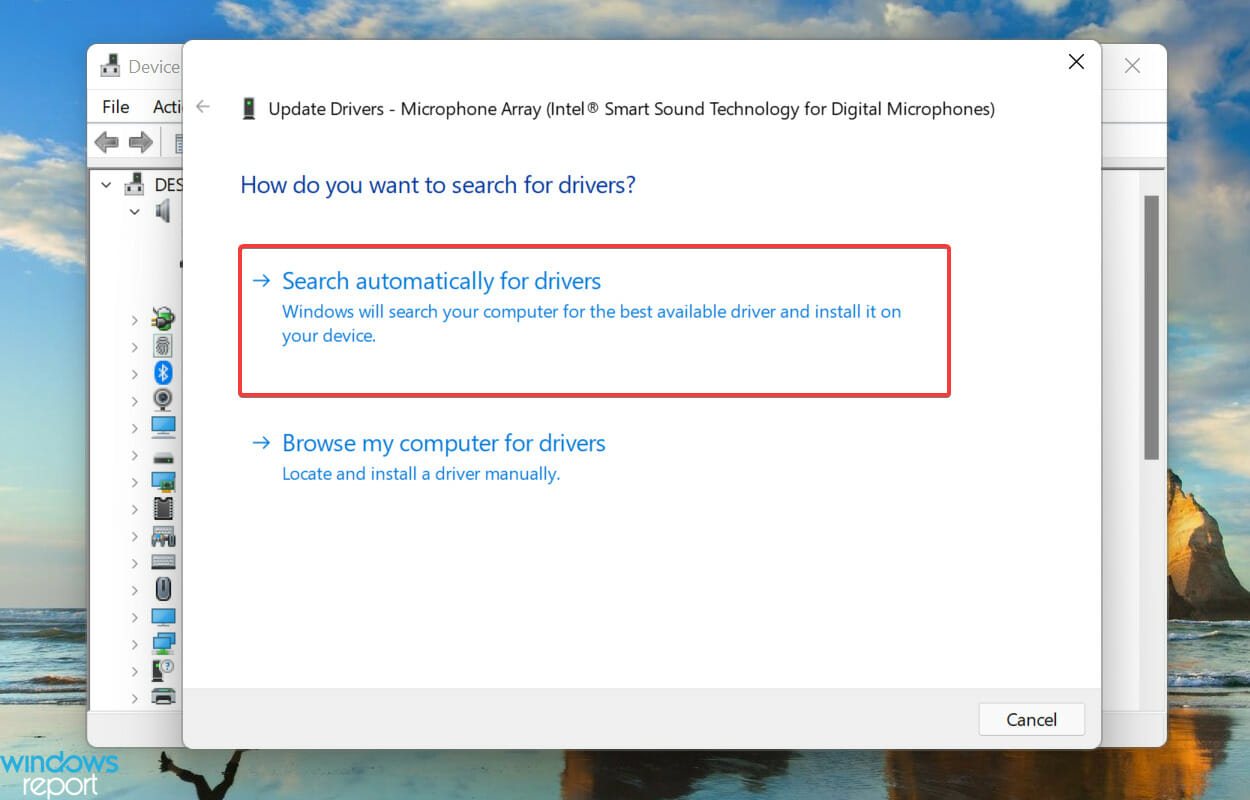
- Right-click on the malfunctioning microphone, and select Update driver from the context menu.
- Finally, select Search automatically for drivers from the two options listed in the Update Drivers window.
- The system will now scan for the best available drivers and install it for the the microphone.
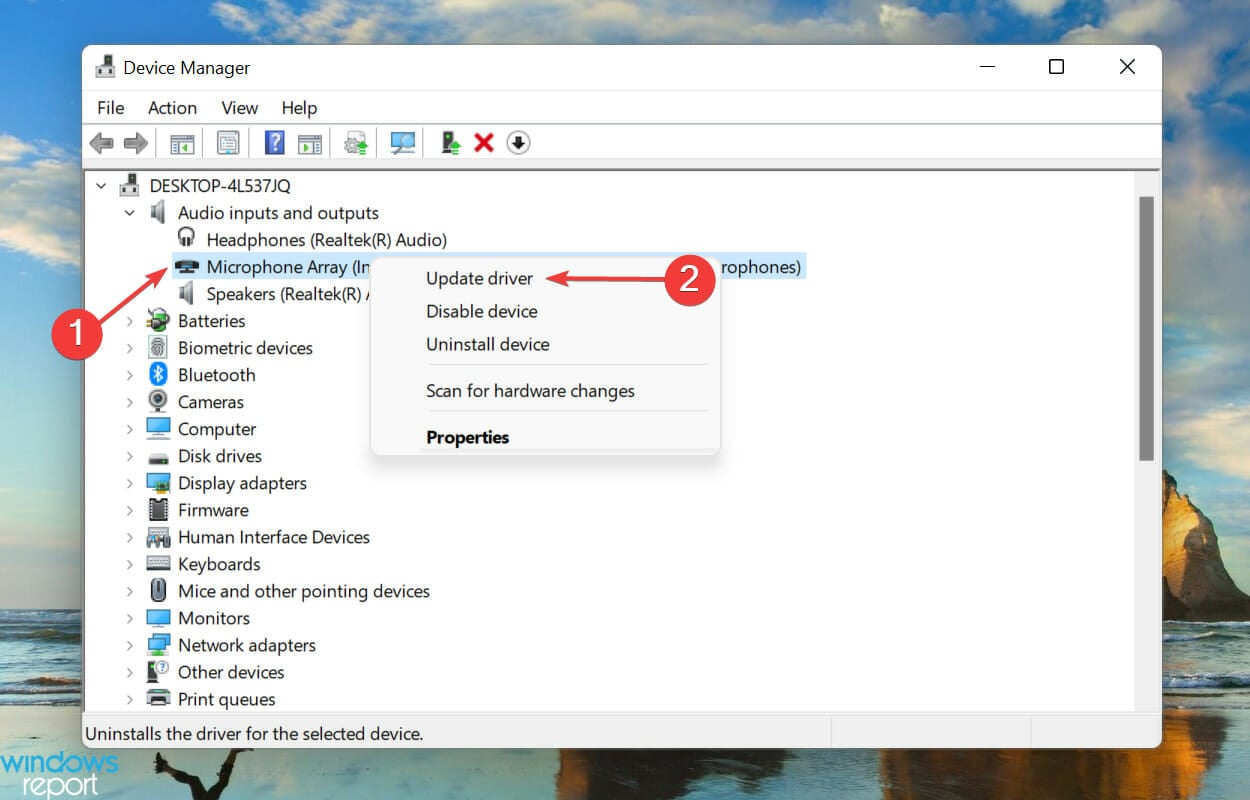
If none of the fixes listed above have worked, it’s most likely the outdated microphone driver to blame. Outdated drivers are known to cause various problems, and after installing the update, you will notice considerably better performance.
But, the Device Manager method listed above only scans for the updates on the system. So, if you haven’t downloaded the latest version previously, the update wouldn’t go through, and it would tell you that the best available driver is already installed.
In which case, you can check for the latest driver version in Windows Update, or manually download the setup from the manufacturer’s website and install it.
If that sounds like too much trouble, you can always rely on a third-party app. We recommend using DriverFix, a dedicated tool that will scan every source for the latest version, and keep all the installed drivers up-to-date.
What are the best speech to text software tools for Windows 11?
If the voice typing tool in Windows 11 doesn’t meet your requirements, though that’s rarely the case, there are a bunch of similar apps available. Check our curated guide including the best speech to text software for Windows 11 in that regard.
These tools offer a lot more features, and in some cases a higher accuracy and precision as well. When selecting any of the ones listed in our guide or even another, it’s imperative that you verify if the software is effective.
Accuracy is of prime importance here, because you certainly wouldn’t want to keep editing the text over and over again. It should be able to accurately transcribe what’s being spoken with no, or minimum, errors.
By now, you know all about voice typing tools, and the most effective methods to fix it, in case it is not working in Windows 11.
Also, find out how to use Cortana, a quick way to command your computer using voice, in Windows 11, if you are facing issues with it.
Tell us which fix worked and your experience with voice typing in Windows 11, in the comments section below.
![]()
Newsletter
Если голосовой ввод не работает в Windows, попробуйте попробовать на компьютере следующие действия по устранению неполадок:
Перед началом работы
Прежде всего проверьте, не работает ли голосовой ввод:
-
Убедитесь, что в Параметры выбран нужный Параметры. Чтобы проверить это, выберите Начните> Параметры> Системный> Звук> Вход> Выберите устройство для выступления или записи.
-
Если вы используете внешний микрофон, убедитесь, что он правильно подключен к компьютеру.
Сообщения об ошибках
При голосовом вводе могут возникнуть другие ошибки.
|
Сообщение об ошибке |
Что можно сделать |
|---|---|
|
Голосовой ввод должен иметь доступ к микрофону. Этот параметр необходимо включить в параметрах, чтобы использовать речь к тексту. |
Выберите Пуск> Параметры> конфиденциальности & безопасности> Микрофони убедитесь, что включен доступ к микрофону. |
|
Голосовой ввод не доступен на текущем языке. |
Проверьте список поддерживаемых языков и установите нужный. См. список |
Текст не появляется после выступления
Если после выступления вы ничего не видите в текстовом ящике, проверьте некоторые из них.
-
Настройте уровень ввода микрофона. Дополнительные справки см. вэтой Windows.
-
Если вы используете встроенный микрофон, подумайте о том, чтобы повторить попытку с гарнитурой или внешним микрофоном.
Слова ввели неправильно
Если вы говорите неправильно, проверьте некоторые моменты.
-
Переход в более тихое место.
-
Убедитесь, что выбран правильный язык для голосового ввода. Для этого нажмите клавиши Windows клавиша с логотипом + ПРОБЕЛ и выберите один из доступных языков. Дополнительные сведения об установке других языков см. в теме Использование голосового ввода для голосового ввода вместо ввода текста на компьютере.
-
Если вы используете встроенный микрофон, подумайте о том, чтобы повторить попытку с гарнитурой или внешним микрофоном.
Статьи по теме
-
Использование голосового ввода для голосового ввода вместо ввода текста на компьютере
Нужна дополнительная помощь?
Нужны дополнительные параметры?
Изучите преимущества подписки, просмотрите учебные курсы, узнайте, как защитить свое устройство и т. д.
В сообществах можно задавать вопросы и отвечать на них, отправлять отзывы и консультироваться с экспертами разных профилей.
Speech recognition is a relatively new but important feature in Windows computers. This option allows you to voice type and give commands to use applications in Windows. However, in some cases, the Speech Recognition Setup may not work. If speech recognition doesn’t work on your Windows 11/10 computer, then please read this article for the resolutions.
Voice recognition not working
![Windows Speech Recognition doesn’t work [Fixed]](https://www.thewindowsclub.com/wp-content/uploads/2022/08/Speech-Recognition-Setup-Doesnt-Work.jpg "Windows Speech Recognition doesn’t work [Fixed]")
Speech Recognition helps you do various things on your computer. From opening a program to dictate text in any text editor – you can do everything using this functionality. However, if it doesn’t work on your computer, the following suggestions may be handy for you.
The main causes of Speech Recognition not working are hardware related issues, software/system permissions, missing or corrupt system files, issues with drivers, etc. If you encounter this problem on your computer, then please try the following solutions sequentially to fix the same:
- Re-enable Speech Recognition
- Check for hardware related issues
- Check if the correct microphone is connected
- Check for microphone permissions
- Increase the input volume of your microphone
- Check speech language
- Turn on Online Speech Recognition using Registry
- Change Group Policy settings
- Disable hotkey changer software
- Reinstall microphone (if external)
- Run the Recording audio troubleshooter
- Perform SFC scan
- Troubleshoot in Clean Boot State
- Miscellaneous solutions
1] Re-enable Speech Recognition
Even if you have turned on the Speech Recognition in Windows Settings, a bug or glitch could disable it automatically. It happens when you use a Beta or Dev Channel build. That is why it is recommended to verify the setting or re-enable it in Windows Settings.
To re-enable Speech Recognition in Windows 11, follow these steps:
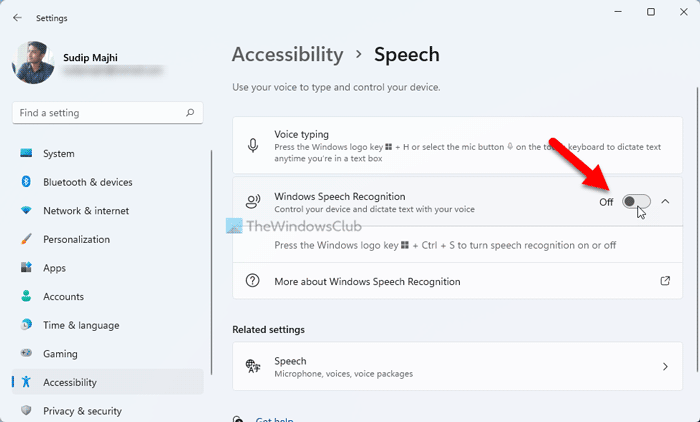
- Press Win+I to open Windows Settings.
- Switch to the Accessibility tab.
- Click on the Speech menu.
- Toggle the Windows Speech Recognition button to turn it on.
Then, check if you can use Speech Recognition on your computer or not.
2] Check for hardware related issues
If there are issues with the microphone hardware or the USB connections then no matter what you try on your computer, the speech recognition will not work properly. In this case, we advise you to check your microphone with another computer to isolate the cause with the hardware. If the microphone works fine with another computer, then you can try further solutions.
3] Check if the correct microphone is connected
Ideally, the preferred microphone for any function on the computer is the default microphone of the laptop and if it is not attached then you would have to attach an external one. In the latter case, a Windows computer may or may not detect an external microphone. To confirm this, try the following.
- Right-click on the Start button and select Settings from the menu.
- In the Settings window, go to the System tab on the list on the left-hand side. In the right pane scroll down to Sound and click on it.
- Now scroll down to the Input section and check which microphone is connected and currently in use. It can be judged by checking the radio button.
If your mic is not connected, then click on add device and connect your Input microphone. Make sure that it is the one on which the radio button is checked after connecting.
4] Check for microphone permissions
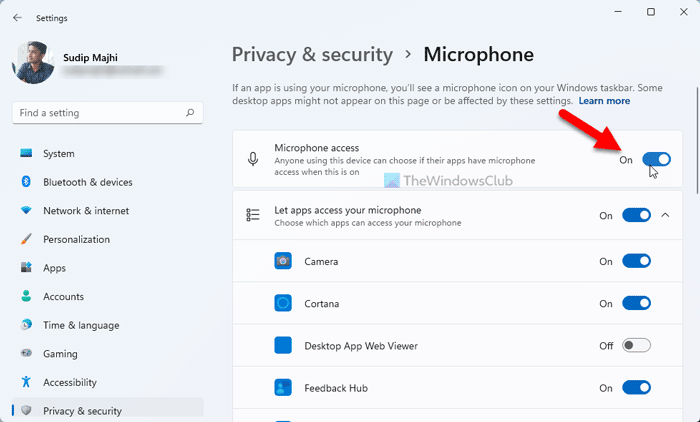
- Right-click on the Start button and select Settings from the menu.
- In the Settings window, go to the Privacy and Security tab on the list on the left-hand side.
- In the right pane, scroll down to App permissions, and click on Microphone.
- Turn the switches on for Microphone access and Let your apps access the microphone.
Also make sure that the switch is turned ON for the application for which you need the speech recognition.
5] Increase the input volume of your microphone
Usually, the volume of the output devices like speaker and headset is visible in the system tray itself. However, you will have to change the microphone volume through the Settings panel. In case the microphone volume is low, the issue in discussion can appear since the computer might not be able to recognize your speech. In this case, you can increase the microphone volume as follows.
- Right-click on the Start button and select Settings from the menu.
- Go to the System tab on the list on the left-hand side and then go to the Sound option on the list on the right-hand side.
- Scroll down to the Input section and you can use the slider to increase the volume.
6] Check speech language
Another reason for your software not recognizing the speech to the microphone could be that you might have selected the wrong language for speech recognition. This can be checked and fixed as follows.
- Right-click on the Start button and select Settings from the menu.
- Go to the Time and Language tab on the list on the left-hand side.
- In the right pane, scroll down and click on Speech.
- Check the speech language and change it if is incorrect.
Although Speech Recognition works with many languages, if you understand English, it is recommended to set English as the primary language. At times, a bug or glitch may block you from using speech recognition when you use any language other than English. That is why it is recommended to follow this guide to change Windows language back to English.
7] Turn on Online Speech Recognition using Registry

If you get this problem with Online Speech Recognition, you must verify the Registry settings. It is possible to enable or disable online Speech Recognition using Windows Registry. If you deactivated this feature in the past, you might encounter the aforementioned problem. That is why follow these steps to turn on Online Speech Recognition using Registry:
- Press Win+R to open the Run prompt.
- Type regedit > click the OK button.
- Click on the Yes button.
- Navigate to this path: HKEY_CURRENT_USERSoftwareMicrosoftSpeech_OneCoreSettingsOnlineSpeechPrivacy
- Right-click on OnlineSpeechPrivacy > New > DWORD (32-bit) Value.
- Set the name as HasAccepted.
- Double-click on it to set the Value data as 1.
- Click the OK button.
- Close all windows and restart your PC.
After that, you can use online Speech Recognition without any error.
8] Change Group Policy settings
There is a Group Policy setting that helps you prevent or block users from enabling Speech Recognition on Windows 11/10 PC. If you enabled this setting earlier, you could not turn on the same option from Windows Settings. That is why follow the following steps to allow the user to enable online speech recognition:
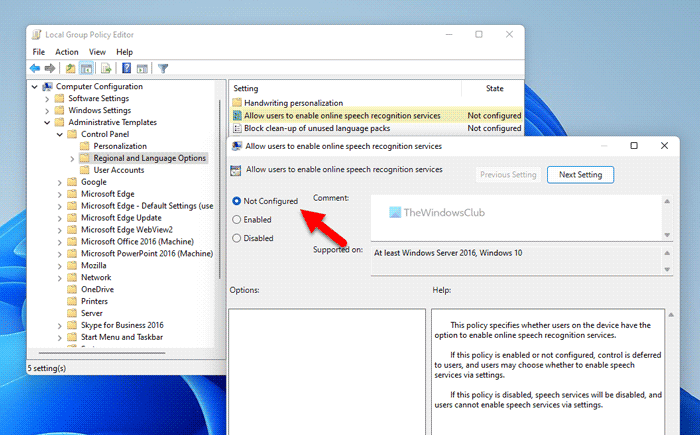
- Search for gpedit.msc in the Taskbar search box.
- Click on the individual search result.
- Go to Computer Configuration > Administrative Templates > Control Panel > Regional and Language Options.
- Double-click on the Allow users to enable online speech recognition services setting.
- Choose the Enabled or Not Configured option.
- Click the OK button.
After that, you can turn on or off online speech recognition without any problem.
9] Disable hotkey changer software
Windows 11/10 allows users to activate Speech Recognition using a hotkey, Win+Ctrl+S. However, if you have used the same keyboard shortcut to open something else or execute a different command, you won’t be able to use Speech Recognition. That is why it is suggested to check the hotkey changer software or keyboard shortcut changer software minutely.
10] Reinstall microphone (if external)
If you use an external microphone, it is recommended to reinstall it. You can do the following:
- Unplug the microphone from your computer first. Restart your computer and re-plug it in.
- If you haven’t installed the driver, it is suggested to do that. However, if you have already installed the corresponding driver, you can remove it first and reinstall the same.
- Verify if your microphone is in working condition. You can use the same microphone with another computer.
11] Run the Recording audio troubleshooter
The Recording Audio troubleshooter is an excellent tool to check for problems related to microphone and speech recognition. You can run it as follows.
- Right-click on the Start button and select Settings from the menu.
- In the Settings window, go to the System tab on the list on the left-hand side.
- In the right pane, scroll down and click on Troubleshoot. On the next page, select Other troubleshooters.
- From the list of troubleshooters, select Run corresponding to the Recording Audio troubleshooter.
12] Run SFC scan
If everything else fails, it could be quite possible that the system files are missing or corrupt. In this case, you can consider performing an SFC scan on your computer. The SFC scan will replace the missing and corrupt files and fix the problem of speech recognition not working.
13] Troubleshoot in Clean Boot State
It is quite possible that an external software might be interfering with speech recognition on the intended software. This case can be isolated by troubleshooting the computer in the clean boot state. While in the clean boot state, no other third-party software will launch at the startup itself. In this case, you can identify the problematic software and halt it while using the speech recognition function.
14] Miscellaneous solutions
You can also try solutions like moving to a quieter place, using an external microphone instead of your laptop’s microphone, updating drivers, etc.
Read: How to disable Speech Recognition feature in Windows
How do I turn on my microphone?
First of all, the hardware of the microphone should be plugged and turned on. Some external microphones may have a switch to turn them on but most of them are simply plug and play. If your external microphone requires a separate power supply, make sure that the same is connected. Usually, windows will recognize the hardware and it will be turned on automatically. If that does not happen, you can use the Realtek audio player or Windows Settings to turn it ON manually.
Read: Best Speech Recognition software for Windows 11/10
What is a microphone used for?
A microphone is simply an audio input device for sending an audio input to the computer. The audio input can be used for recording, voice typing, instructing the system, etc. Usually, these days laptops come with inbuilt microphones.
Windows Speech Recognition is not available for the current display language

If you get Windows Speech Recognition is not available for the current display error in Windows 11/10, you need to set English as the default language. If you have used any regional language or anything else as the primary display language, you may encounter the aforementioned error on your computer.
That is why follow these steps to set English as the default Windows display language in Windows 11:
- Press Win+I to open Windows Settings.
- Click on the Time & language tab.
- Select the Language & region menu.
- Expand the Windows display language drop-down menu.
- Select English from the list.
However, you must install the English language first. For that, you can click the Add a language button, select English (United States) and click the Next button to get started with the installation process.
Following that, you can choose it from the drop-down menu.
How do I set up voice recognition on Windows 11?
To set up Voice Recognition or Speech Recognition on Windows 11, you need to open the Windows Settings panel first. Then, go to the Accessibility tab and click on the Speech menu. Following that, toggle the Windows Speech Recognition button to turn it on. Then, you can press Win+Ctrl+S to open the respective panel.
Why is my Windows Speech Recognition not working?
There are many reasons why Speech Recognition might not be working on your computer. For example, if it is turned off in the Windows Settings panel, you cannot use it by pressing the Win+Ctrl+S shortcut. On the other hand, it could be a microphone issue as well. If you use a third-party app, an internal conflict can also cause the same issue.
Does Windows 11 have a talk-to-text feature?
Yes, like Windows 10, Windows 11 also has a talk to text features included. For that, you do not need to install third-party programs or services. You can press Win+H to open the corresponding panel and start talking. Everything will be typed automatically in any text editing or word processing application.
Голосовой ввод — невероятно полезная функция в Windows 11, которая позволяет диктовать предложения, а не печатать их. Он использует онлайн-распознавание речи для быстрого преобразования вашей речи в текст. Однако, если вы не можете воспользоваться преимуществами голосового набора, потому что эта функция не работает, мы здесь, чтобы помочь.

У этой проблемы может быть несколько причин, в том числе отсутствие соответствующего разрешения и неисправные драйверы микрофона. Если вы не можете понять, в чем причина проблемы, вам помогут приведенные ниже советы по устранению неполадок. Итак, начнем.
1. Проверьте физическое соединение
Если вы используете внешний микрофон на своем ПК, начните с проверки его физического подключения. Пока вы это делаете, очистите аудиопорт или USB-порт, который вы используете. Вы также можете протестировать свой микрофон на другом компьютере, чтобы исключить любые проблемы, связанные с оборудованием.
2. Проверьте устройство ввода звука по умолчанию.
Если к вашему ПК подключено несколько аудиоустройств, Windows может выбрать неправильный микрофон. Убедитесь, что Windows 11 использует предпочитаемый вами микрофон в качестве устройства ввода звука по умолчанию. Вот как это сделать.
Шаг 1: Щелкните значок поиска на панели задач, чтобы открыть меню поиска. Введите настройки звука и выберите результат в разделе Лучшее совпадение.

Шаг 2. В разделе «Выберите устройство для разговора или записи» выберите предпочитаемое аудиоустройство. Также убедитесь, что громкость не слишком низкая.

После этого используйте сочетание клавиш Windows + H, чтобы получить доступ к голосовому набору в Windows и посмотреть, работает ли он.
3. Включите доступ к микрофону
Если в Windows 11 нет необходимых разрешений для доступа к вашему микрофону, функция голосового ввода не будет работать. Выполните следующие действия, чтобы включить доступ к микрофону в Windows 11.
Шаг 1: Щелкните правой кнопкой мыши значок «Пуск» и выберите «Настройки» из списка.

Шаг 2. Перейдите на вкладку «Конфиденциальность и безопасность». Затем прокрутите вниз до «Разрешения приложения» и выберите «Микрофон».

Шаг 3. Включите переключатели рядом с доступом к микрофону и «Разрешить приложениям доступ к вашему микрофону».

Попробуйте снова использовать голосовой ввод, чтобы убедиться, что он работает правильно.
4. Проверьте язык речи
Windows 11 поддерживает различные языки для голосового ввода. Вы можете загрузить и установить предпочитаемый язык голосового ввода в настройках языка речи. Проблемы также могут возникнуть, если вы говорите на языке, отличном от указанного языка речи. Вот что вы можете сделать, чтобы это исправить.
Шаг 1: Откройте меню «Пуск» и щелкните значок в виде шестеренки, чтобы запустить приложение «Настройки».

Шаг 2: На вкладке «Время и язык» нажмите «Речь».

Шаг 3. Используйте раскрывающееся меню в разделе «Язык речи», чтобы выбрать предпочтительный язык для голосового ввода. При желании вы можете включить «Распознавать неродные акценты для этого языка», если это не ваш родной язык.

5. Переместитесь в более тихое место
Если Windows не может обработать ваш голос и правильно набрать слова, подумайте о том, чтобы перейти в более тихое место в вашем доме. Это устранит любые помехи, вызванные фоновым шумом. Кроме того, переключение на проводную гарнитуру или внешний микрофон должно помочь повысить точность, если вы используете встроенный микрофон на своем ноутбуке с Windows для голосового набора.
6. Запустите средство устранения неполадок с записью звука.
Windows 11 предлагает средство устранения неполадок практически для всех проблем, связанных с оборудованием и программным обеспечением. Запуск средства устранения неполадок с записью звука может обнаруживать и автоматически устранять проблемы, если таковые имеются. Даже если он не может, он, по крайней мере, поделится более подробной информацией о проблеме.
Шаг 1: Нажмите клавишу Windows + I, чтобы запустить приложение «Настройки». На вкладке «Система» нажмите «Устранение неполадок».

Шаг 2. Перейдите к разделу Другие средства устранения неполадок.

Шаг 3: Запустите средство устранения неполадок с записью звука.

Следуйте инструкциям на экране, чтобы завершить процесс устранения неполадок. После этого проверьте, нормально ли работает голосовой ввод.
Драйверы на вашем ПК помогают Windows обмениваться данными с вашими аппаратными устройствами. Если драйвер микрофона на вашем ПК неисправен, голосовой ввод может не работать. Чтобы исправить это, вы должны обновить драйвер микрофона на своем ПК, выполнив следующие действия.
Шаг 1: Нажмите клавишу Windows + X и выберите «Диспетчер устройств» в открывшемся меню.

Шаг 2: Дважды щелкните «Аудиовходы и выходы», чтобы развернуть его. Щелкните правой кнопкой мыши микрофон и выберите «Обновить драйвер».

Оттуда следуйте инструкциям на экране, чтобы обновить драйвер. После этого голосовой ввод должен снова начать работать.
Поговорите с типом
Голосовой ввод может быть удобен, если вы тратите большую часть дня на написание длинных документов или делаете заметки. И инструмент довольно точен и прост в использовании. Иногда инструмент голосового набора может не работать должным образом, но вы не можете исправить это самостоятельно.
Post Views: 461
Если голосовой ввод не работает в Windows 11/10, эти советы по устранению неполадок помогут вам решить проблему. Хотя это довольно необычно, когда все настроено, если вы не можете использовать голосовой ввод в браузере или любом другом приложении, вы можете устранить проблему с помощью этих решений.
Инструмент голосового набора позволяет вам печатать в любой программе, используя свой голос. Вам не нужно использовать клавиатуру для ввода в Блокноте, Google Chrome или где-либо еще. Вместо этого вы можете ввести что угодно в любой программе, используя свой голос.
Если голосовой ввод не работает в Windows 11/10, выполните следующие действия:
- Проверьте настройки микрофона
- Проверить сочетание клавиш
- Выберите язык речи
- Установить драйвер микрофона
- Запустить средство устранения неполадок
Чтобы узнать больше об этих советах и рекомендациях, продолжайте читать.
1]Проверьте настройки микрофона
Это первое, что вам нужно проверить, если голосовой ввод не работает на вашем компьютере с Windows 11. Чтобы использовать функцию голосового ввода, у вас должен быть действующий микрофон, и он должен быть включен. Чтобы проверить настройки микрофона в Windows 11, сделайте следующее:
- Нажмите Win+I, чтобы открыть настройки Windows.
- Перейдите в раздел Конфиденциальность и безопасность > Микрофон.
- Переключите кнопку доступа к микрофону, чтобы включить его.
После этого проверьте, можете ли вы печатать голосом или нет.
2]Проверьте сочетание клавиш
По умолчанию вам нужно нажать Win + H, чтобы открыть панель голосового ввода на ПК с Windows 11. Однако, если вы установите ту же комбинацию клавиш для чего-то другого, вы больше не сможете использовать голосовой ввод. Для Windows 11/10 существует несколько инструментов для изменения сочетаний клавиш по умолчанию. Если вы недавно установили такой инструмент, рекомендуется проверить, назначено ли сочетание клавиш Win+H чему-то другому или нет.
3]Выберите язык речи
В большинстве стран необходимо установить английский язык, чтобы использовать голосовой ввод. Однако, если вы установили что-то другое, это может не работать все время. Поэтому сделайте следующее, чтобы выбрать язык речи:
- Нажмите Win+I, чтобы открыть настройки Windows.
- Перейдите в раздел Время и язык.
- Выберите параметр «Речь».
- Выберите английский (США) в раскрывающемся списке Язык речи.
4]Установите драйвер микрофона
Если вы используете сторонний или внешний микрофон для голосового набора, вам может потребоваться установить соответствующий драйвер. Вы не можете сделать то же самое, если используете встроенный микрофон вашего ноутбука, но рекомендуется установить драйвер, когда вы используете внешний микрофон с вашим компьютером.
5]Запустите средство устранения неполадок
Если ни одно из вышеупомянутых решений не помогло вам, вы можете попробовать использовать Воспроизведение аудио Устранение неполадок на вашем компьютере. Для этого сделайте следующее:
- Нажмите Win + I, чтобы открыть настройки Windows на вашем ПК.
- Выберите «Система» > «Устранение неполадок» > «Другие средства устранения неполадок».
- Найдите средство устранения неполадок с воспроизведением аудио.
- Нажмите кнопку «Выполнить».
Затем вам может потребоваться следовать инструкциям на экране, чтобы выполнить работу.